In 1987, an experienced climber descending Mount Borah fell on the snowpack and lost control of his self-arrest. He landed just above a water chute/water-melt tunnel as the avalanche he triggered pushed him into the chute and buried him.
Water Chutes/Water-Melt Tunnels
When temperatures warm, water melts below the snow surface and flows in river-like patterns downhill. As the water flows, a tunnel of air forms and melts the snow from underneath. On steep slopes, and in areas with deep gullies, larger chutes/tunnels may form. Much like a crevasse, these chutes/tunnels may not be evident on the snow surface, though sometimes the snow appears thinner or is of a different color. You may also hear water flowing underneath as you near a chute/tunnel area. Like a crevasse, if the tunnel is large enough, a climber can fall through the weakened snow surface and be buried and/or swept by the water under the snow down the tunnel. A fall into the tunnel on a steep slope can also precipitate backfill of snow from above into the tunnel as the melting, weakened snow surface moves to stabilize itself.
Water-melt tunnels can be large permanent features below established glaciers and year-round snowfields, or short-lived, more shallow features on seasonal snowfields. Accidents and fatalities from falling into water-melt chutes/tunnels are rare, though these melt features are common. However, risk a chute/tunnel posses to a climber is related to a multitude of factors including: the steepness of the slope, the thickness of the snowpack, the terrain below the snow, the amount of melting occurring, whether a tunnel already exists or is forming, and if a chute/tunnel is large enough and close enough to the surface to collapse and fall into.
An important lesson from this unfortunate accident is that water-melt chutes/tunnels are features that may exist under the snowpack. Take this possibility into account when choosing a descent path and when searching for a missing team member.
Here are links to a few photos of chutes/tunnels from places outside of Idaho that gives you an idea of what the feature looks like to help you assess this risk on your climbs.
The accident report was published by the American Alpine Club (AAC) in Accidents in North American Mountaineering, 1988. Read the full article below, or click on the title to read it on the AAC website.
On June 13, 1987, David Probst (38), who was a member of the Idaho Mountain Search and Rescue Unit for several years, was descending Mount Borah (3,950 meters) with three friends when he fell 150 meters to his death.
Accident
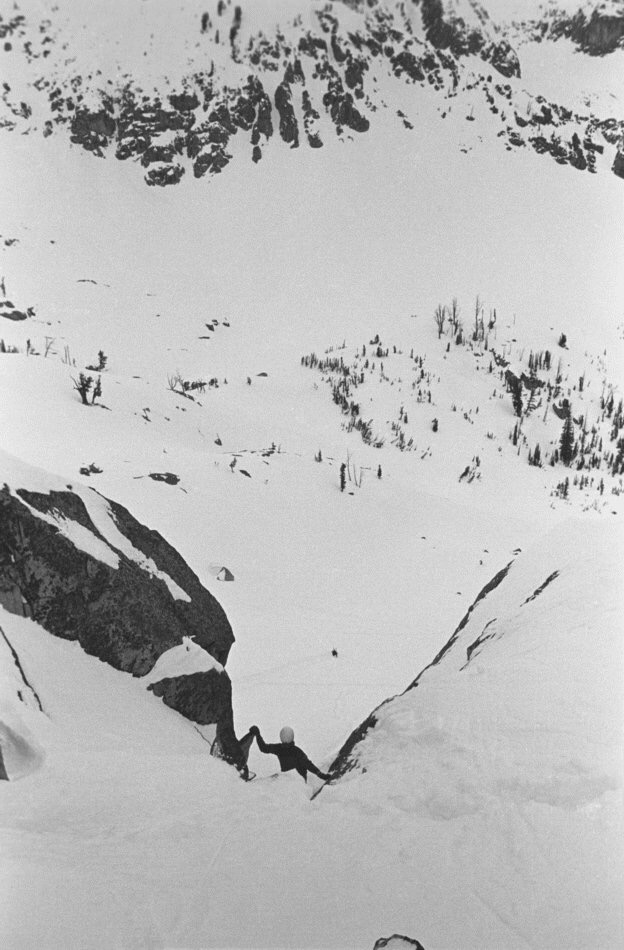
They had started late in the morning, around 0900. Knowing there was very little snow, they carried only one ice ax with them. They reached the summit at 1800. Then they started down and, when they reached the saddle between the summit and false summit, they changed to the Rock Creek descent. The first two, Linda Claiborne (30) and Ben Childlaw (35) with the ice ax, started ahead of Probst and Jennifer Smith (31). Probst used a rock as a dagger for control on the snow while Smith waited in the rocks above. Probst lost control while trying to self-arrest. He disappeared around a bend in the snowfield.
At this time Claiborne and Childlaw were down at the fourth snowfield. They saw a large mass of snow coming down the chute, but no sign of anyone. They climbed back up to Smith. At this point they searched for Probst and, finding his hat at the second snowfield, they started probing for him. They also probed the first snowfield but stopped when it got too dark to work. They spent ten hours climbing down and hiking out for help.
The local sheriff’s rescue group from Mackay responded but were initially not able to get to the victim’s location because they had no experience or equipment. The 3-person team arrived wearing tennis shoes and jeans, carrying one rope and a carton of Pepsi-Cola. A deputy accompanied them. Idaho Mountain Rescue personnel were on hand at the staging area. The sheriff indicated that he would have his team go up the mountain and assess the situation first to see what resources were needed. As night neared, the sheriff got a MAST helicopter to drop sleeping bags and food for his team. The helicopter flew to 4700 meters and dropped the supplies. The supplies were well scattered after their 1250 meter descent.
On June 15, an electrical storm hit, and the sheriff ordered everyone off the mountain, suspending the search until later in the week. The sheriff’s team and Idaho Mountain Rescue returned on June 19. The next day, June 20, rescue teams fine-probed the first snowfield. Course probes and tunnels were dug on the second field. An avalanche dog was used but alerted many times on the snowfields. When teams started searching snowfield three, the body was spotted under the snow above a water chute which Probst had slid into with the loose snow. [Sources: various newspaper reports; Larry Novak and Bob Meridith of Idaho Mountain Search and Rescue; and Merle King]
Analysis
The late start, an apparently festive group with an experienced leader, and a clear day that deteriorated late in the afternoon led to the circumstances that turned this situation around. Choosing a technical descent route without having adequate equipment put the group at risk. That Probst used a rock for an ice dagger for self-arrest aid indicates the level of concern he had.
While it seems likely that Probst died quickly, the rescue response was apparently not handled properly. If the victim had survived the fall, he most likely would have died by the time he was finally reached. Technical rescue resources were available but do not appear to have been used appropriately. [Source: J. Williamson]
Editor’s Note: On August 4, 2006, a fatality occurred on a summit attempt of Mount Church. What follows is the final article, published by the American Alpine Club in Accidents in North American Mountaineering2006.
I wrote the article along with Butte County Sheriff Wes Collins, with additional input provided by Portneuf Life Flight Registered Nurse Lance Taysom. Wes, an exceptional climber, led the rescue and recovery activities.
Accidents In North American Mountaineering started as a report from the Safety Committee of the American Alpine Club. The Safety Committee was established in 1947 in response to “the startling increase in the number of mountaineering accidents which occurred” during that particular Summer. The Safety Committee is charged “to investigate climbing accidents and to formulate a program of prevention for the future.” The Committee gathers data “with no intent to criticize persons involved, but rather to learn why these accidents occurred and to emphasize the lessons to be learned from them.” As such, climbers are referred to by their initials and not their names.
The full article is a thorough accounting and analysis of the events that lead to this tragic fatality. Consequently, the article also provides valuable route information and lessons learned for this increasingly popular peak. You may also click on the title to read the article directly from the American Alpine Club site.
On August 4, I.C. (41) and B.B. (36) set out to climb the standard route on Mount Church (12,200 feet) in the Lost River Range.
The approach to Mount Church begins with a strenuous 1.5 miles, 1,000-foot climb through the forested bottom of the Jones Creek Canyon. The route then climbs a side canyon for 1,400 feet to a ridge which divides Jones Creek from an unnamed drainage to the west. The bottom is blocked repeatedly by the meandering Jones Creek, which zigzags back and forth leaving steeply cut banks covered with tangled brush and downed timber. The approach route is so difficult that it takes most climbing groups more than two hours to reach the point where the route leaves the canyon bottom. On the day of the accident, there were no other climbers on the route.
About halfway through the Jones Creek bottom, the climbers left the route and started to climb a steep side canyon. It appears that at first, they believed they already crossed the entire Jones Creek section of the approach and were on the route. After climbing roughly 800 feet, they realized their mistake and attempted to regain the route by climbing north through a large Class 5 cliff band. I.C. was climbing above B.B. and moving over a rock wall that took her out of his view. I.C. told B.B. “Don’t climb that. That was stupid.” She directed him to climb back to the base of the cliffs while she looked for a route down the other side of the obstacle she just climbed.
B.B. started down but got stuck on a ledge. As he was looking for a route he heard I.C. call his name. Moments later, he heard rocks falling from I.C.’s direction. He also spotted contents from her pack falling down the face and then saw her falling, ricocheting off a ledge and then continuing to fall out of his view.
At 11:12AM, B.B. called 911 on his cell phone, reported the accident and advised that he was stuck on a ledge. Custer/Butte County Search and Rescue Team and Portneuf Life Flight responded to the scene. Shortly after 12:00PM, as the rescue team was approaching the mouth of Jones Creek, the rescuers witnessed a violent thunderstorm and saw several bolts of lightning strike the upper slopes of Mount Church and nearby Donaldson Peak. The upper part of the route was covered with a layer of hail. Most of the lightning strikes were above the accident scene. After reaching the scene, the rescuers confirmed I.C. had died in the fall. Her injuries consisted of a broken neck and severe head injuries. The rescue team performed a roped rescue for B.B and then walked him out to his truck.
About 2:00PM, during the rescue of B.B, the team experienced another series of less-intense thunderstorms. During the rescue and subsequent investigation, rockfall was a continual hazard facing the rescuers. Rain from that system produced slippery conditions in the canyon that ultimately caused two rescuers to slip and sustain injuries as they hauled out I.C.’s body.
Analysis
Mount Church is one of nine 12,000-foot summits in Idaho. In recent years, climbing all of these peaks has become a popular pursuit for Idaho climbers. The Lost River Range is rugged, steep and wild. Other than Mount Borah, Idaho’s highest summit, the summits in the range are approached cross-country through difficult, debris-filled, cliff-lined canyons.
The climbers had a topo map and route description from a hiking guidebook. I.C. was a novice climber who had started sport climbing in the spring of 2006. Two weeks prior to the accident, she successfully climbed the busy standard route (mostly trail) on Mount Borah. Her partner was an avid hiker but did not have any climbing experience.
This accident occurred due to a combination of the inexperience of both climbers and the difficulty of the terrain. Mount Church is not a peak which can be safely climbed by inexperienced climbers. Jones Creek is extremely wild and unforgiving and the bottom of Jones Creek constantly changes from year to year. Ascending the canyon requires physical conditioning, endurance, prior off-trail hiking experience, mental toughness, and map-reading skills.
The canyon walls are steep and are crowned by broken cliffs. Experienced climbers who would have known from reviewing the topographic map and scouting the route from the valley floor that there were no non-technical routes up the West Side of the canyon. Despite the technical nature of the canyon walls, the climbers left the canyon at the 8,200-foot contour and climbed up the wall to roughly 8,900 feet. As they ascended the slope, they crossed steep, cliffy terrain and a face that steepened as they continued their ascent. The unsuitability of the canyon wall for inexperienced, unequipped climbers is highlighted by the fact that when I.C. fell, she dropped more than 150 feet, bounced off at least 3 wide ledges, landed on a talus slope, and then rolled to a stop some 80 feet below the bottom of the cliff.
Inexperience also played into the decision to leave the route. Although B.B. was unsure of why they prematurely left Jones Creek, it was likely due to the difficulty of the terrain, that they believed they had actually reached the correct turning point. In reality, they had traveled less than a mile, underestimating the time it takes to cross such inhospitable country. It is also possible B.B. and I.C. left the route in an attempt to avoid the strain of climbing through the obstacles littering the Jones Creek bottom.
Inexperience was also demonstrated by their decision to continue onto technical terrain without adequate climbing equipment. While technical climbing equipment was not necessary for the Standard Route, the climbers did not recognize the need for such equipment when they ventured out onto the cliff band.
The climbers got off to a late (8:00AM) departure on a day when the weather forecast called for thundershowers. The early development of thundershowers made the climb unwise, as the majority of the route crosses exposed ridges and faces. B.B. did not mention that weather concerns factored into their decisions. Finally, their decision-making process was simply to react to obstacles by changing directions. They had several opportunities to retreat but did not consider this option until they were in serious trouble.
[Editor’s Note: Art Troutner is a pioneering Idaho mountaineer who was involved in many firsts in the 1970s including the first Winter ascent of Mount Borah. In this article, he writes about a difficult first ascent of the Lick Creek Range’s most compelling North Face.]
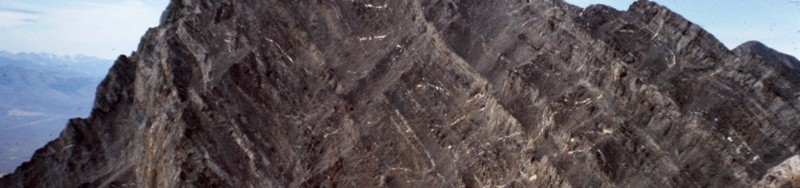
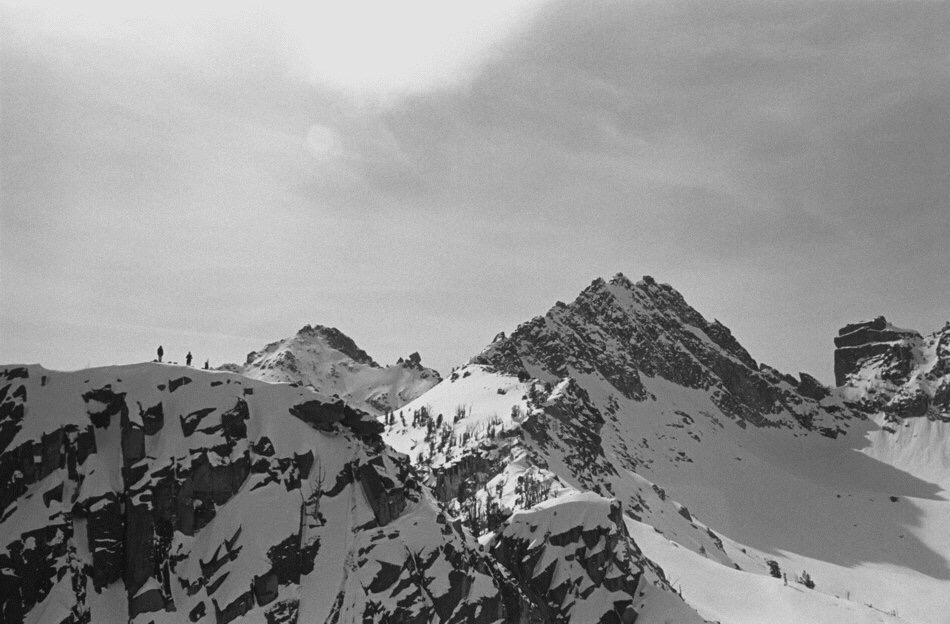
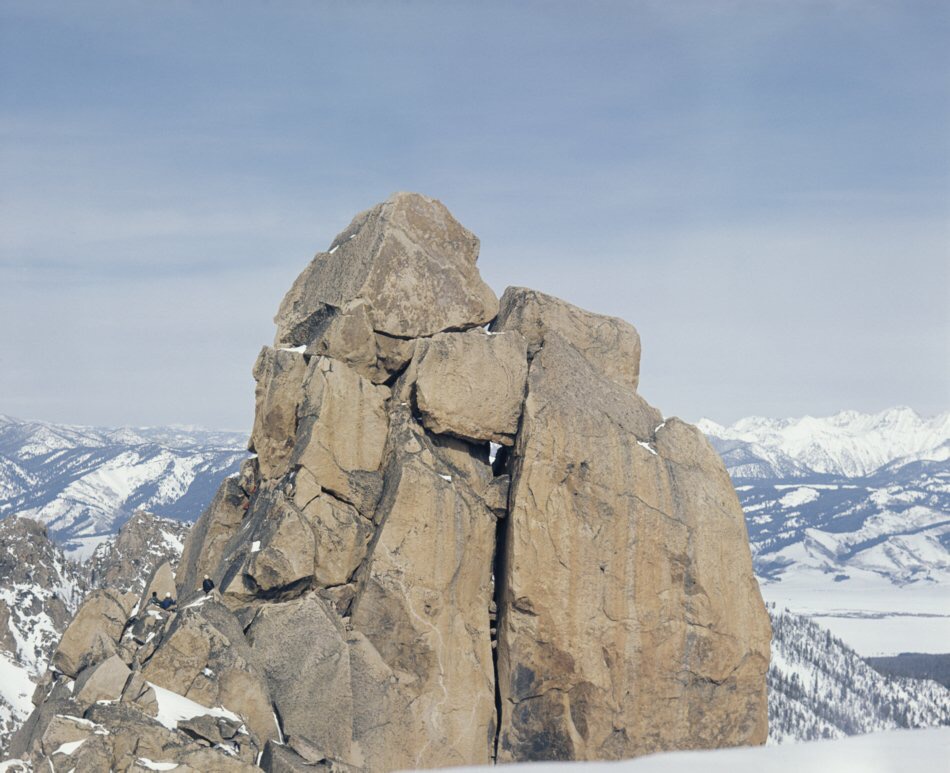
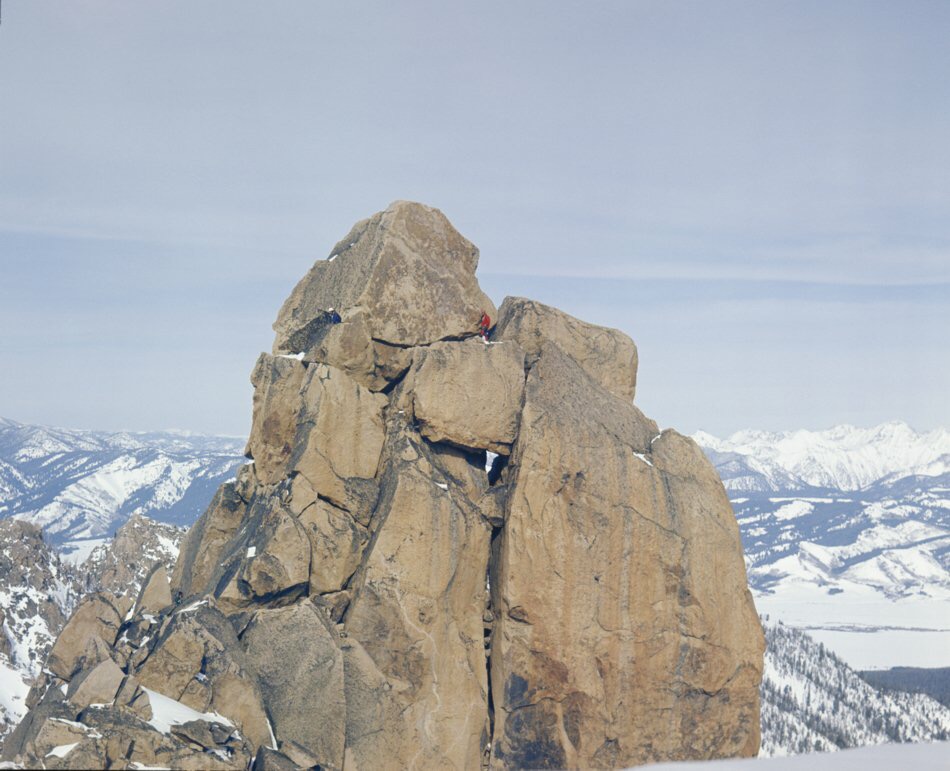
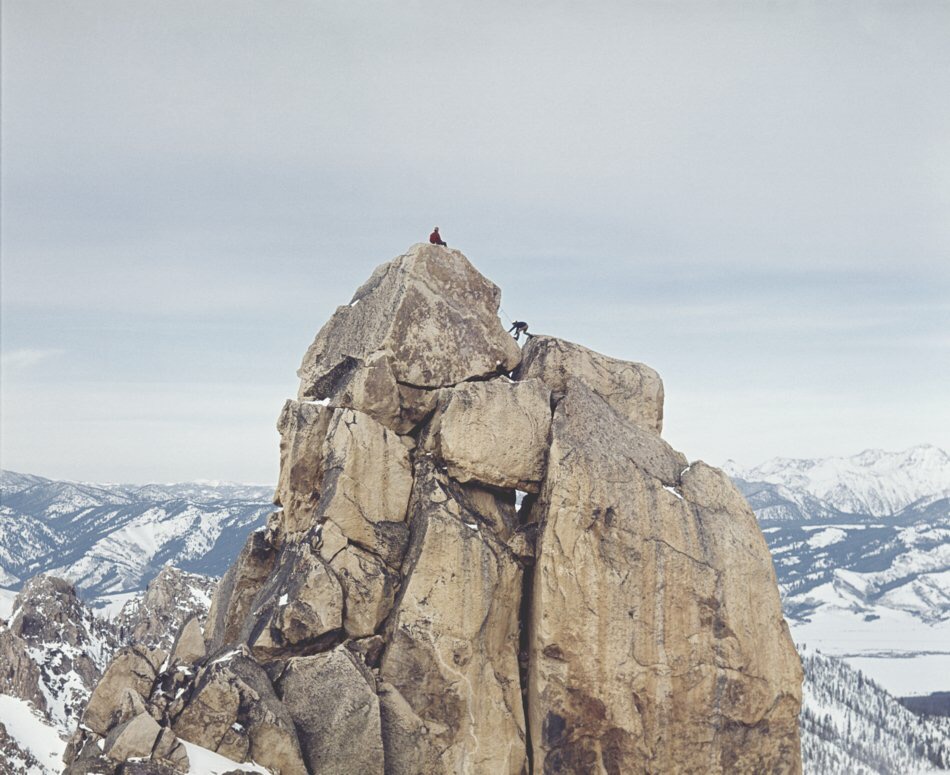
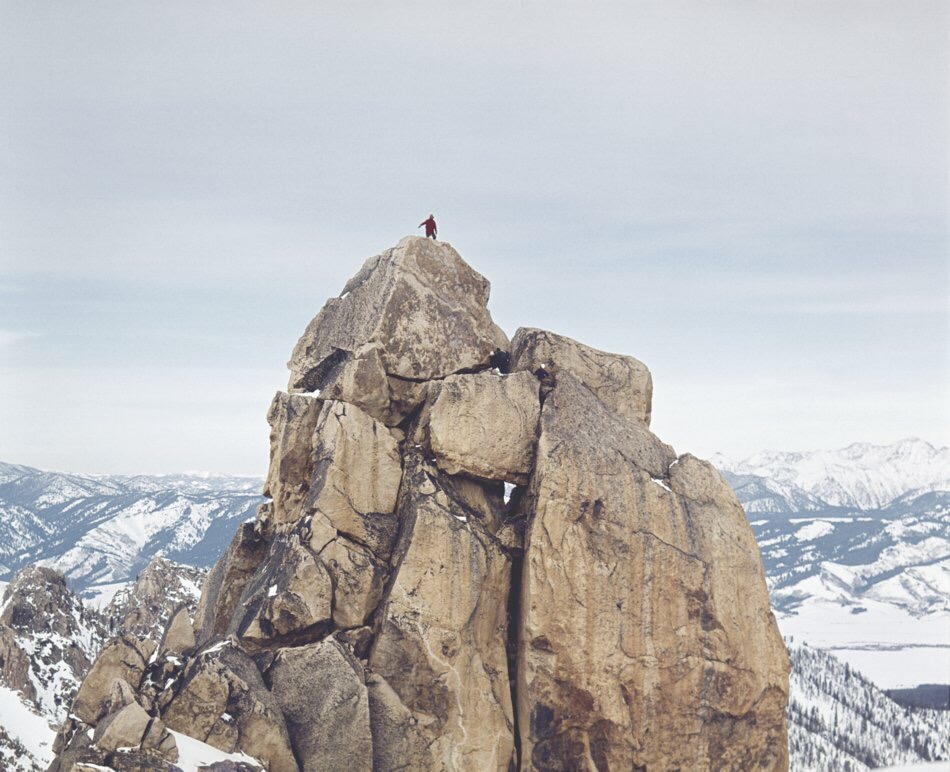
On July 4th, 1973, Bill Whitman (19 years old) and I (18 years old) made the first ascent of the North Face of Snowslide Peak. We took my brother Jim Cockey’s rack of Lost Arrow pitons and around ten Bongs and my diminutive rack of nuts and chocks along with one 90-foot length of Goldline nylon rope and an assortment of white slings, also on loan from my brother.
When my brother had gone off to college, he loaned his climbing equipment to Bill who was forever borrowing it to climb Slick Rock. We suspected Bill’s infatuation with Slick Rock was more often than not used as a ploy to introduce some young lovely to the wonders of rock climbing. We hoped the best for Bill in his endeavors but never found out the results as he was not a braggart. All the same, due to his frequent infatuations, he racked up quite a lot of rock time on Slick Rock. So Jim figured Bill was a worthy recipient of the gear. Lord knows I had considerably less of the gumption that Bill showed for getting out on the rock.
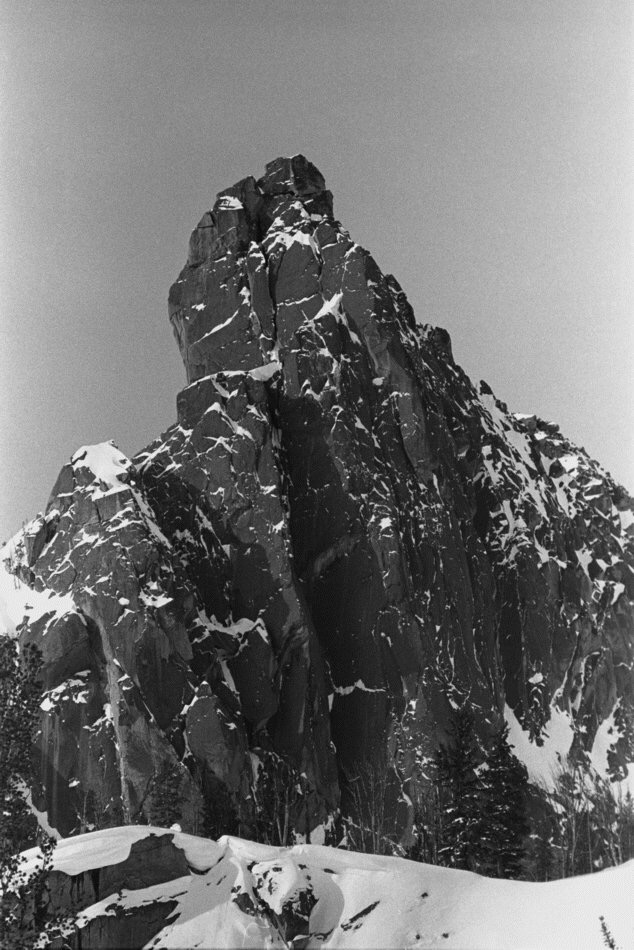
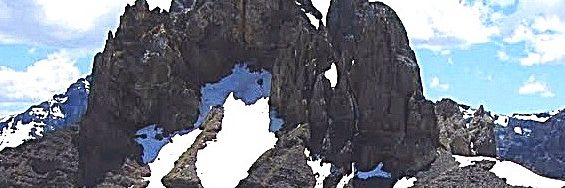
The North Face of Snowlide Peak. The V-climbed by Troutner and Whitman is just right of center. John Platt Photo
All the same, I was intrigued by Snowslide’s imposing North Face and thought it was something I’d like to work up to. The fact that none of us knew anyone who had climbed it was an incentive that was hard to ignore. When I was 16, I was working on a house my dad and uncle were working on in Stanley, I used my free time to started gaining some climbing experience in the Sawtooths.
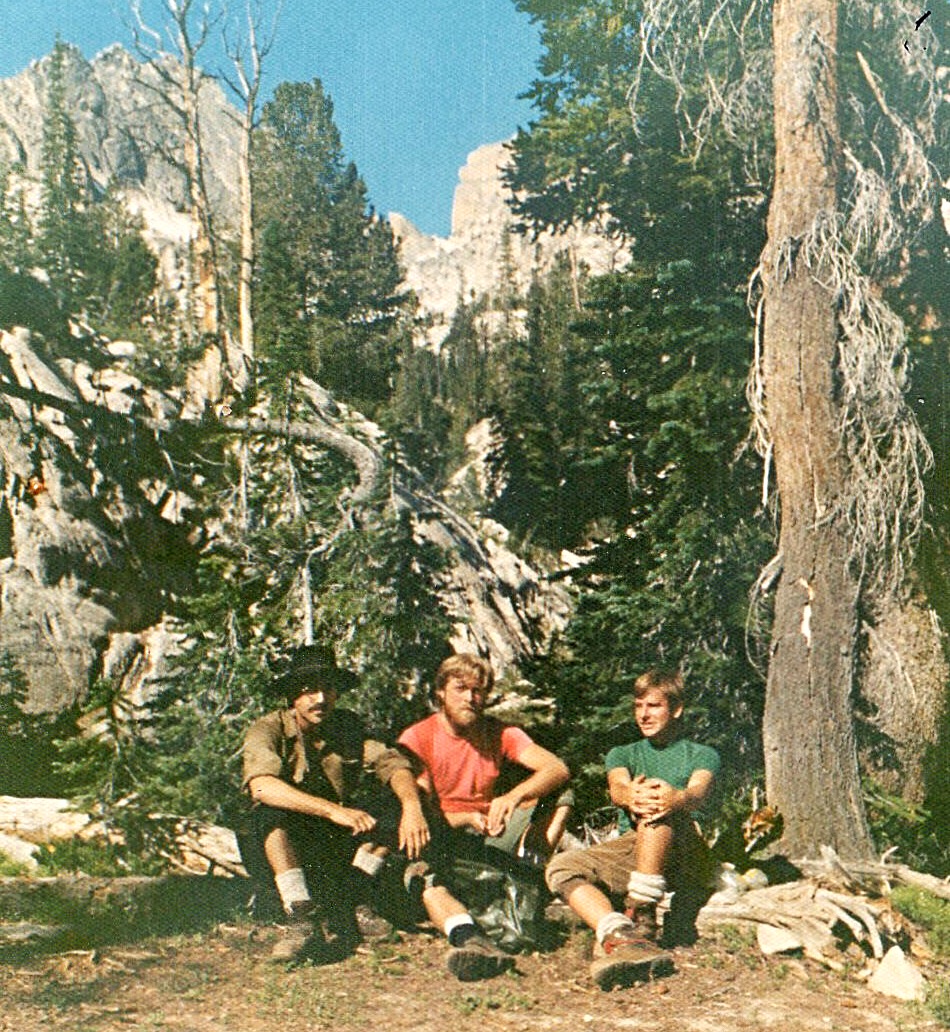
Art and Jerry on the way to start the Open Book. Kathy Troutner Photo
Now comes some jostling of my memory as to the sequence of events, but I believe the house construction was the same Summer that Jerry Osborn and I attempted the Finger of Fate, climbed the Stur Chimney Route on Heyburn, and climbed the back side of Finger of Fate.
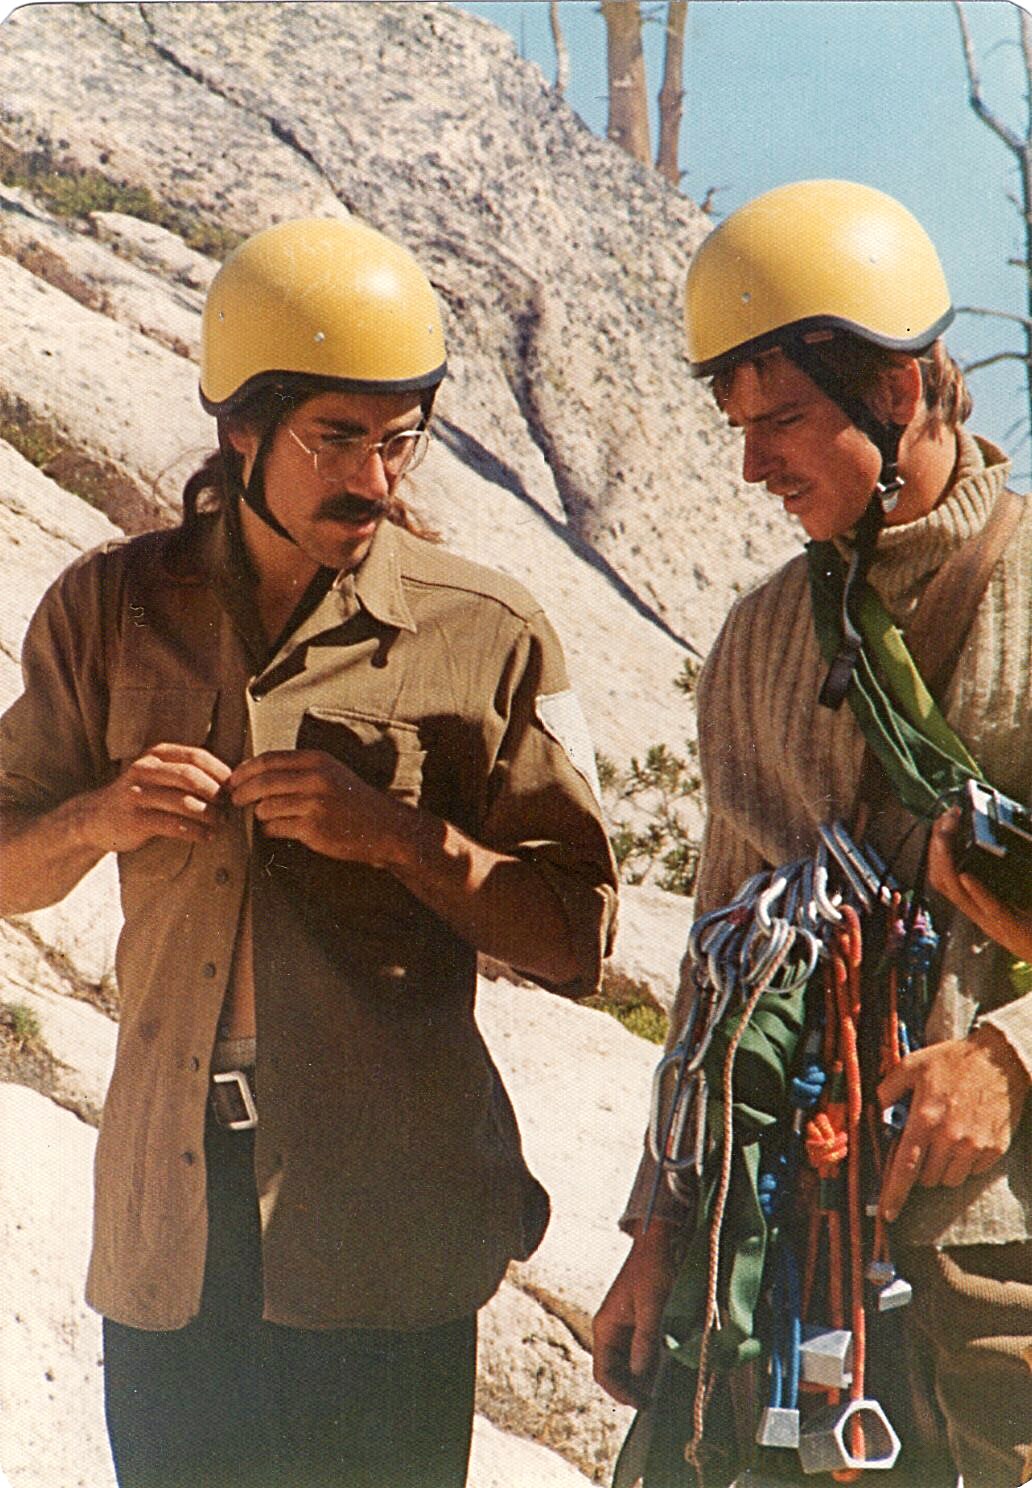
From left to right: Art Troutner, the photographer and Jerry Osborne. Art Troutner Photo
Jerry lead the first pitch which, though not very exposed, is the most technical pitch. From there we traded leads. We used 2 ropes and 3 climbers. Jerry brought along a photographer acquaintance who we roped up between us.
The attempt on the Finger of Fate involved a nasty slog in overripe Spring snow. I feel that we, in our utter ignorance, were smiled upon by the gods as I now know that the snow should have slid and ended my little story right there. At some point in the day, we realized our predicament and shifted over to the south a bit to some thin snow and navigable rock where we “felt” safer in our retreat to our sodden camp. We avoided a possible disaster and learned a lot from the experience.
So working up to the Snowslide climb included a couple trips up the Open Book on the Finger and a trip up Warbonnet with Pierre Saviers. One of the Open Book excursions was in September 1972. This was a 2-team effort that met at the top for a group photo which included one of our party (Tom McLeod) posed while intensely studying his Physics book. Tom’s photo won the honor of gracing the Wall behind our physics teacher’s desk.
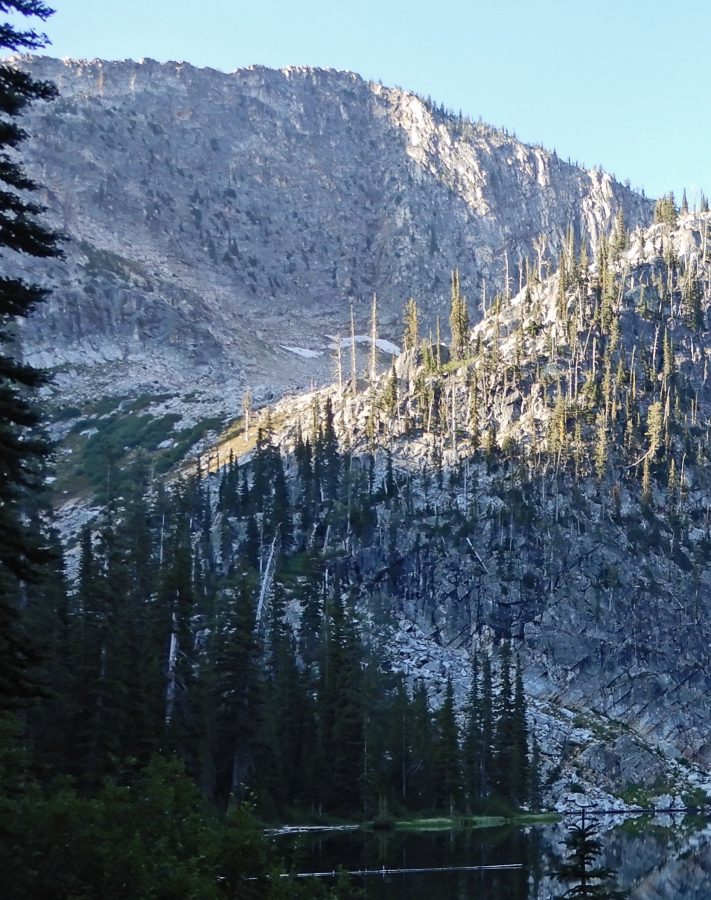
Anyway, by the time July 1973 rolled around, I must have felt enough seasons had taken place to attempt the dark and vertical North Face of Snowslide Peak. The day of the climb we were up at dawn, drove my Mom’s Citroen at speed to the trailhead and were hiking by 7:30AM. About 45 minutes later, we arrived at the lake and made our way around to the base. Here we encountered the permanent snow field (not anymore) that wedged up against the start of the climb. This was a favorite boot glissading spot on previous trips to the lake.
Bill Whitman on a Winter climb of the Finger of Fate.
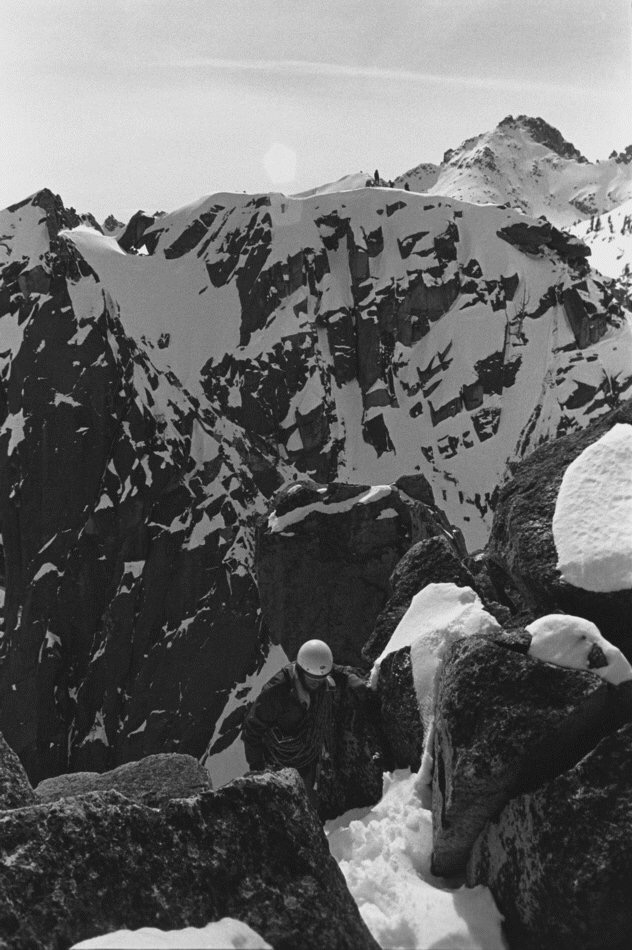
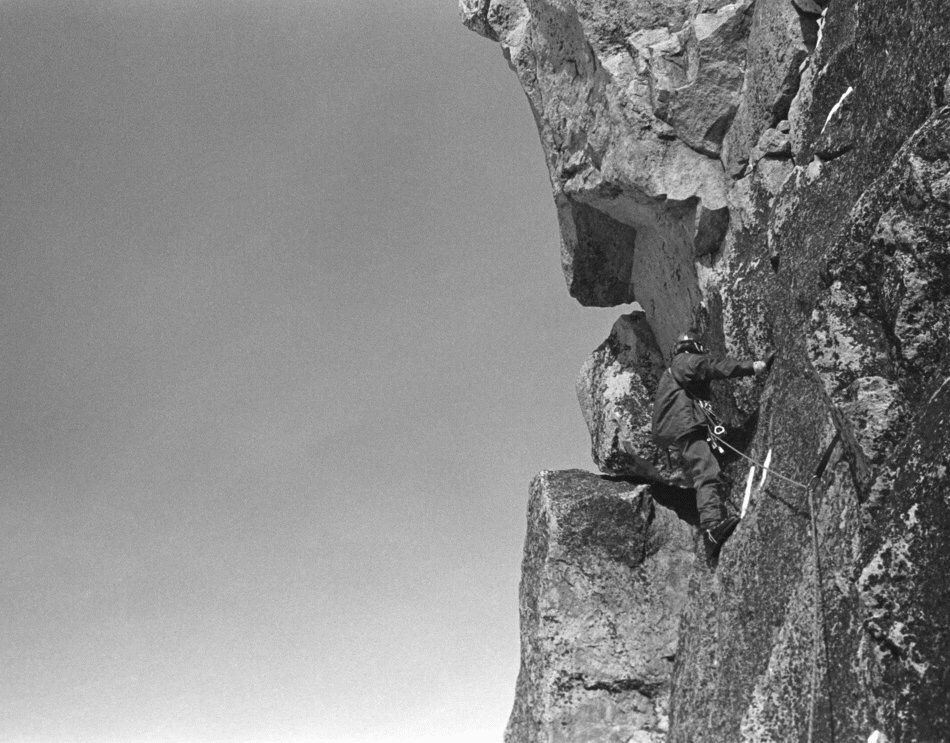
The “route” from here was pretty simple. The face is concave but trending to a V shape on its right side. As long as we stayed in the V we knew it would lead us to the high point of the face. As the face is very fractured for its entire length we just ascended what looked easiest and didn’t stray too far left or right. There were plenty of holds but many of them were loose. We had to be very careful to not drop any rocks down the face as we belayed. All in all, it was not pleasant rock to deal with. We never felt very confident in the protection or the belay anchors we set.
The overall face is very steep with several small, reach-over type, overhanging ledges. Fortunately, there were places where we could gather our wits a bit and rest. I remember them as pockets where 2 could sit. The rock was consistently loose until a couple of rope lengths from the top where things improved.
As it is a north facing, very steep face, the temperatures for the 4th of July were quite cool. While climbing, we watched folks at the lake bathing. It seemed quite incongruous but also somehow reassuring or even comforting to see some normality as we felt quite cut off from that.
We realized early on in the climb that retreating off this thing did not present a pretty picture. The realization was that the best way down was up. So, we got lucky. The face was consistent: loose holds and steep, but doable. Just had to pay attention to the holds and not drop anything on the belay man.
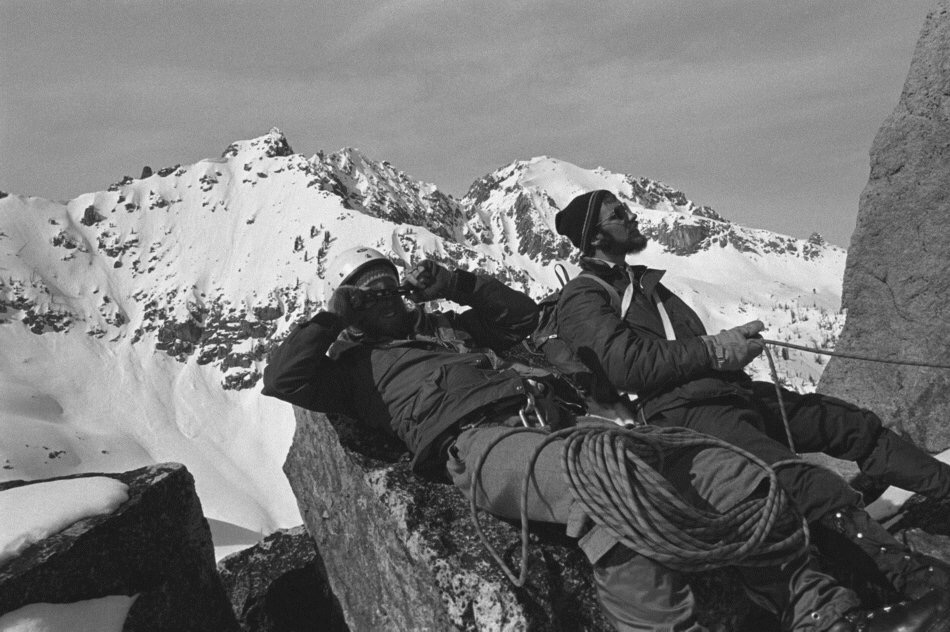
We got to the top around 3:30PM to the sounds of bleating sheep who were grazing unconcernedly right up to the 800+ foot drop. We were elated to have arrived! The sheep not so much. Our reward? Beer and Brass Lamp pizza by 6:00PM.
The first winter ascent of the Finger of Fate was made on March 19, 1973 by James Christopher Hecht, Harry Bowron, Gordon K. Williams and Joe Fox. I was part of the support team which also included Art Troutner and John Platt. I took the color photos. I developed the black and white photos that were shot by the ascent team.
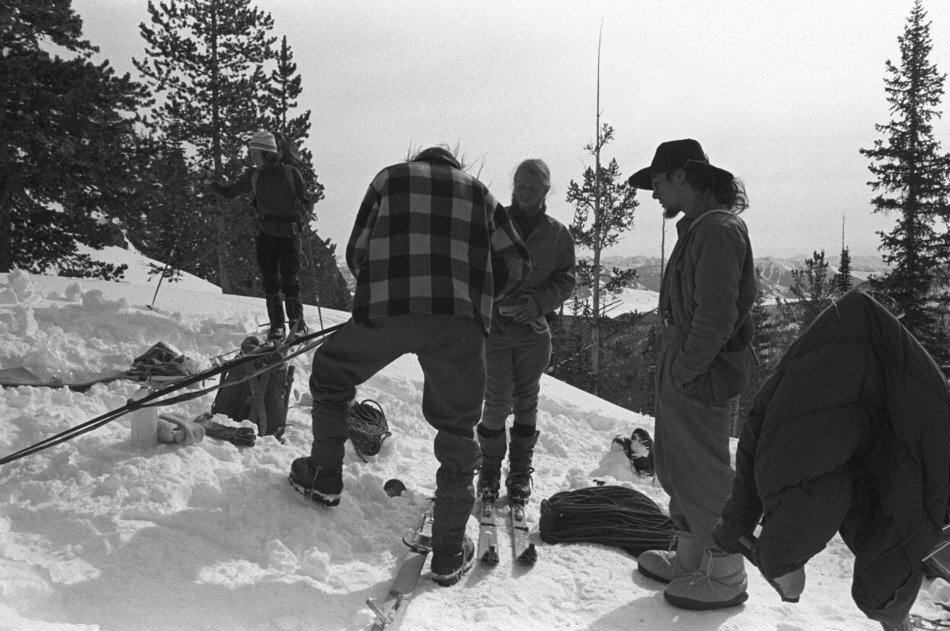
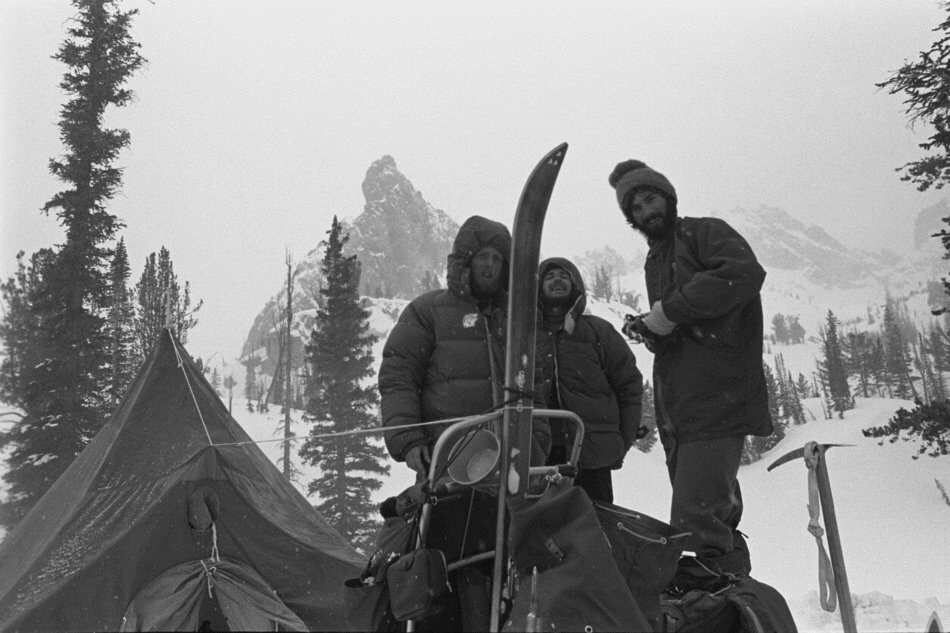
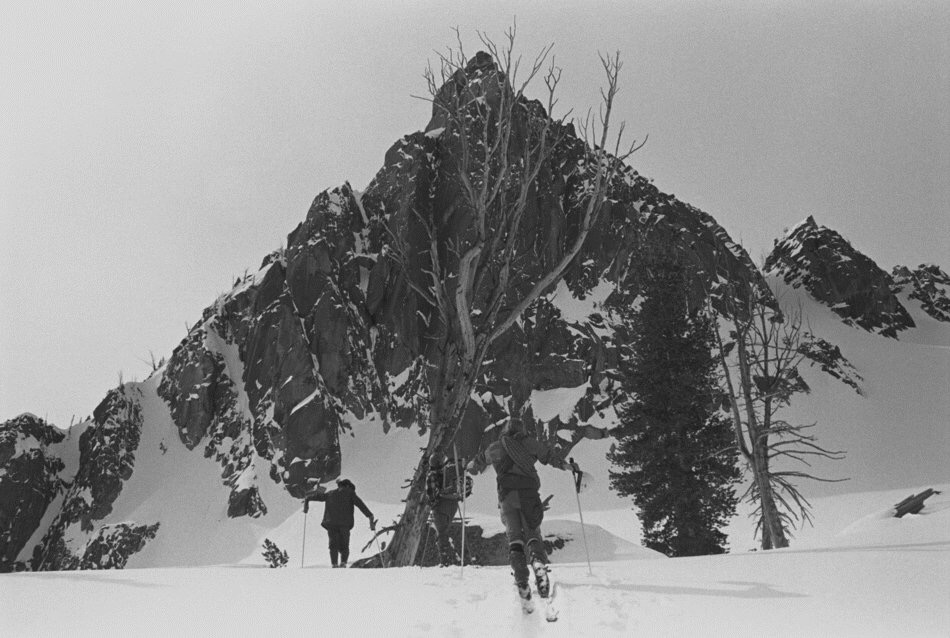
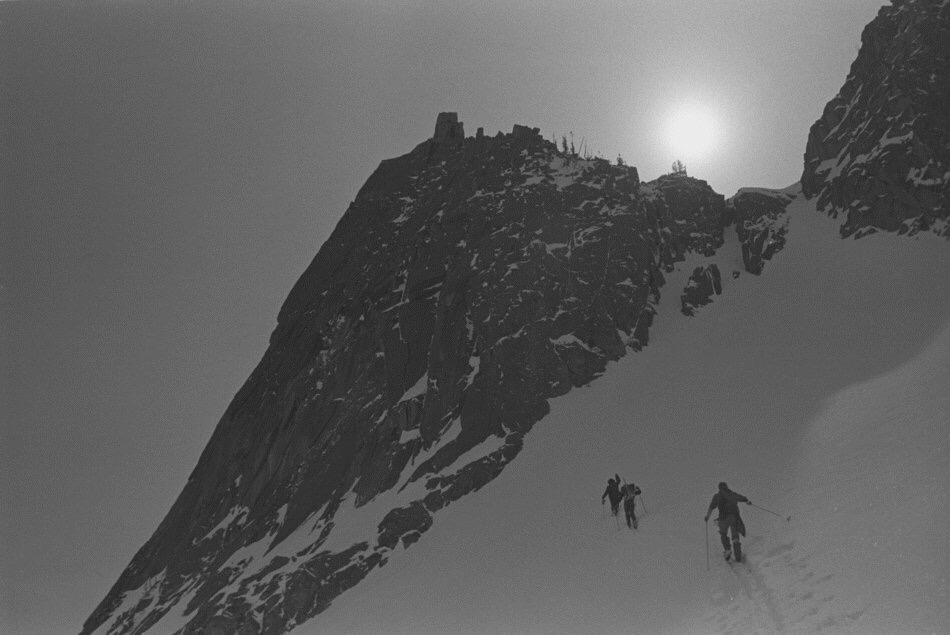
Our first day was spent skiing up Hell Roaring Road down in the forest, the end of the road being Camp I. Semi-unplanned as it was we hooked up with a Boise contingent of the DFC&FC* on the ski in, boosting our group to seven adventuresome lads. The second morning we were greeted with scenery. The fickle “Finger of Fate” is seen pointing skyward in this view from the outlet at Hell Roaring Lake, flanked by the Arrowhead and the Birthday Cake on the skyline. *Decker Flats Climbing & Frisbee ClubLooking southwest from the Hell Roaring Lake outlet toward Imogene lake, which is up and around the spectacular canyon beyond. This was my first Winter expedition and, at this point, I remember being extremely impressed with the snow forms on the mountains. Everything about the Sawtooths was magnified by being there in winter. I was 22 years old in 1973 and it may as well have been the Himalayas to me.The 2nd day we humped from the road end to Hell Roaring Lake, where the climbing began. Carrying heavy packs up to High Camp II was tough. The 3rd morning dawned a little funky but cleared up after a while.The North Face of the Finger, showing the “Open Book” route in deep shadows, not a nice climb in Winter. It was attempted repeatedly before selecting an alternate plan.Gearing up in the morning. Nice equipment, huh? I believe those are my Hickory 215CM Sundins Mountain Skis from REI, with screwed in metal edges and my surplus canvas + aluminum frame pack. I fondly remember treating the ski bases with Pine Tar so wax would adhere properly. I don’t miss doing it anymore though. The Silveretta cable bindings were versatile and enabled amazing Winter travel, though stylish turns were difficult. Also my classic aluminum cup.Gearing up in the morning. Nice equipment, huh? I believe those are my hickory 215 cm Sundins Mountain Skis from REI, with screwed in metal edges, and my surplus canvas + aluminum frame pack. I fondly remember treating the ski bases with Pine Tar so wax would adhere properly. I don’t miss doing it anymore though. The Silveretta cable bindings were versatile and enabled amazing winter travel, though stylish turns were difficult. Also my classic aluminum cup.Soft morning light kisses the powder snow ‘Good Morning’ as Gordon leads off toward the climb on Day 3.Skiing up from Camp II the morning of March 19, 1973. A cloudy dawn turned into a fine day.A closer look at the Open Book Route.Ascending the colouir to the West Ridge saddle.Looking back down the col toward Camp II, with someone working their way up the track way below.Sitting atop the buttress west of the Finger and making a plan before the climbers scramble back down to the saddle and head up the West Ridge Route.Rappelling down the buttress back to the saddle.The Finger of Fate as viewed from the buttress, with Hell Roaring Lake snowed over down below, looking east toward the Sawtooth Valley. Our cars are waaaay out there. Big bad Castle Peak is on the horizon.If you see the rope, follow it upward and you’ll notice Gordon’s head (center) peering out from a belay position above a pitch.A casual belay.Looking down at the saddle.The Buttress west of the Finger as seen from the Finger. I took up a position on top of the buttress with my Graflex to shoot pics back toward the Finger while the rock climbers worked on their goal. You see the route up and down the buttress in the disturbed snow.Looking toward the Arrowhead, Sevy Peak and the Birthday Cake displayed prominently on the skyline.The view west from the Finger of Fate. Chris is coming up.Belay on! View is to the NNW with Decker Peak the more distant summit on the right.Harry leads a nice pitch.The lads are now seen (lower left if you look closely) watching as Harry leads a line. These are the pics I shot from over on the buttress.Looks like Gordon is belaying the next climber up while Harry pokes around.Making a leap of faith. There is a large gap from one boulder to the next, which takes a measured leap to do properly. Don’t come up short, but don’t overshoot the landing either.Harry on the summit block.Detail summit photo of the first Winter ascent (March 19, 1973). Left to right: James Christopher Hecht, Harry Bowren, Gordon K. Williams and Joe Fox.
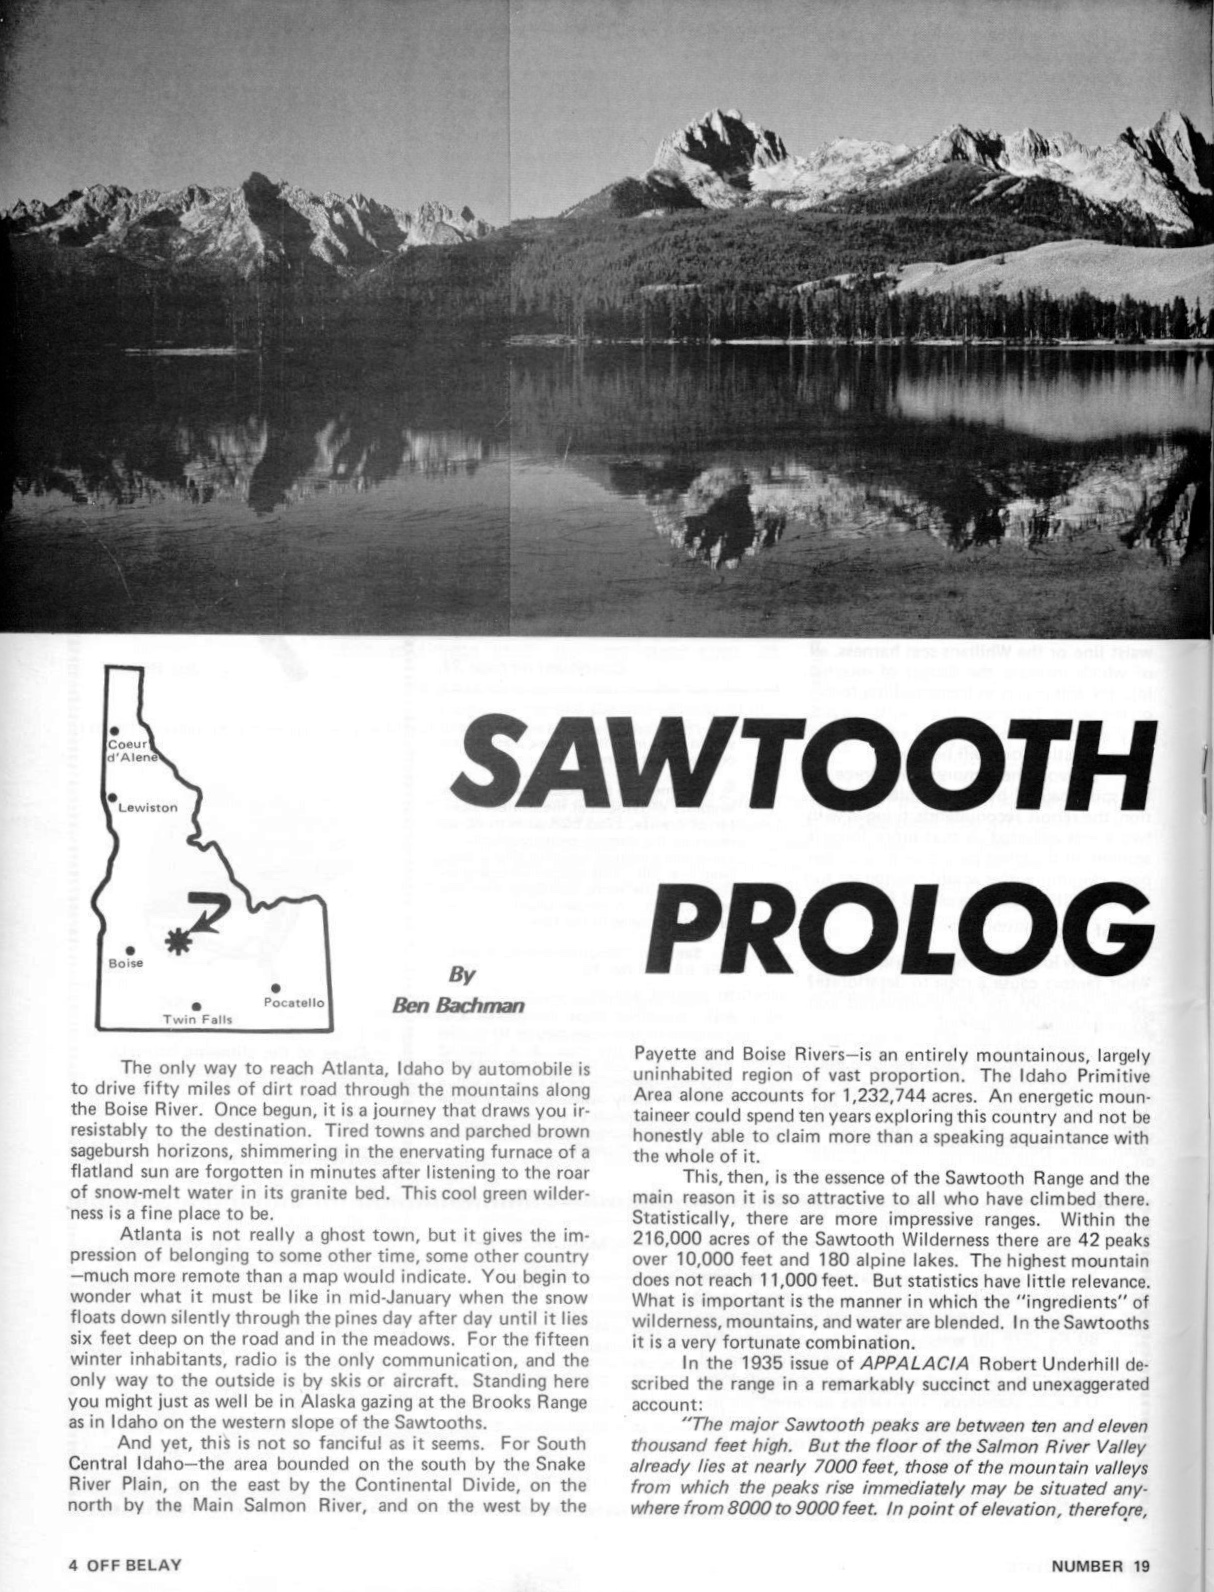
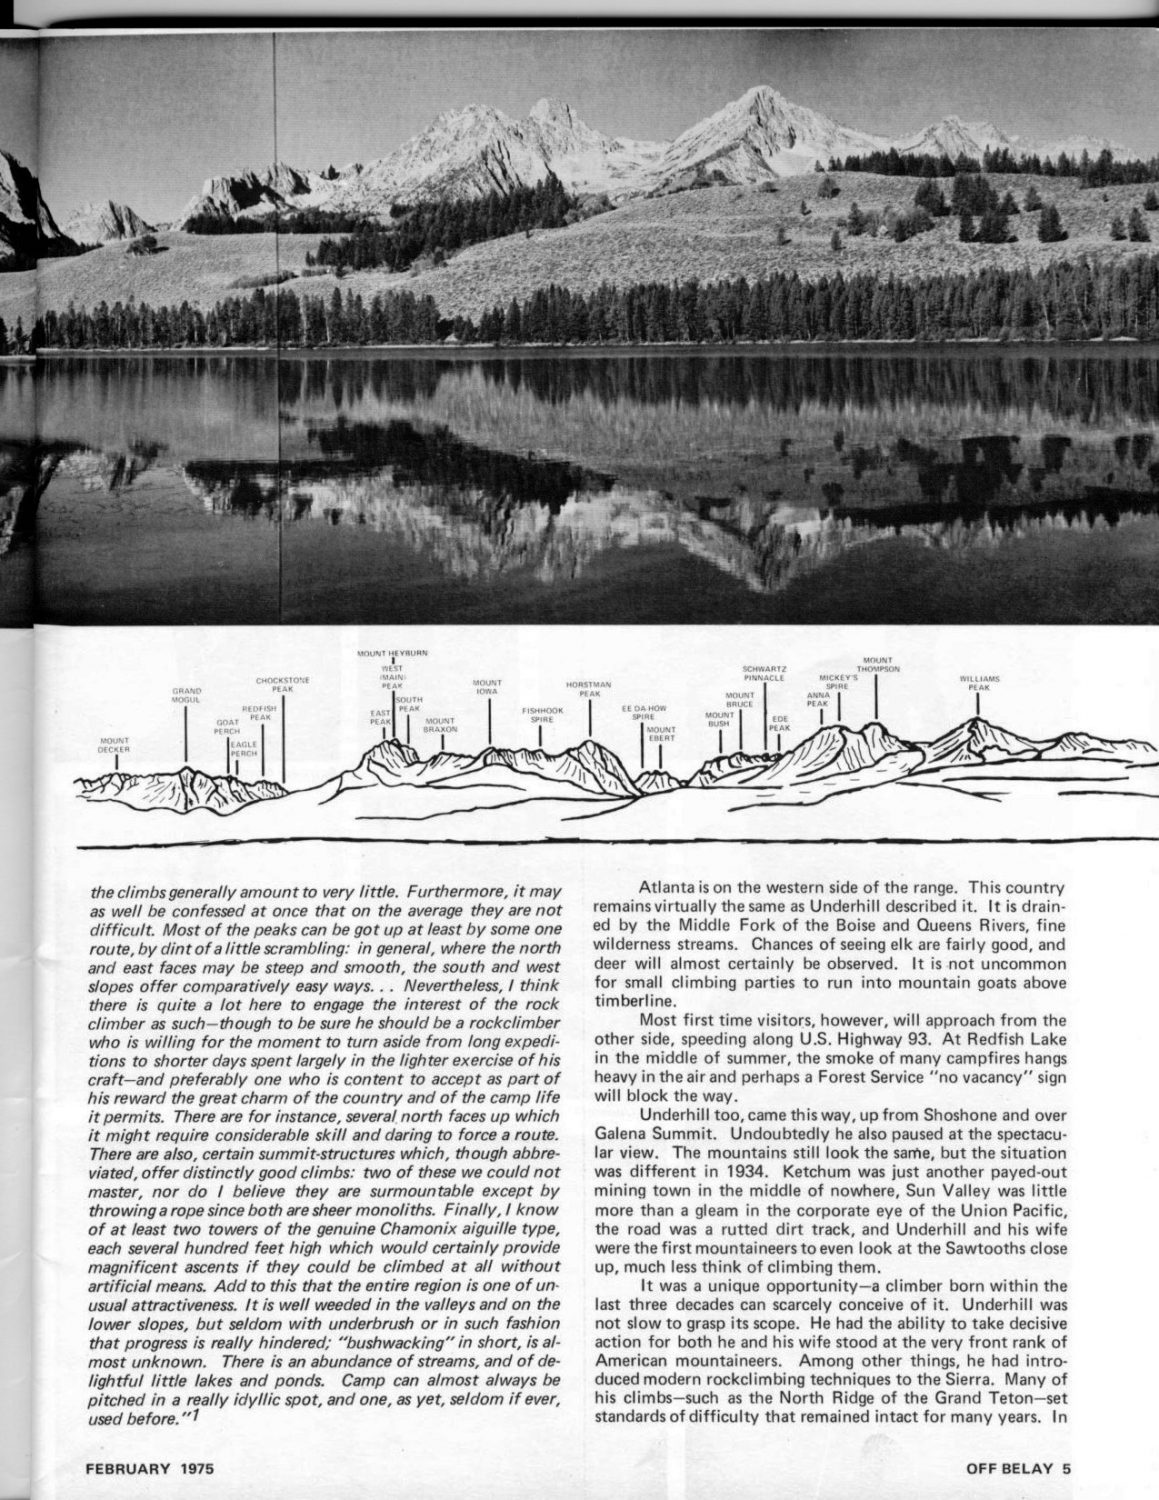
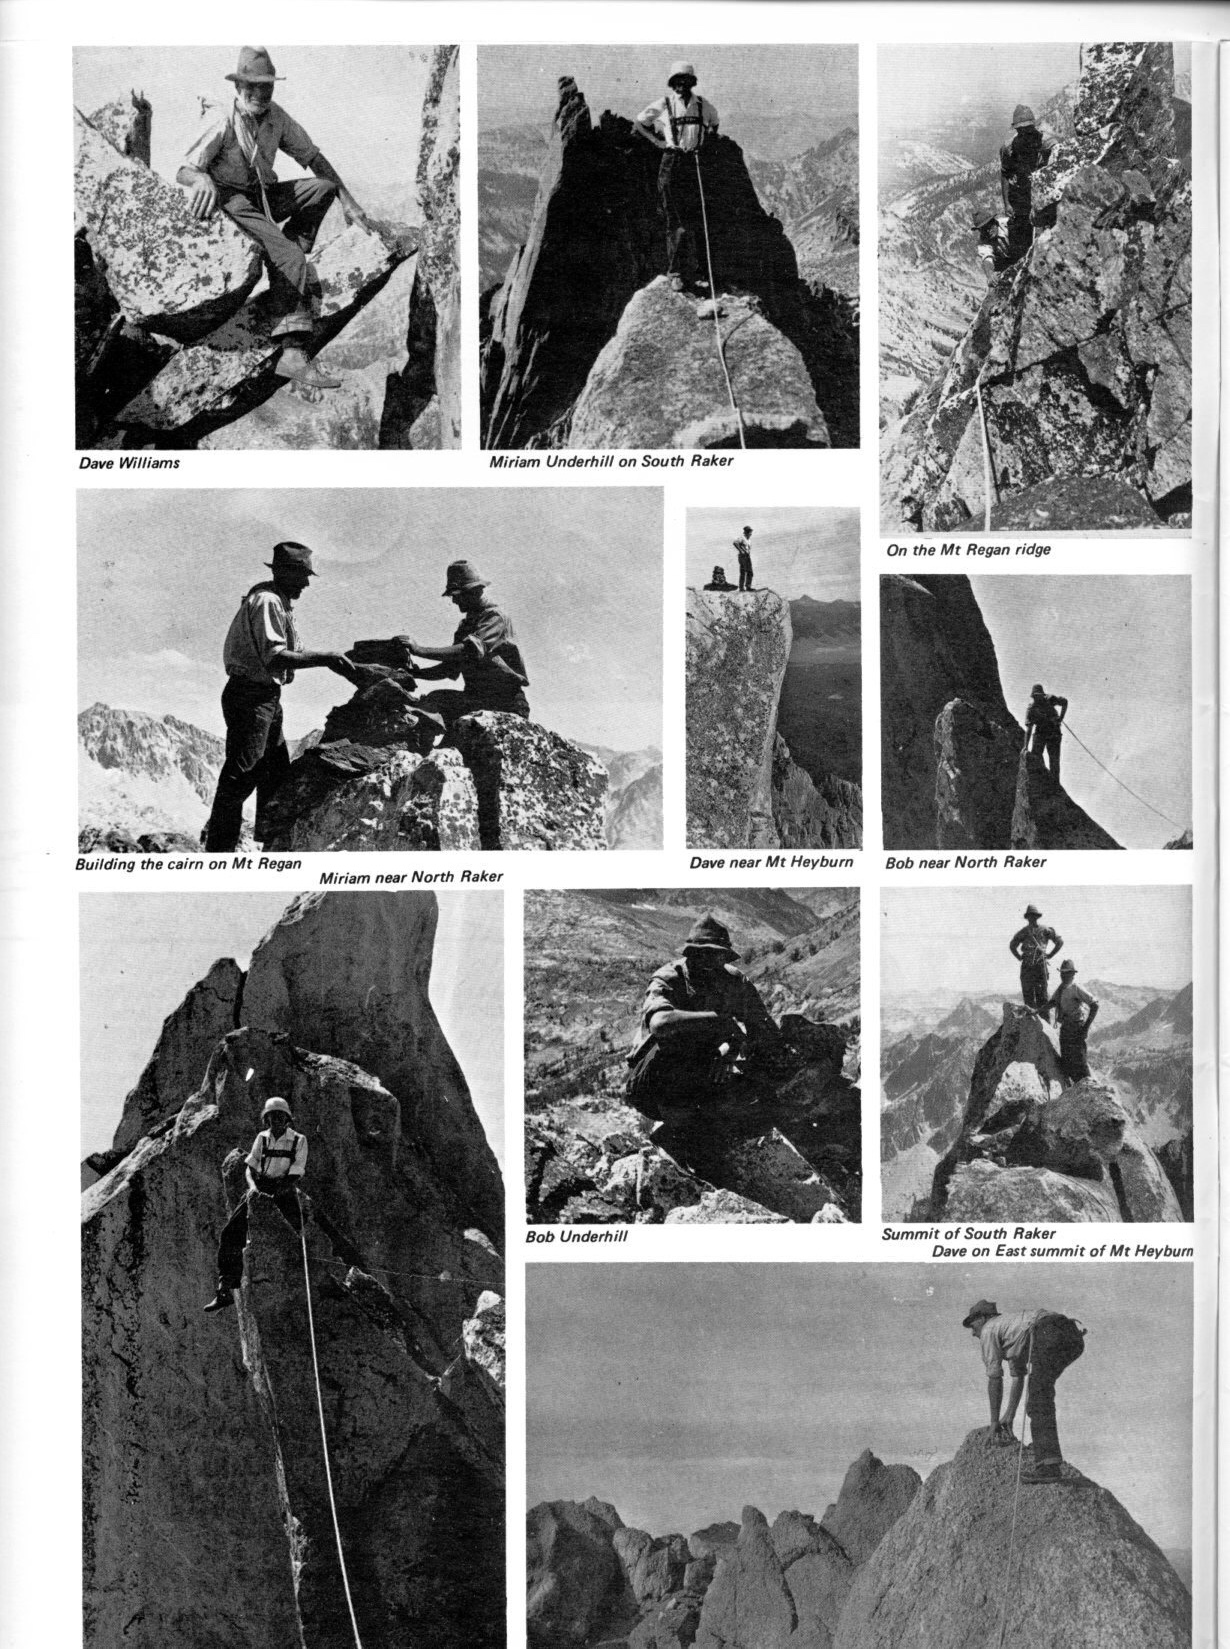
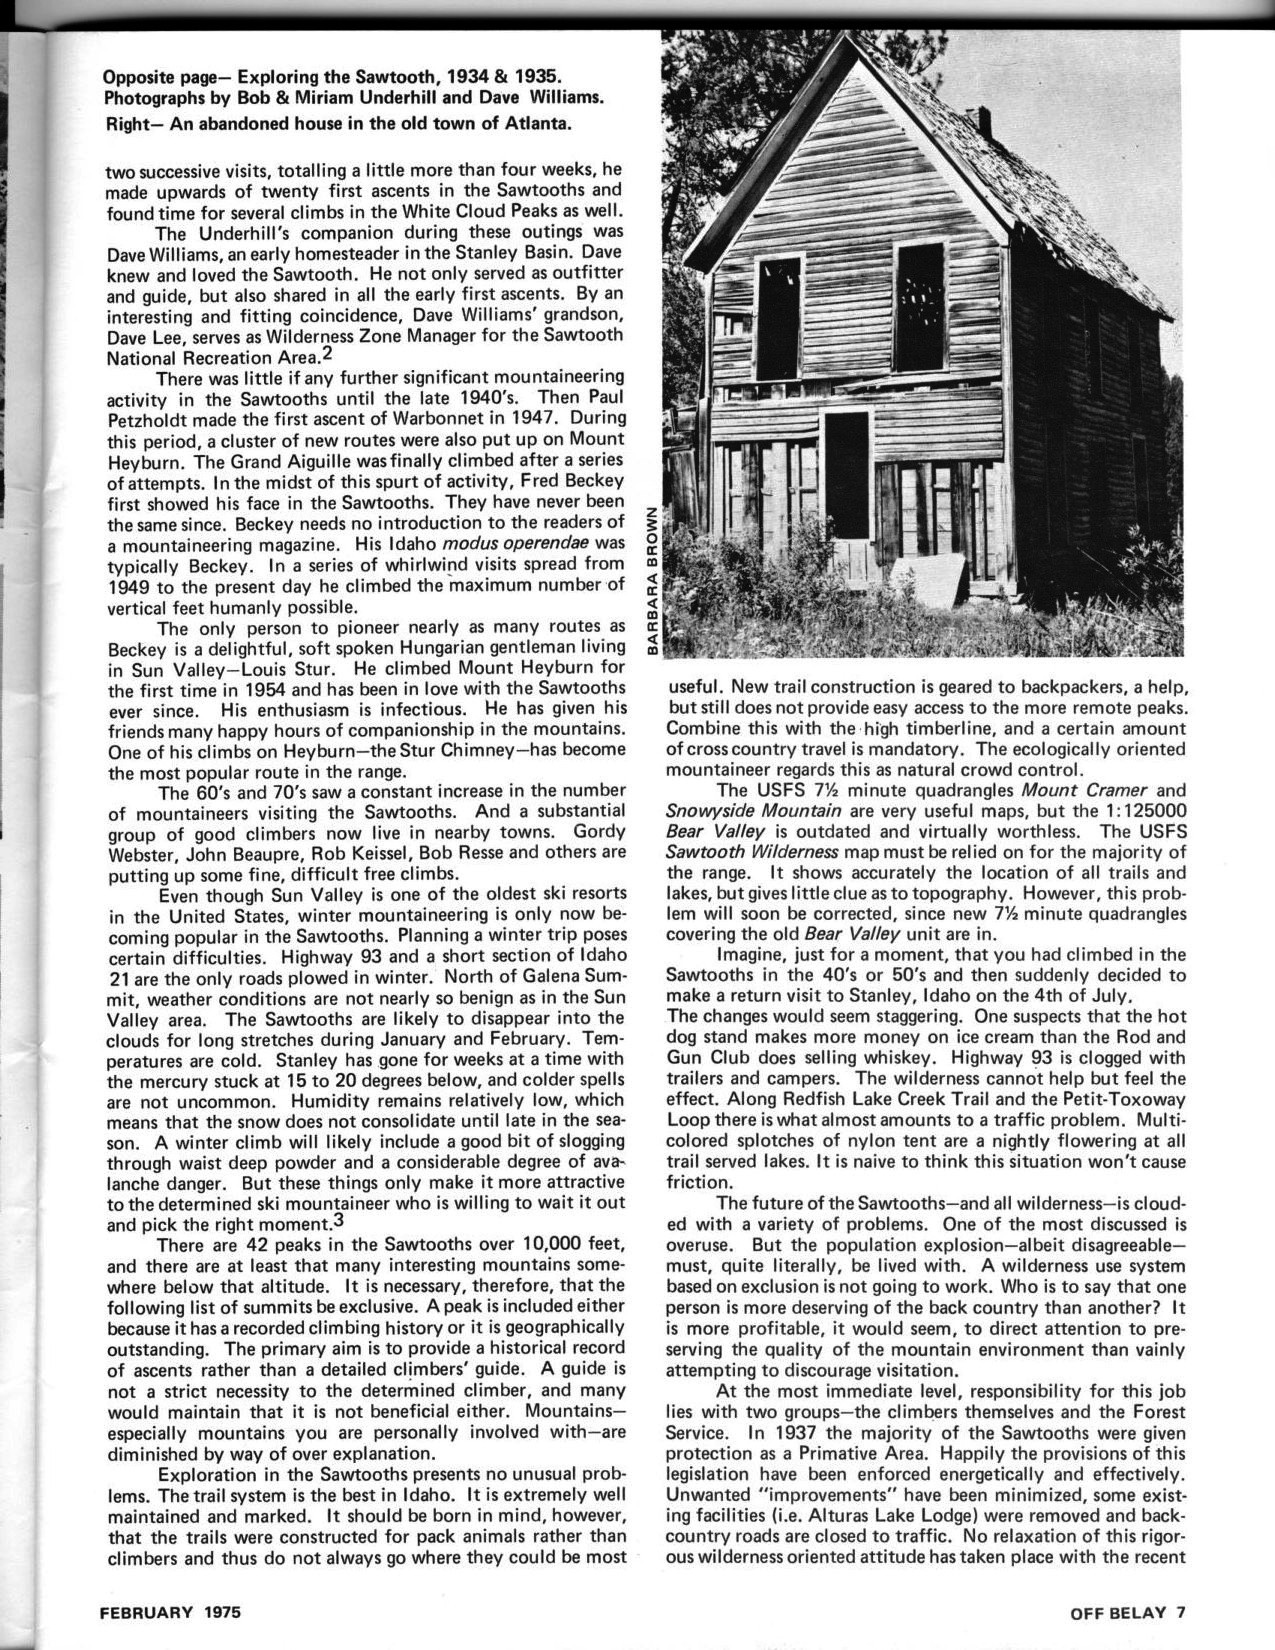
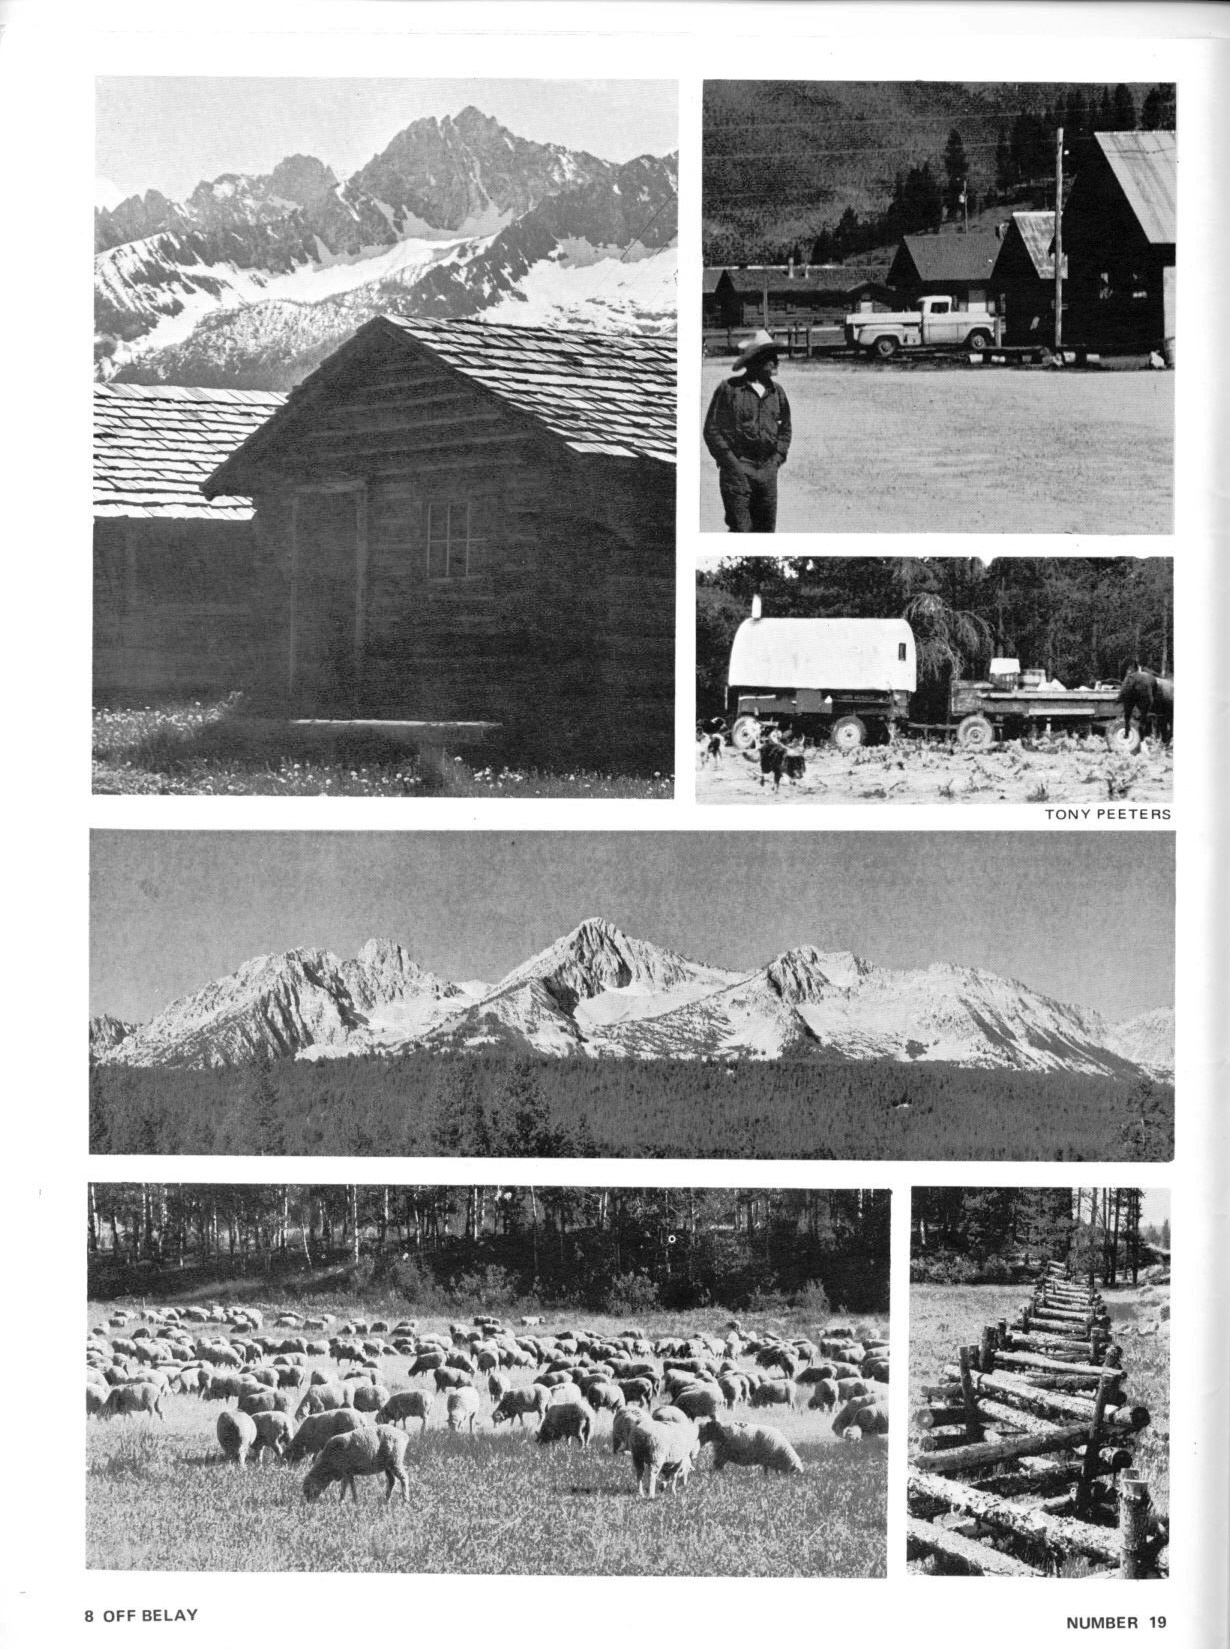
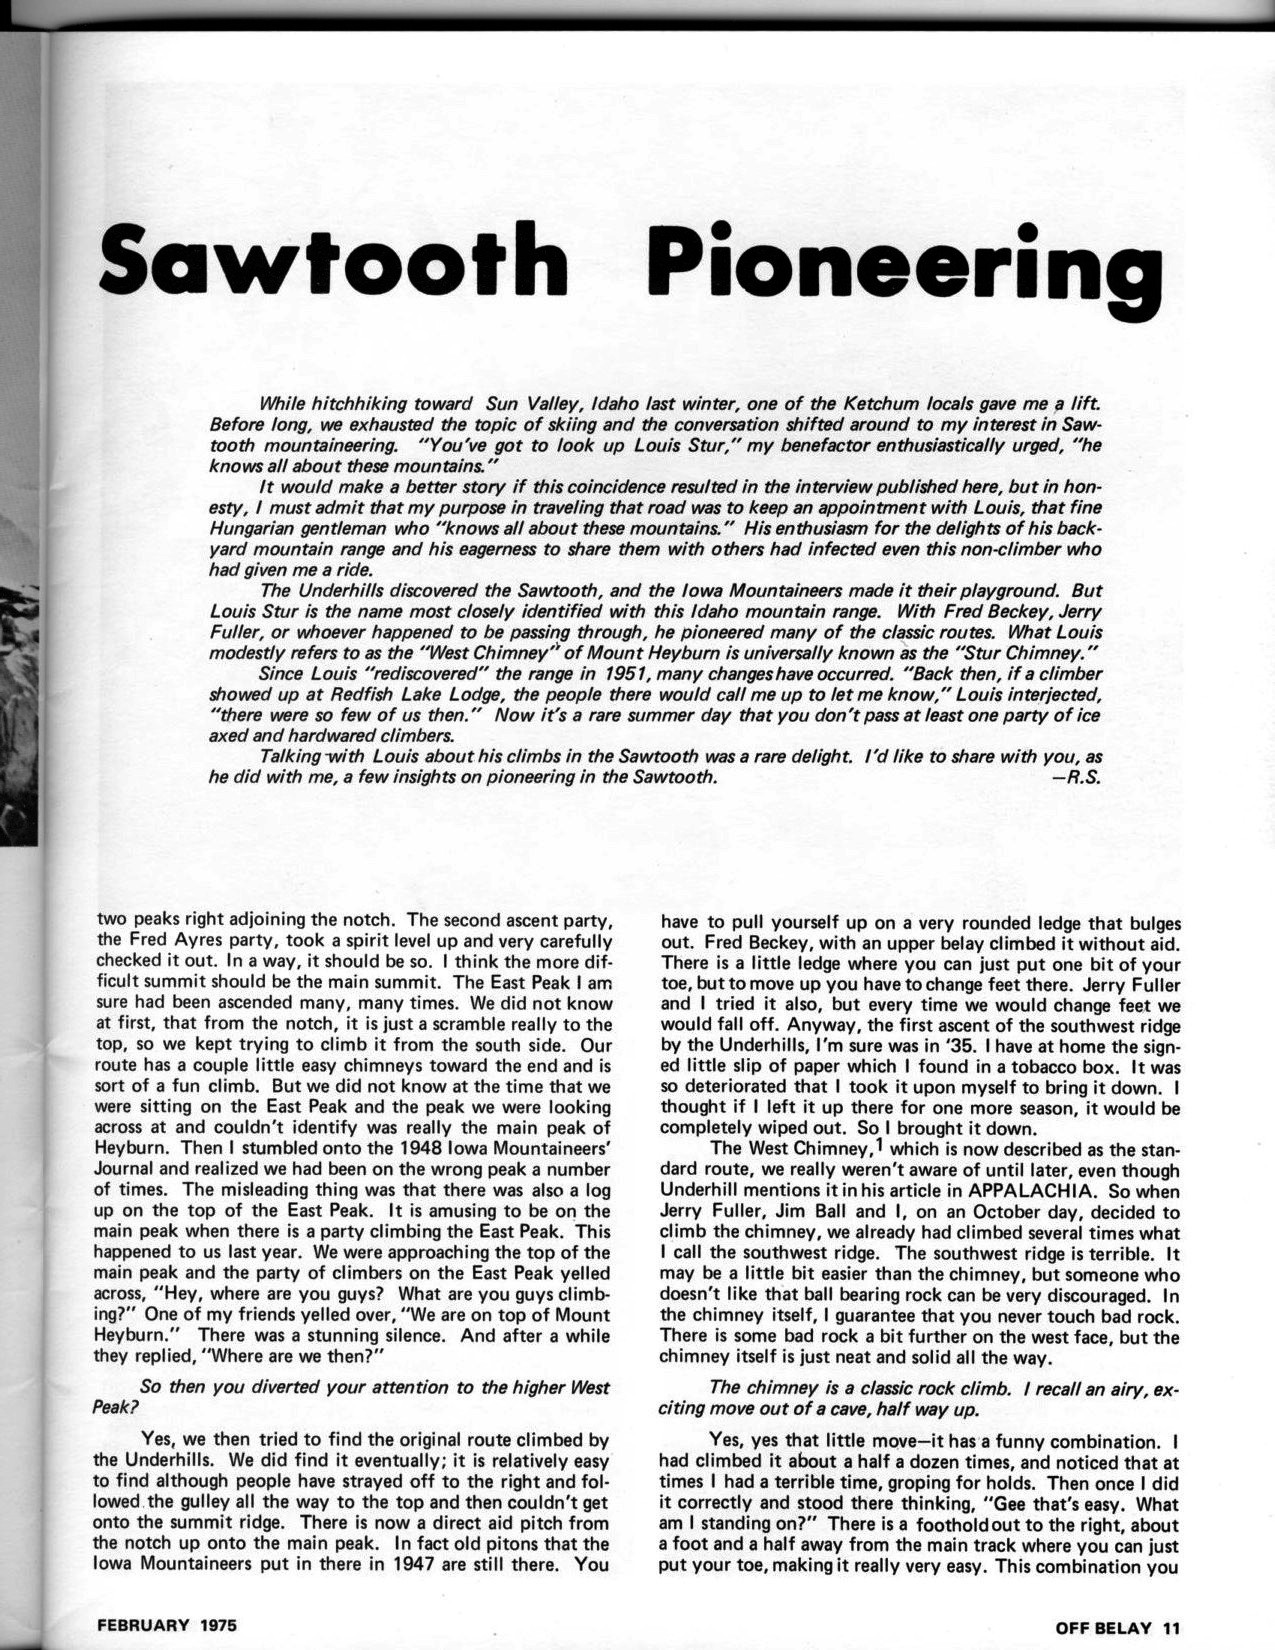
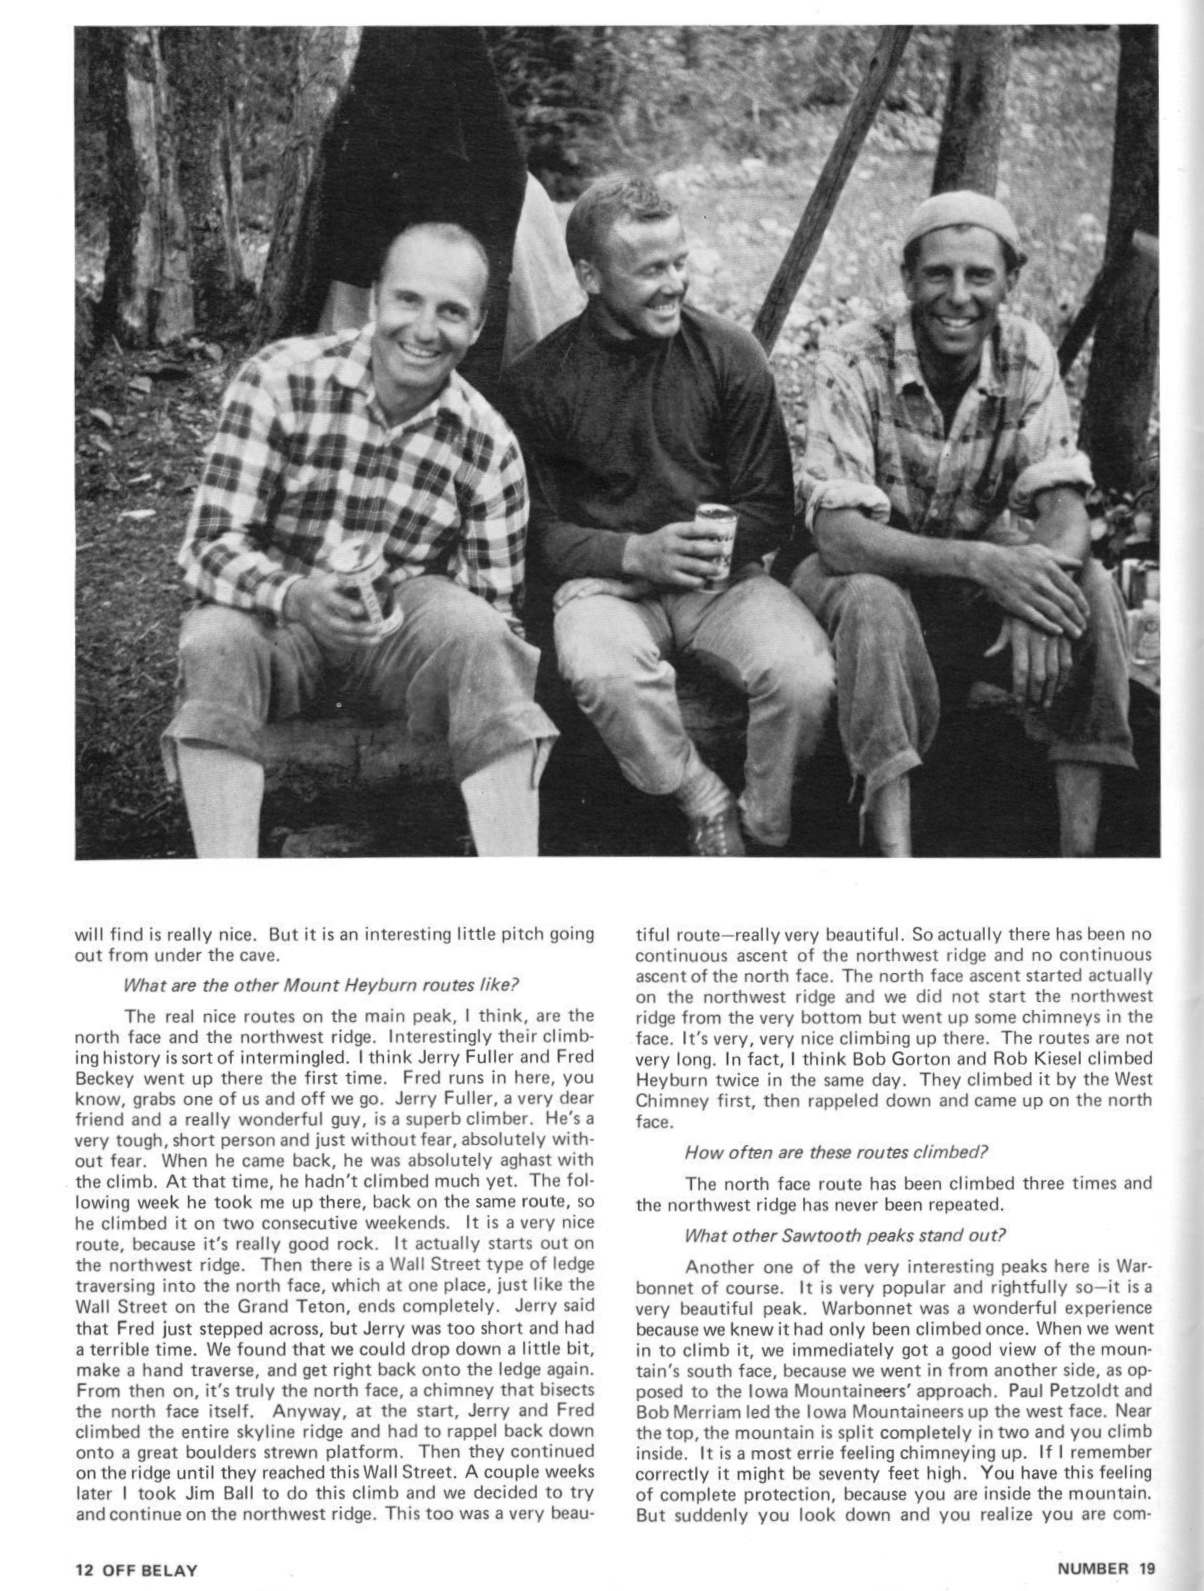
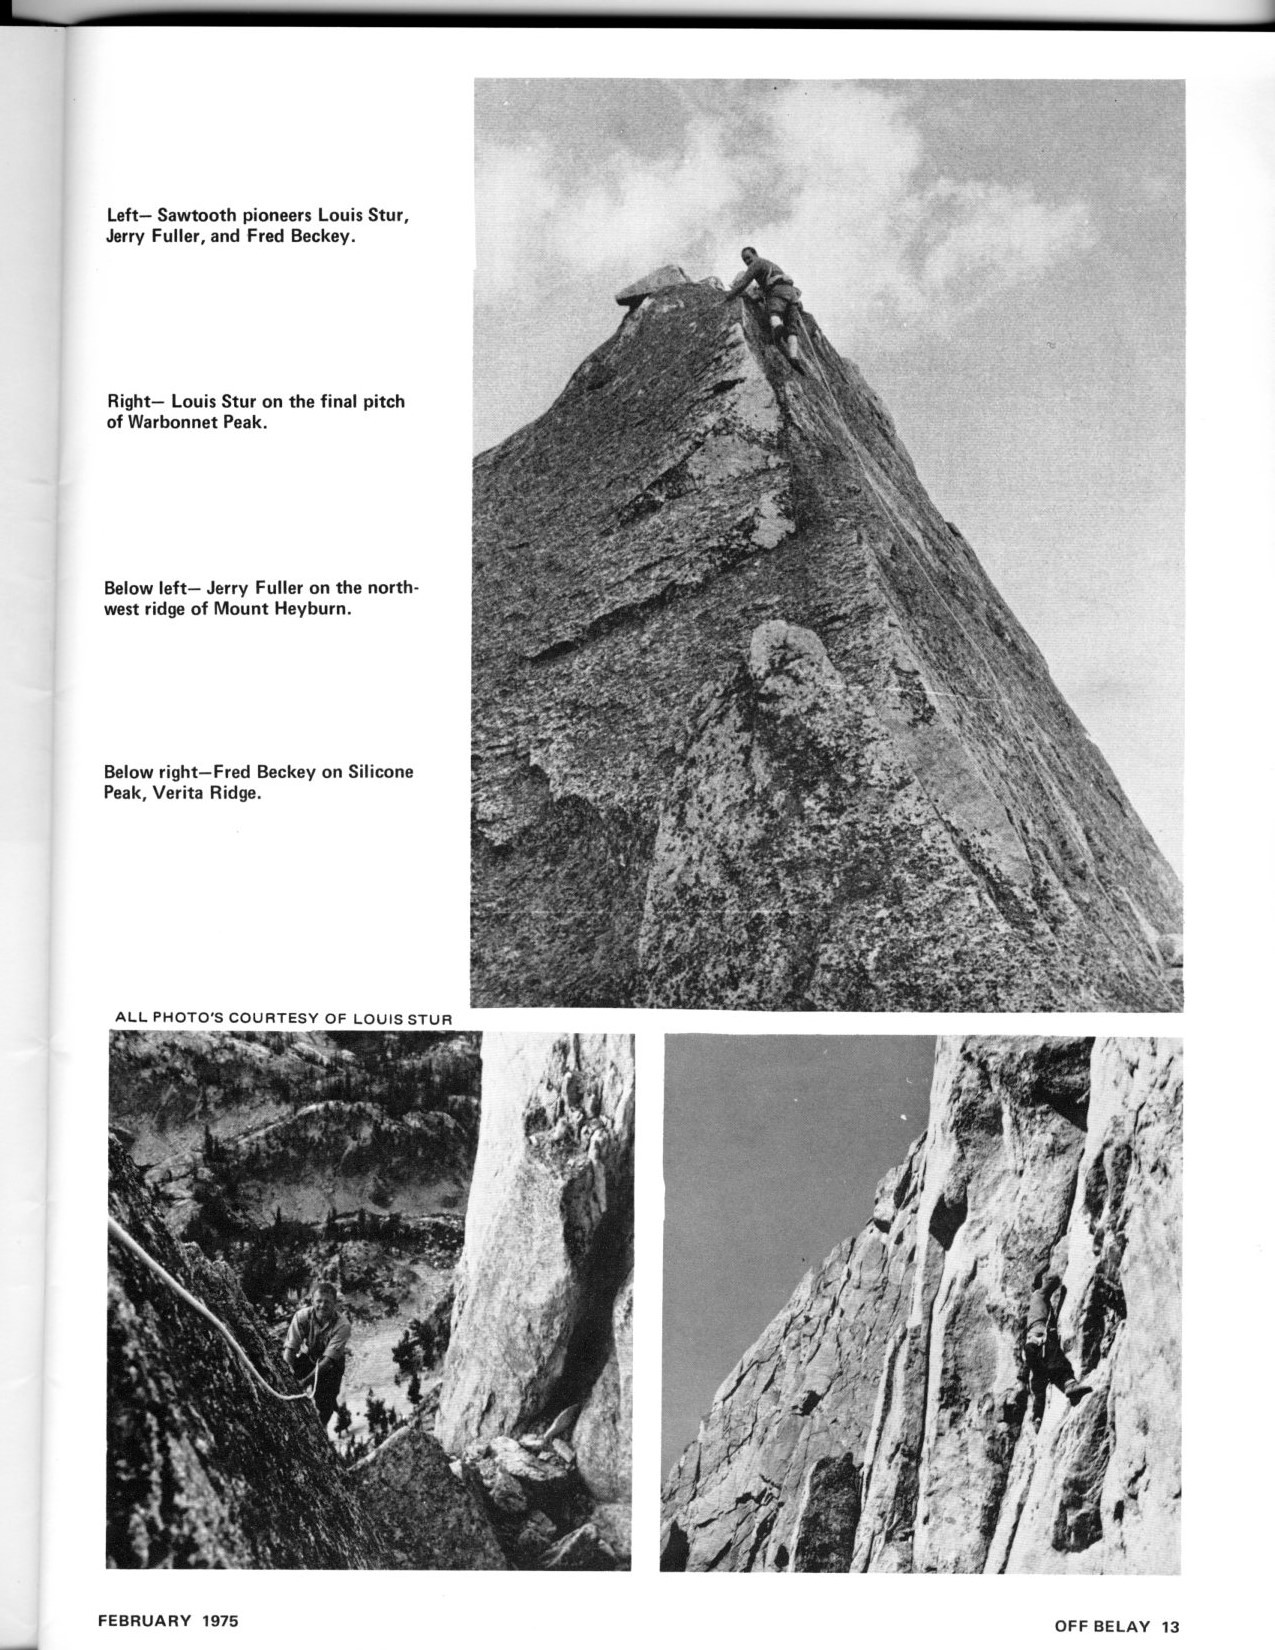
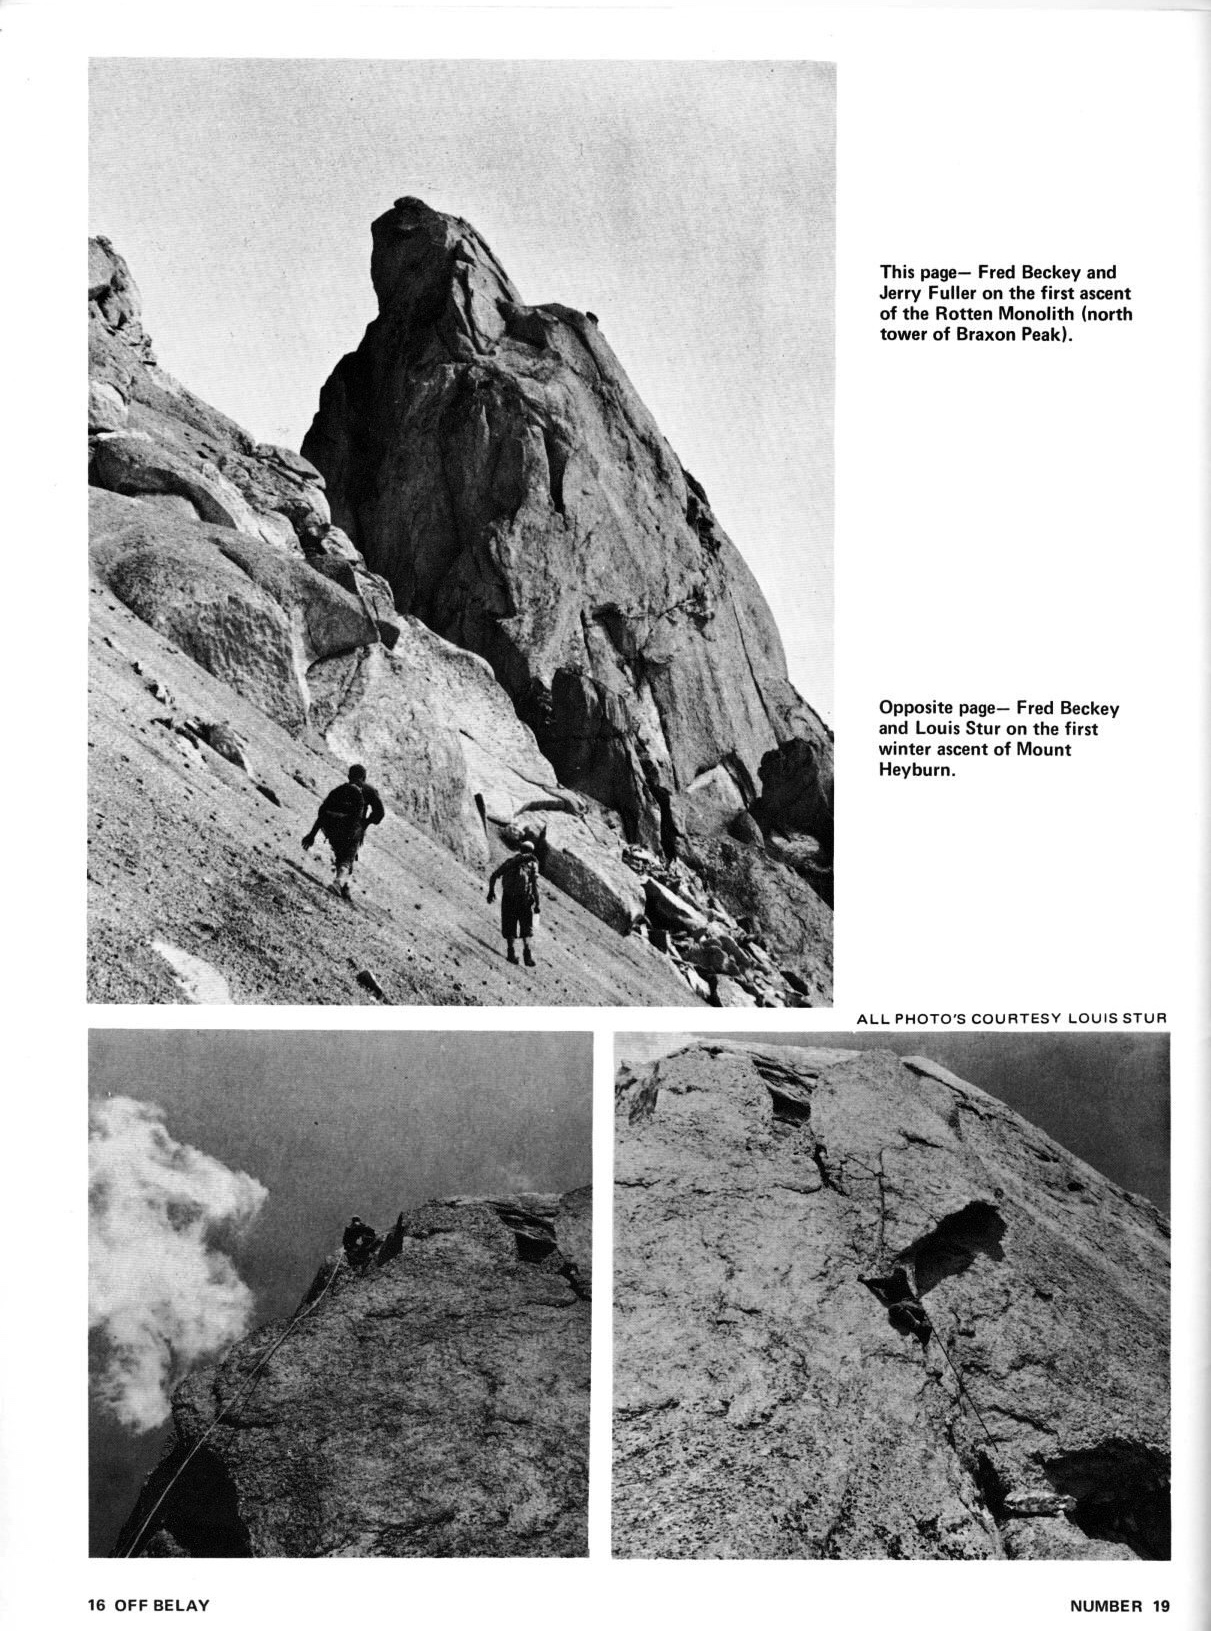
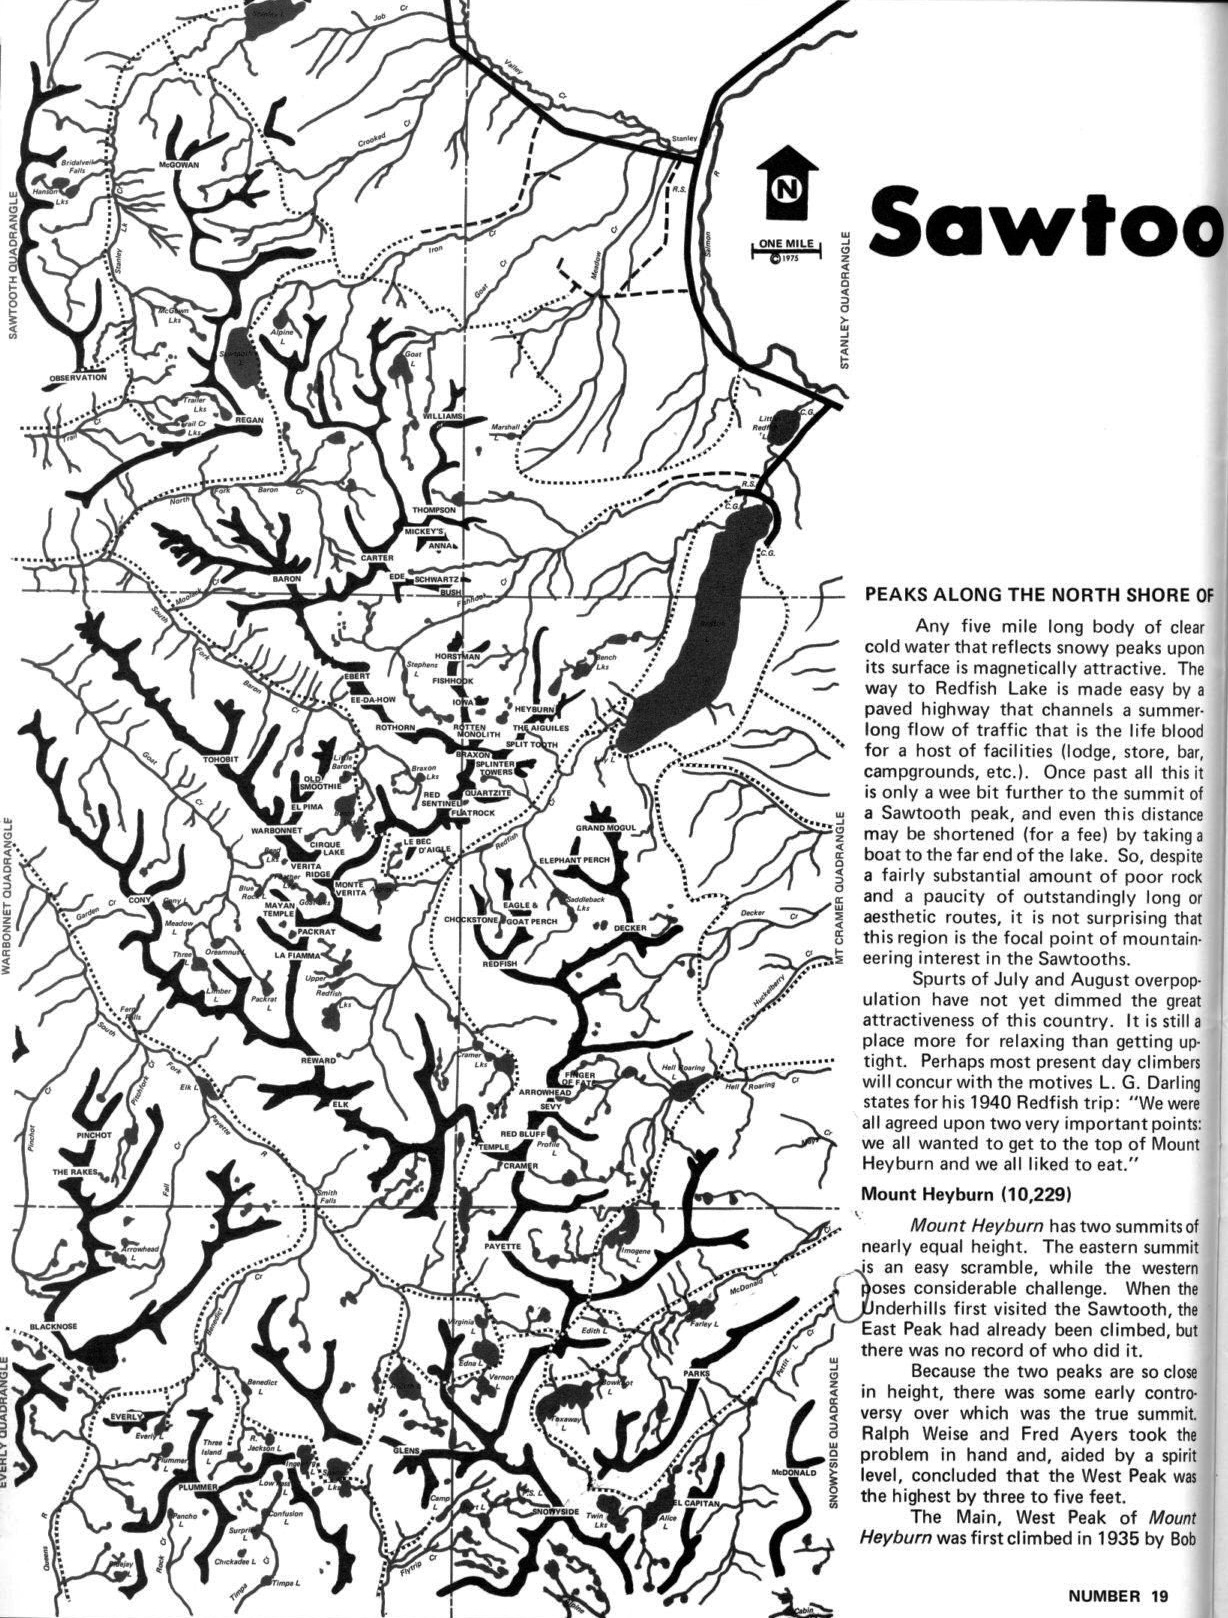
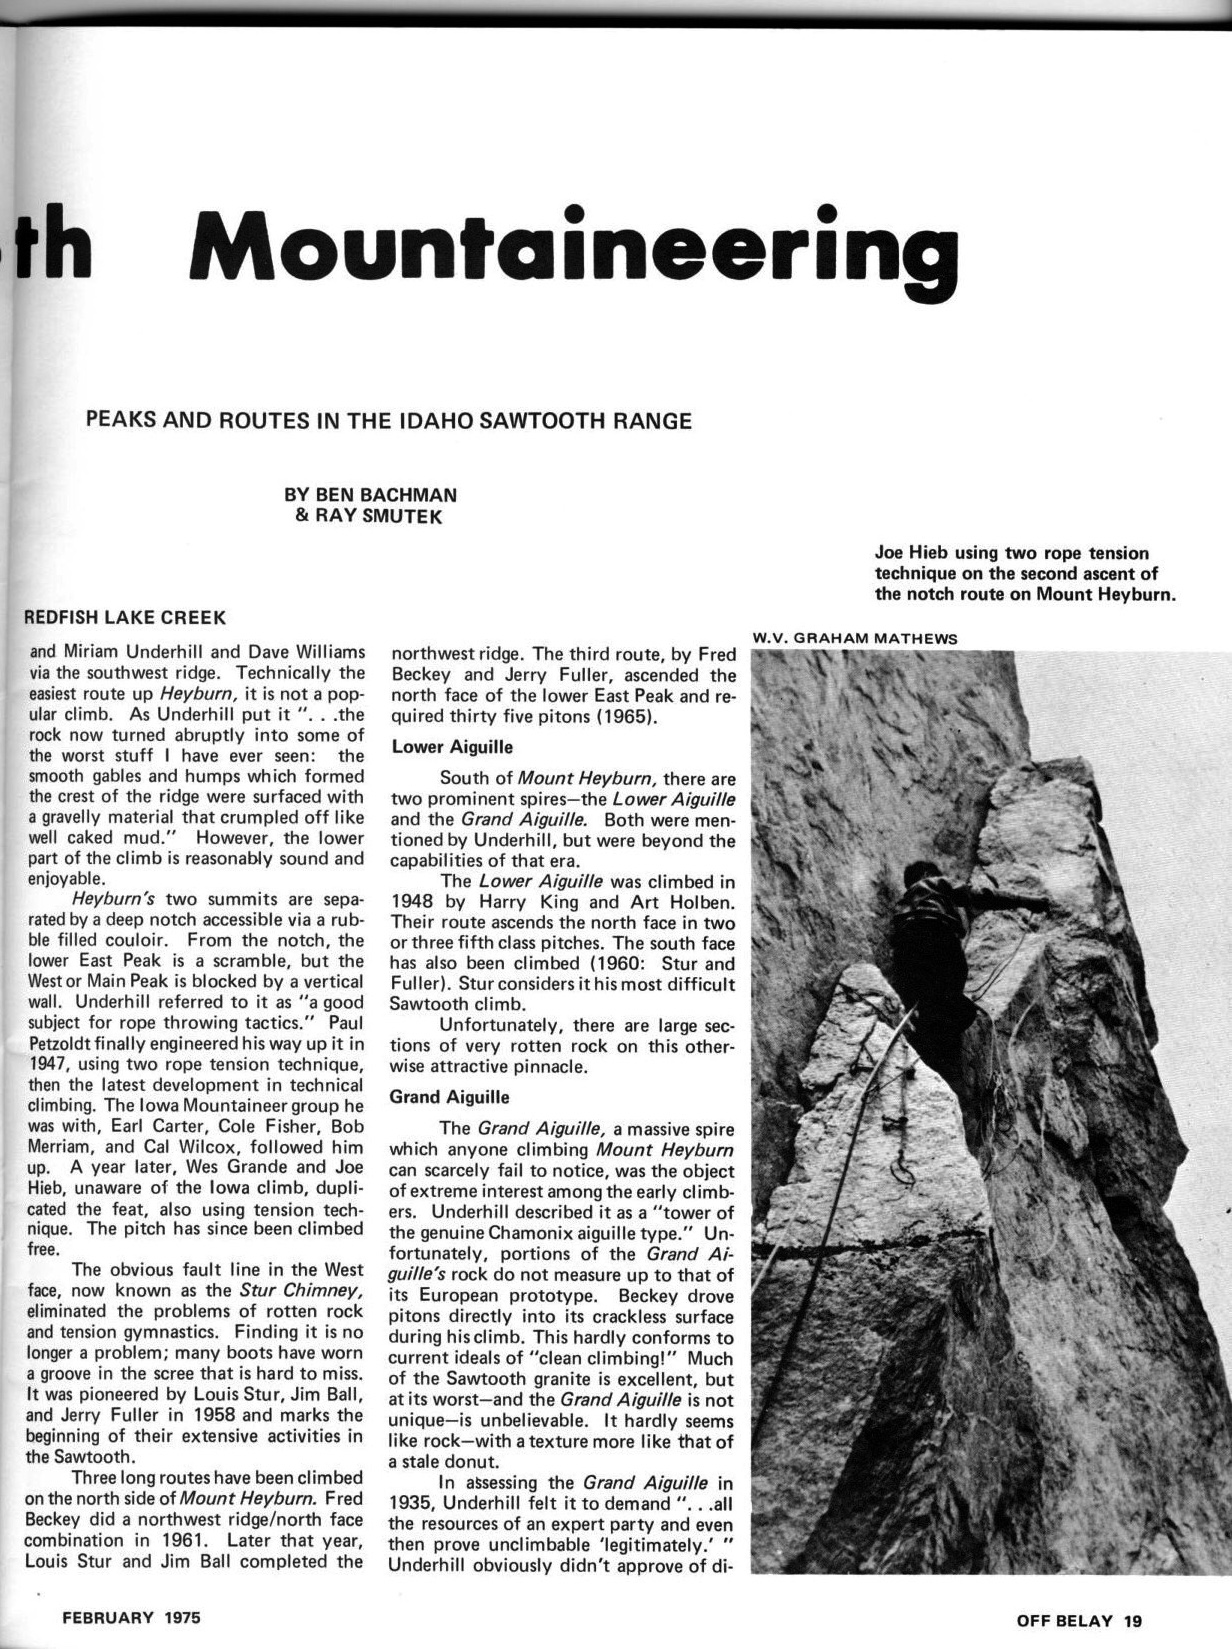
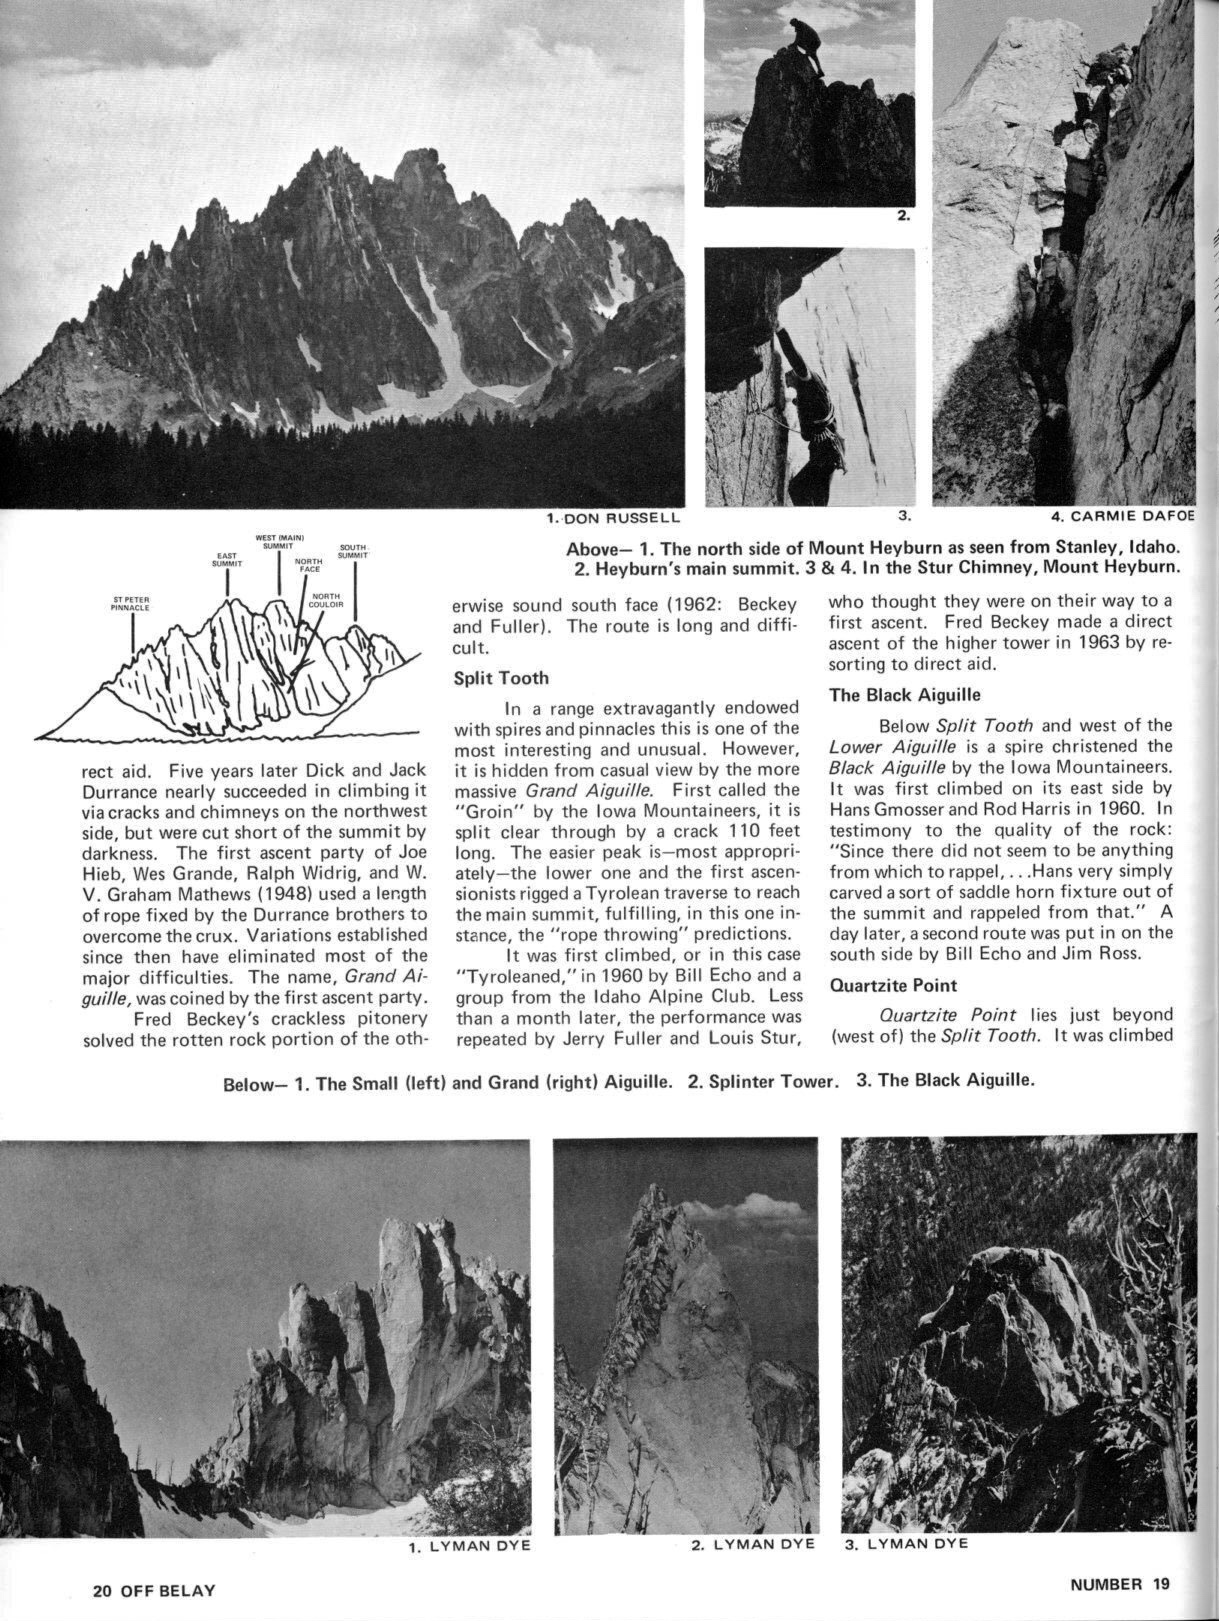
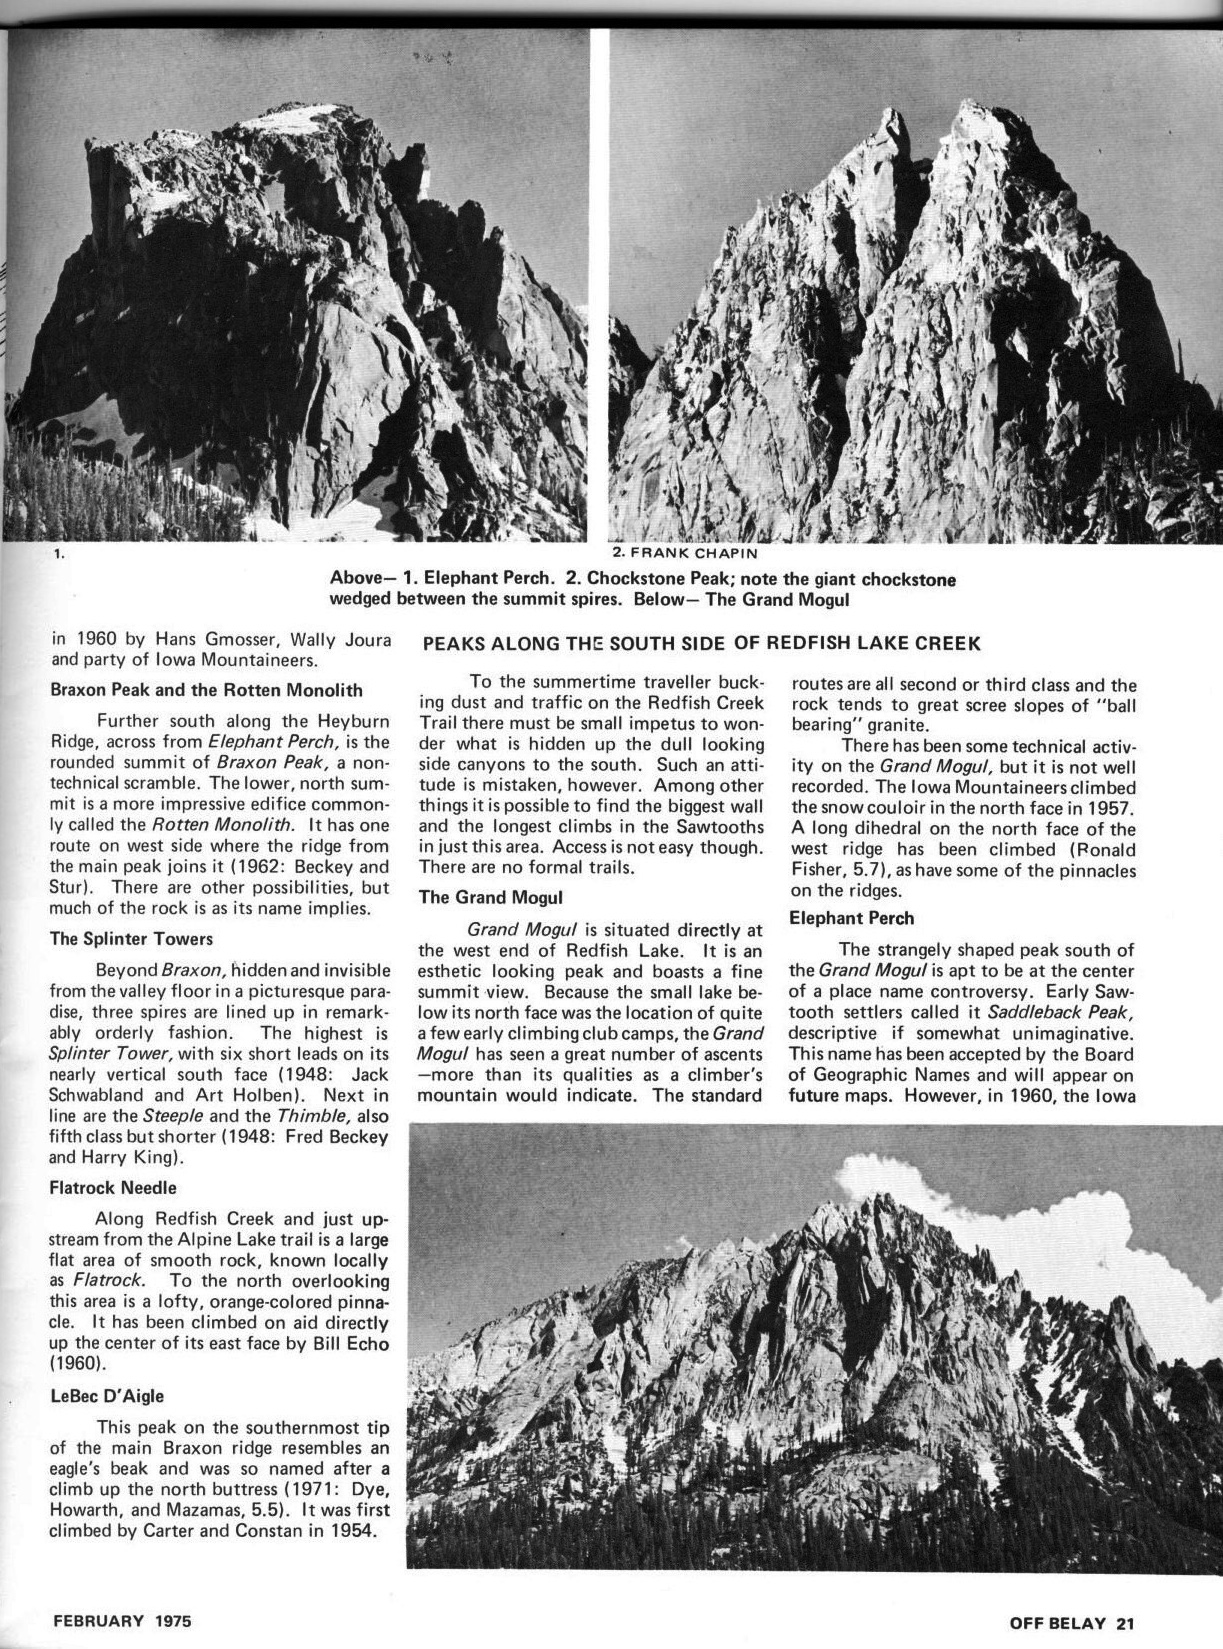
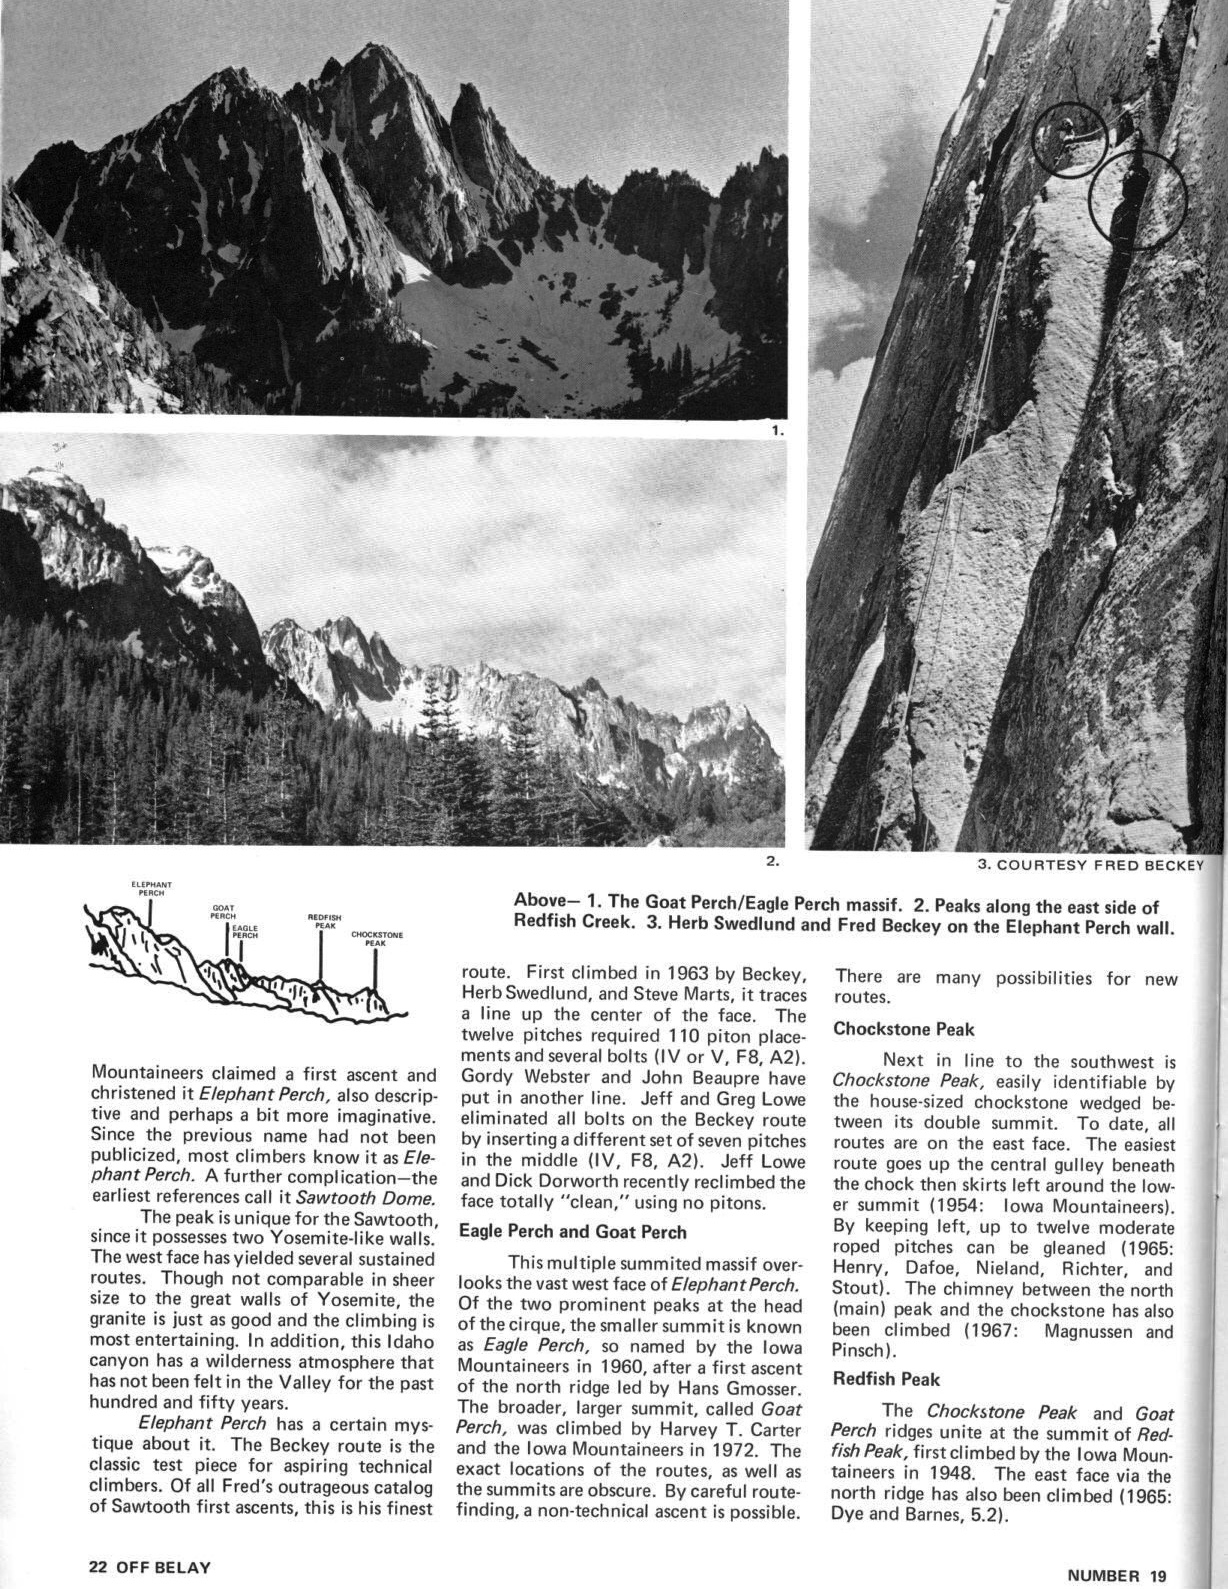
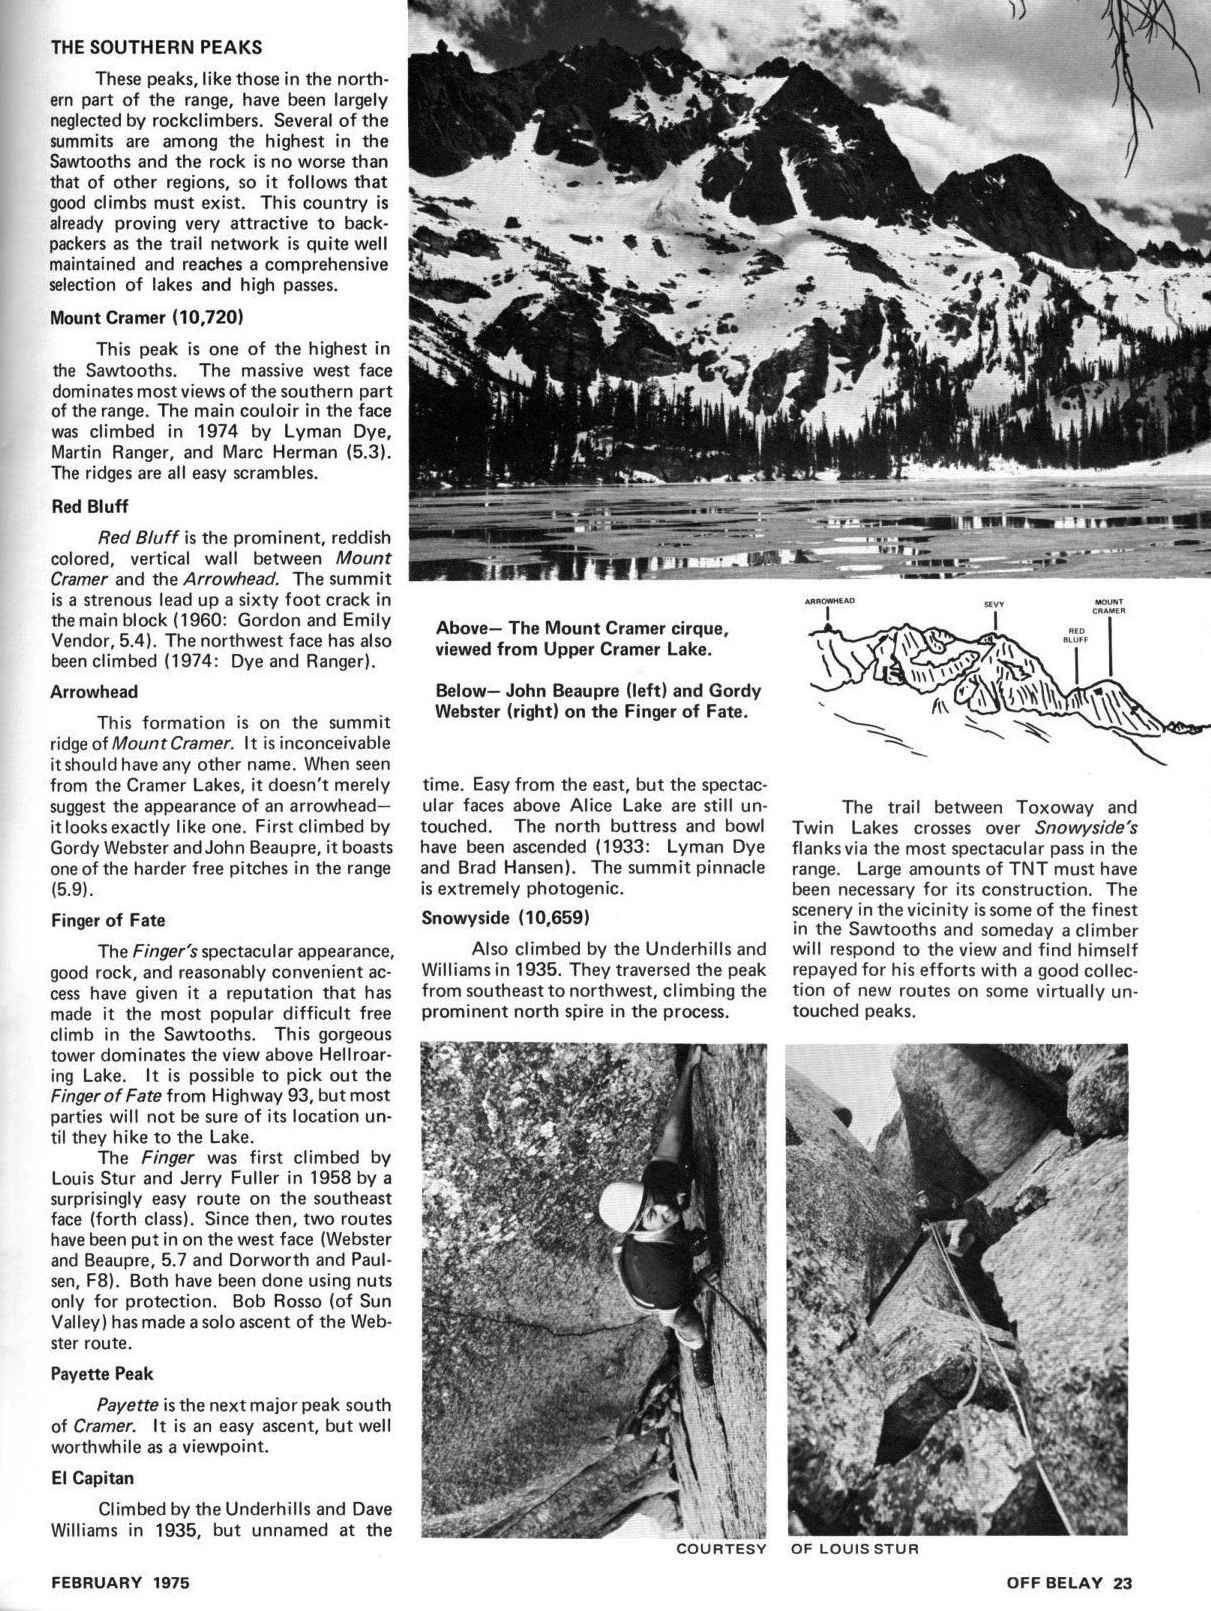
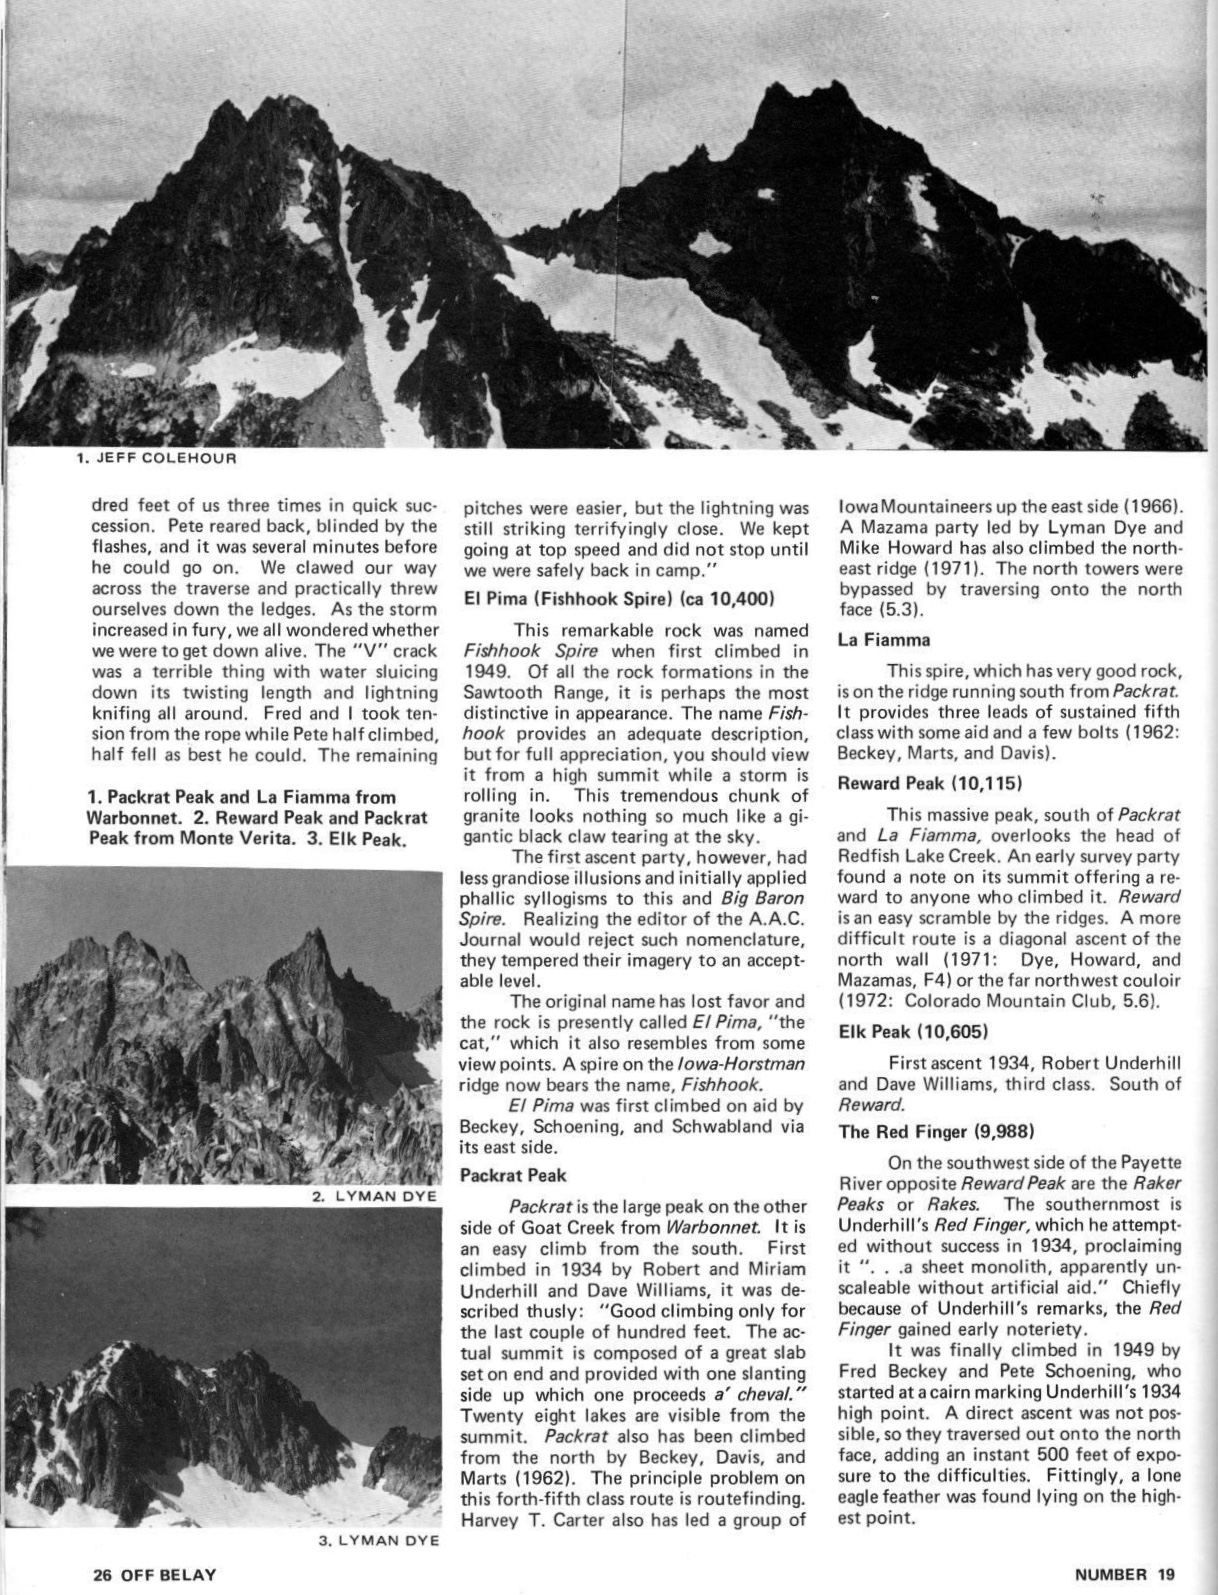
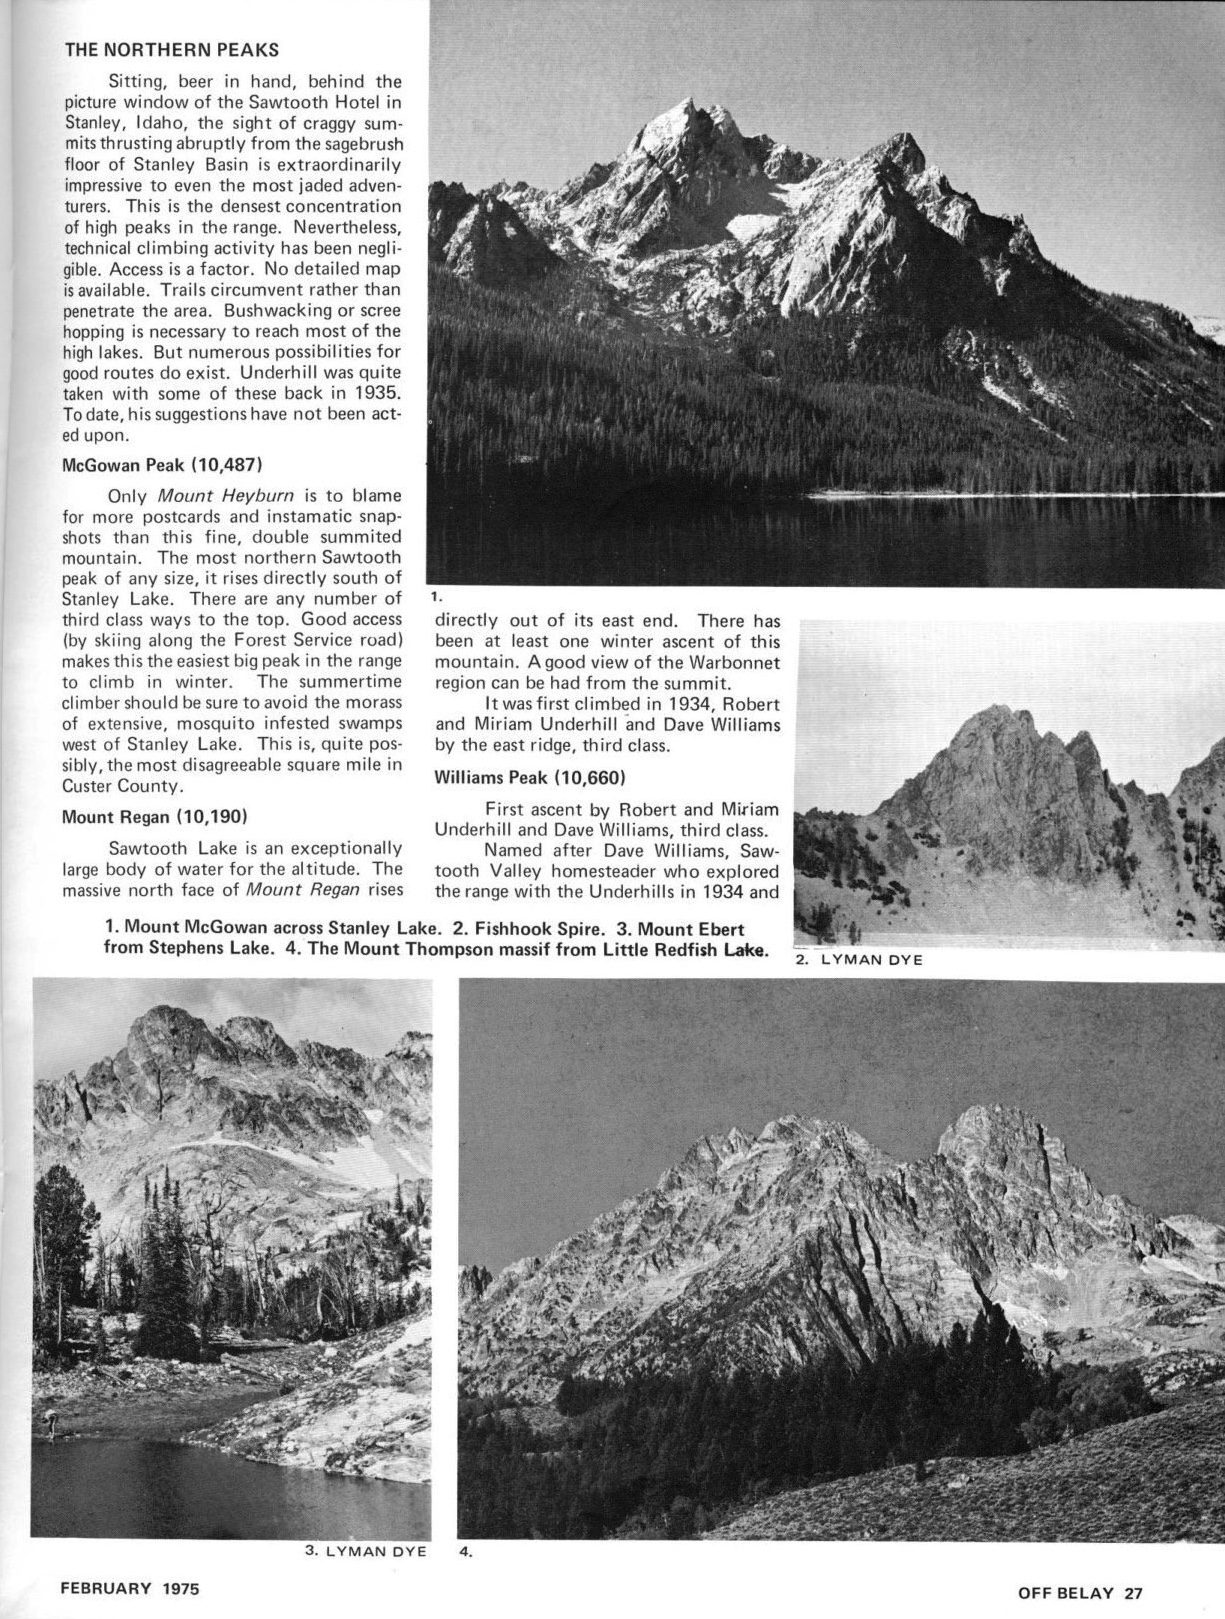
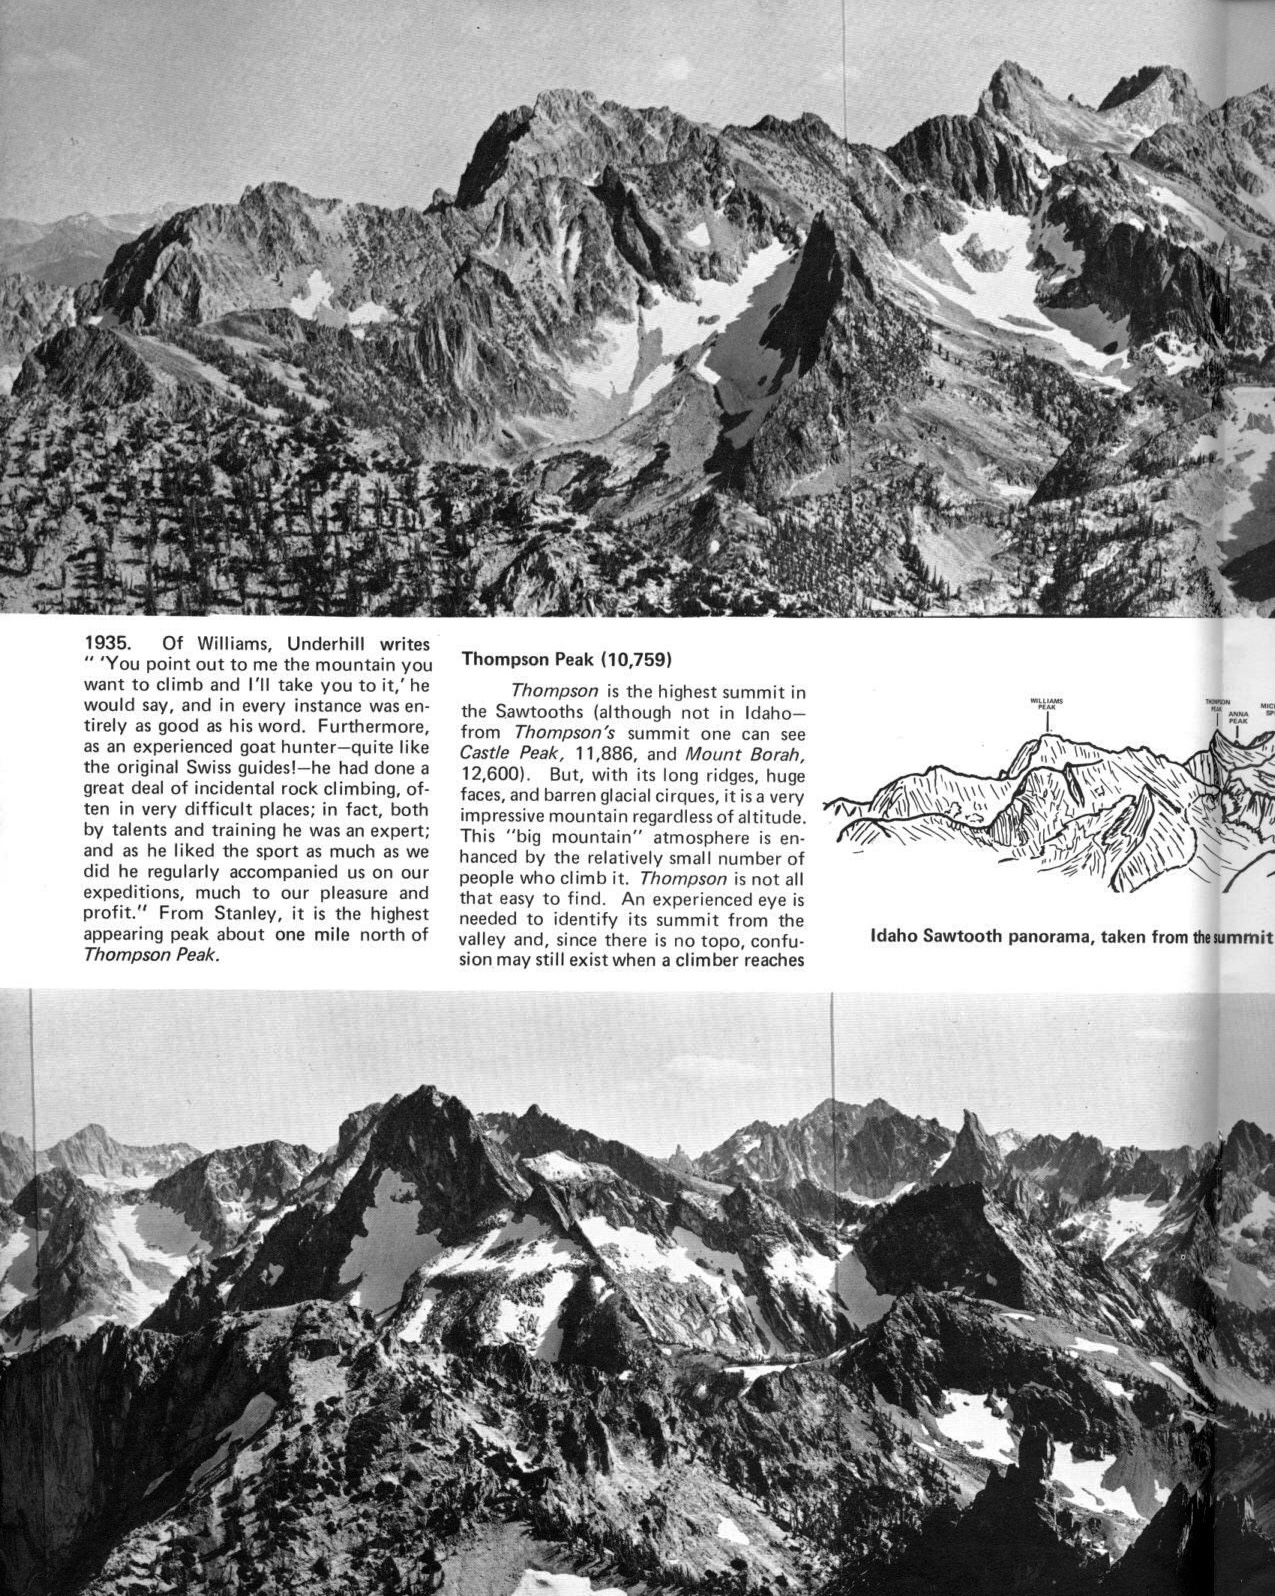
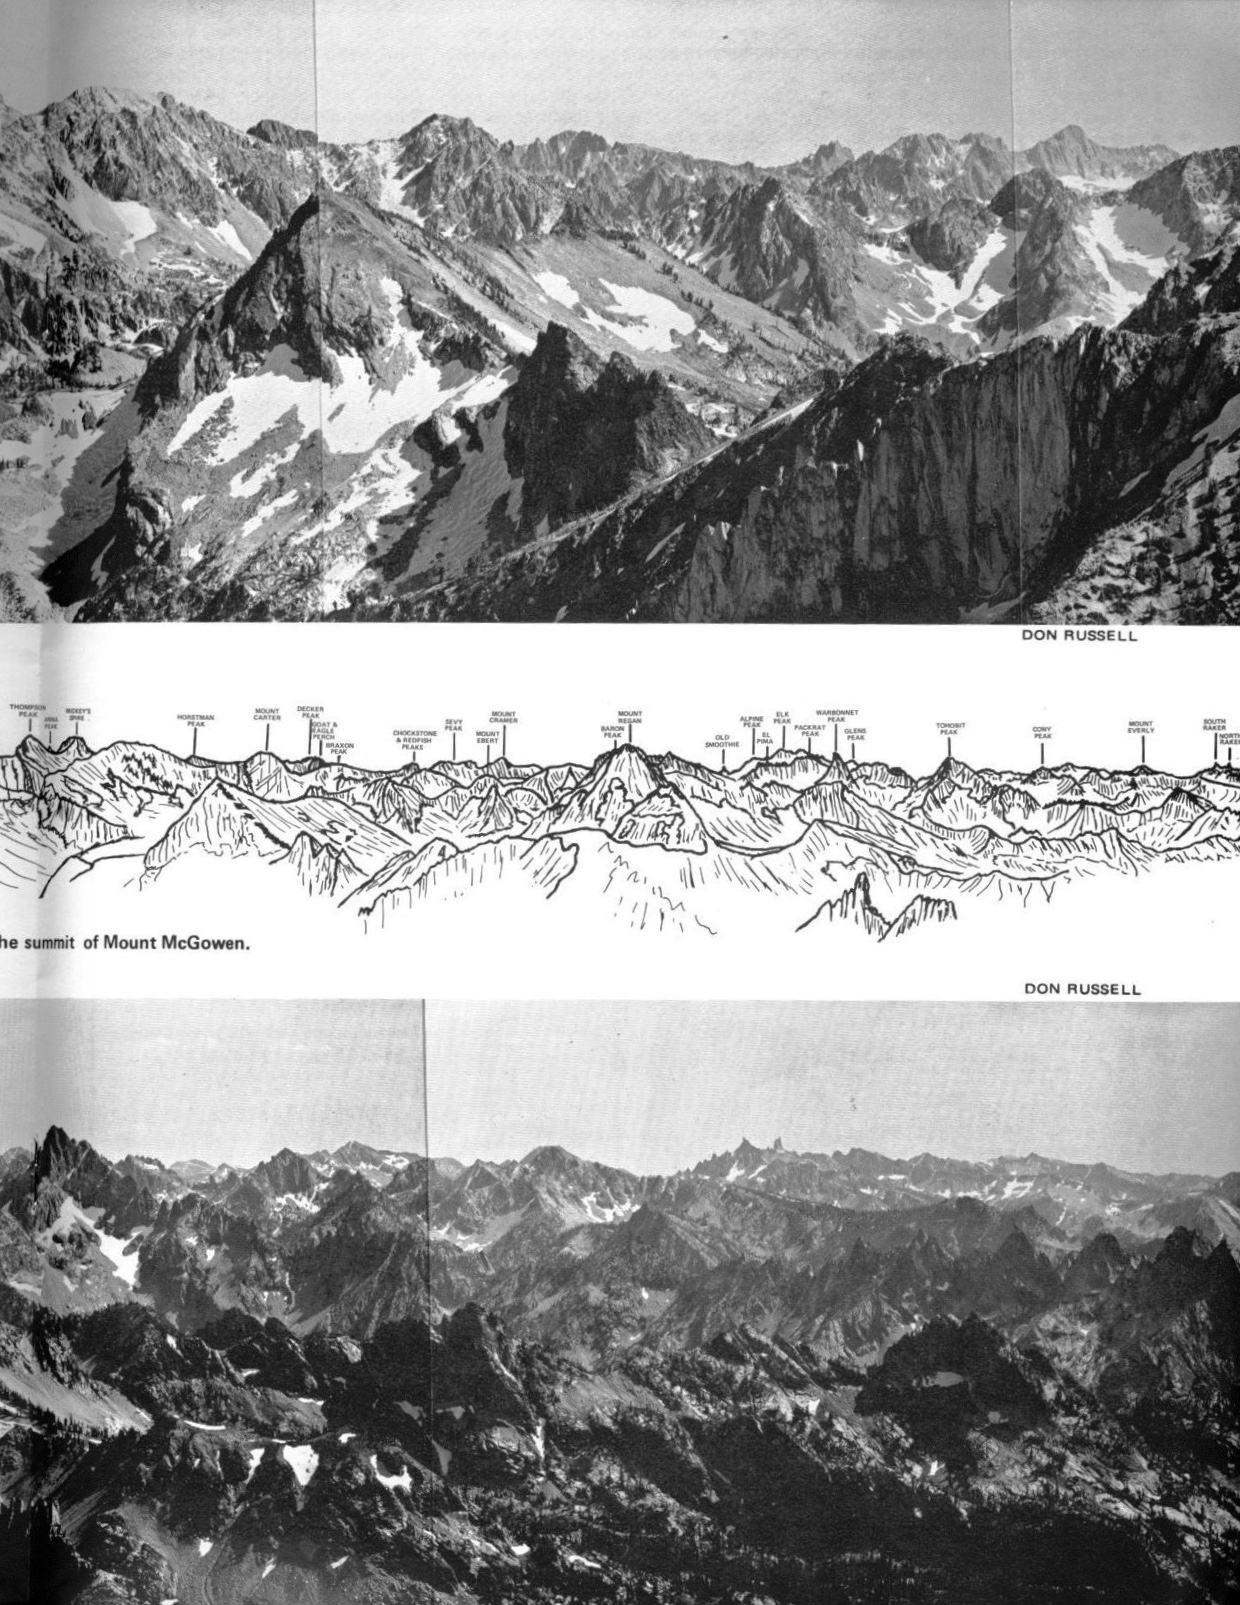
Off Belay Magazine was THE climbing magazine of its day. The following articles contained the most extensive discussion of the Sawtooth Range yet published in 1975. Special thanks to Ray Brooks for providing the scans. (Click on the scans to enlarge)
Mountain climbers and obsessive peak-baggers have a common goal: to stand atop a specific mountain or series of mountains. It is generally accepted that you must stand on the highest point of a mountain to claim a successful ascent. Thankfully, about 95% of the time, there is no dispute as to the mountain top’s exact location (true summit) and its exact elevation (true elevation). But about 5% of the time, things can get murky. Sometimes the location of the true summit is in dispute; sometimes the true elevation (measured in either in feet or meters, or both) is in dispute. This essay attempts to isolate and address these two issues.
Where is the true summit and how is it determined?
To answer this question, we must examine several generic cases (with specific illustrations of Idaho Mountains when possible). We shall start with the easiest case and then progressively handle more complicated cases.
CASE #1
The easiest case is one in which there is one, and only one, highest point. It may be a measured point using a USGS topo map’s figure or it may be the area above the highest contour line on the map (an unmeasured summit). In the latter case, there is only one “highest contour line.” But even in this simple case, you may have to wander around on a summit plateau searching for the “highest point” (measured or unmeasured). Sometimes, it’s just not possible to locate a clear, highest point on a particularly flat summit area. In other instances, some kind soul has built a cairn at what they consider to be the “highest point” and your search is probably unnecessary. In other cases, a surveyor has left a USGS benchmark, or rebar stuck in the ground, or a large cairn with a post in it to indicate exactly where the elusive high point is.
CASE #2
This is the case where a mountain has two measured summits of exactly the same height. THIS IS EXTREMELY UNUSUAL. In Idaho, Peak 8297 fits the bill. This peak is located just off US-93, south of Challis, at Broken Wagon Creek Road. The peak has a narrow summit ridge that stretches from South to North and is over a mile in length. The North Summit is measured at 8,297 feet. The South Summit is measured at 8,297 feet. Which one is the true summit? BOTH ARE. A true peak-bagger will climb both summits to claim this mountain. Doing only one isn’t enough. Why didn’t you climb the other one?
CASE #3
This is the most deceptive case. It is a case in which a measured summit appears to be the true summit, but isn’t. There is an unmeasured summit nearby that sits above a higher contour line than the measured summit. When climbing obscure mountain peaks in Idaho, this case occurs with a much greater frequency than you would think. If you simply look at the USGS topo map, you will be lured into believing that the measured summit IS the true summit.
It is only when you look at the map more closely (or consult an authoritative source on the location and elevation of the true summit of that mountain peak) that you realize that the measured summit is NOT the true summit. The [nearby] unmeasured summit is undeniably higher in elevation (thanks to the higher contour line) and is the true summit. Another way that you will stumble upon Case #3 is when you consult a respected source for peak information and are puzzled as to how they arrived at an elevation for the peak that doesn’t coincide with the measured elevation.
For example, let’s say we have a peak that has a measured summit of 9,995 feet. But your favorite source for peak information lists the peak’s elevation at 10,020 feet. What’s going on here? You examine your source’s map showing the true summit and it turns out to be an unmeasured area above a contour line. In this case, that contour line is at 10,000 feet. The true summit in this case is between 10,000 feet and 10,039 feet (assuming a 40-foot contour interval). Typically, the respected source will use an interpolated estimated of 10,020 feet. 10,020 feet beats 9,995 feet every time. Even if we assume that the unmeasured summit is only 10,000 feet, it still wins and is correctly awarded the honor of being the true summit for this mountain peak. The measured summit of 9,995 feet sits above a [lower] contour line at 9,960 feet.
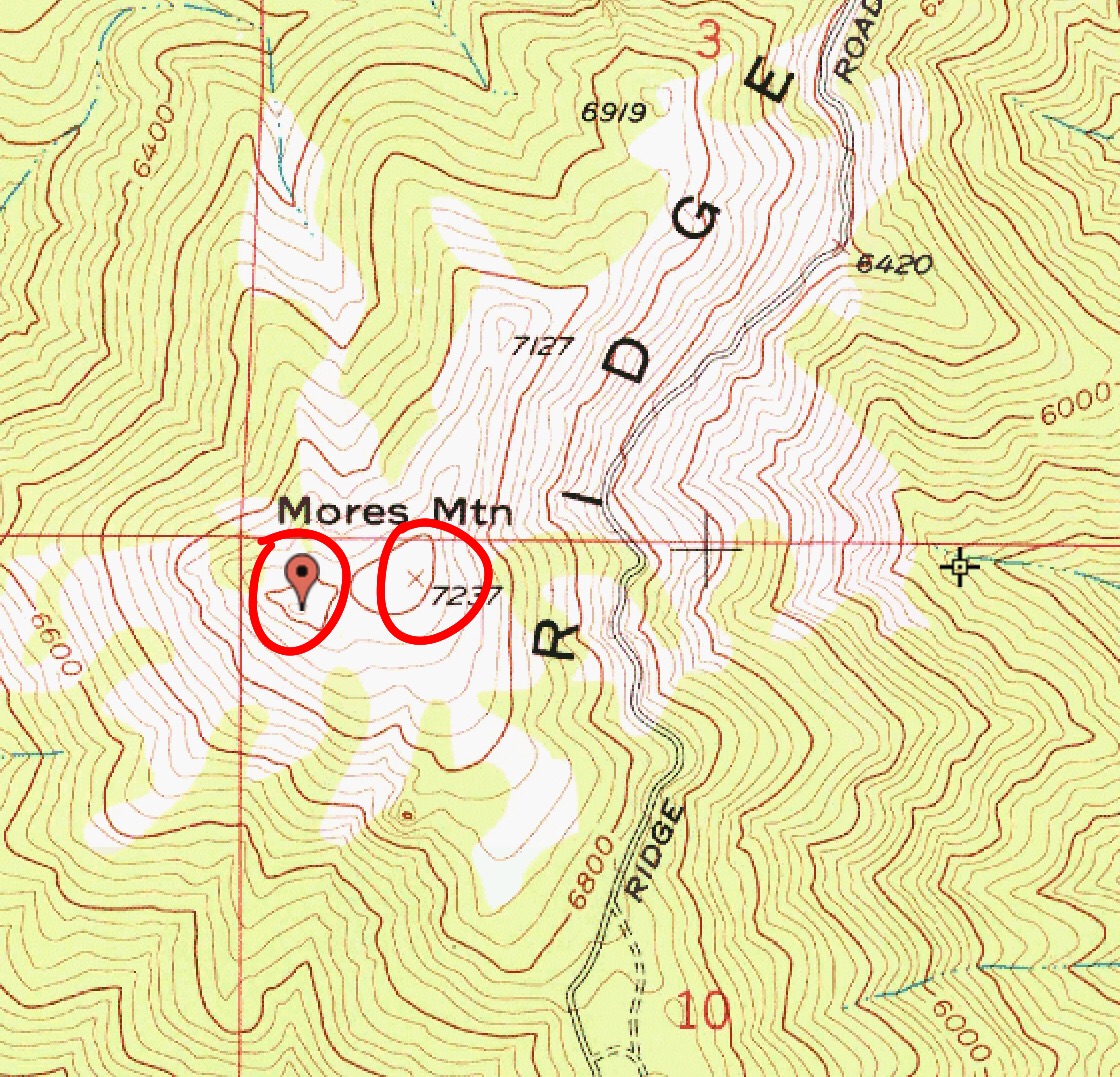
Here is an Idaho illustration of Case #3. Mores Mountain has an elevation of 7,260 feet and yet the nearby measured summit is 7,237 feet. The higher summit is to the west of Point 7237, but a quick look at the map might fool you into thinking that the elevation of Mores Mountain is 7,237 feet. Page 144 of the book incorrectly shows the elevation of Mores Mountain as 7,237 feet. The true summit is just west of Point 7237 and has a higher contour line than Point 7237. The true summit is measured at 7240+ feet or an interpolated elevation of 7,260 feet.
Be VERY CAREFUL when consulting your map(s) to not make the mistake of bagging the [lower] measured false summit. It is remarkably easy to do because the difference between the measured summit elevation and the “highest” contour line might be slim. And if the two points are separated by enough distance, your visual inspection (if you even do one) might just deceive you. This is a case where a respected authority on determining true summits and true elevations is INVALUABLE. I’m not going to name names, but there is one source in particular that is astonishingly good at determining the true summits of thousands of Idaho’s mountains. It’s really amazing.
CASE #4
This is the case where a mountain has two (or more) unmeasured summits of equal height. An unmeasured summit is one that lacks a specific elevation. It is considered the true summit if it is located above the highest contour line for that mountain. But, in Case #4, we have two (or more) possible true summits since we have two (or more) independent, “highest” contour lines of equal height. In this case, we simply don’t know which one is highest. You must stand on each potential summit and make your own determination—visually or, preferably, with the assistance of a GPS or Altimeter reading. Simply assuming that the “highest” contour line with the greatest land area above the contour line is the true summit is a logical, but not sufficient, assessment.
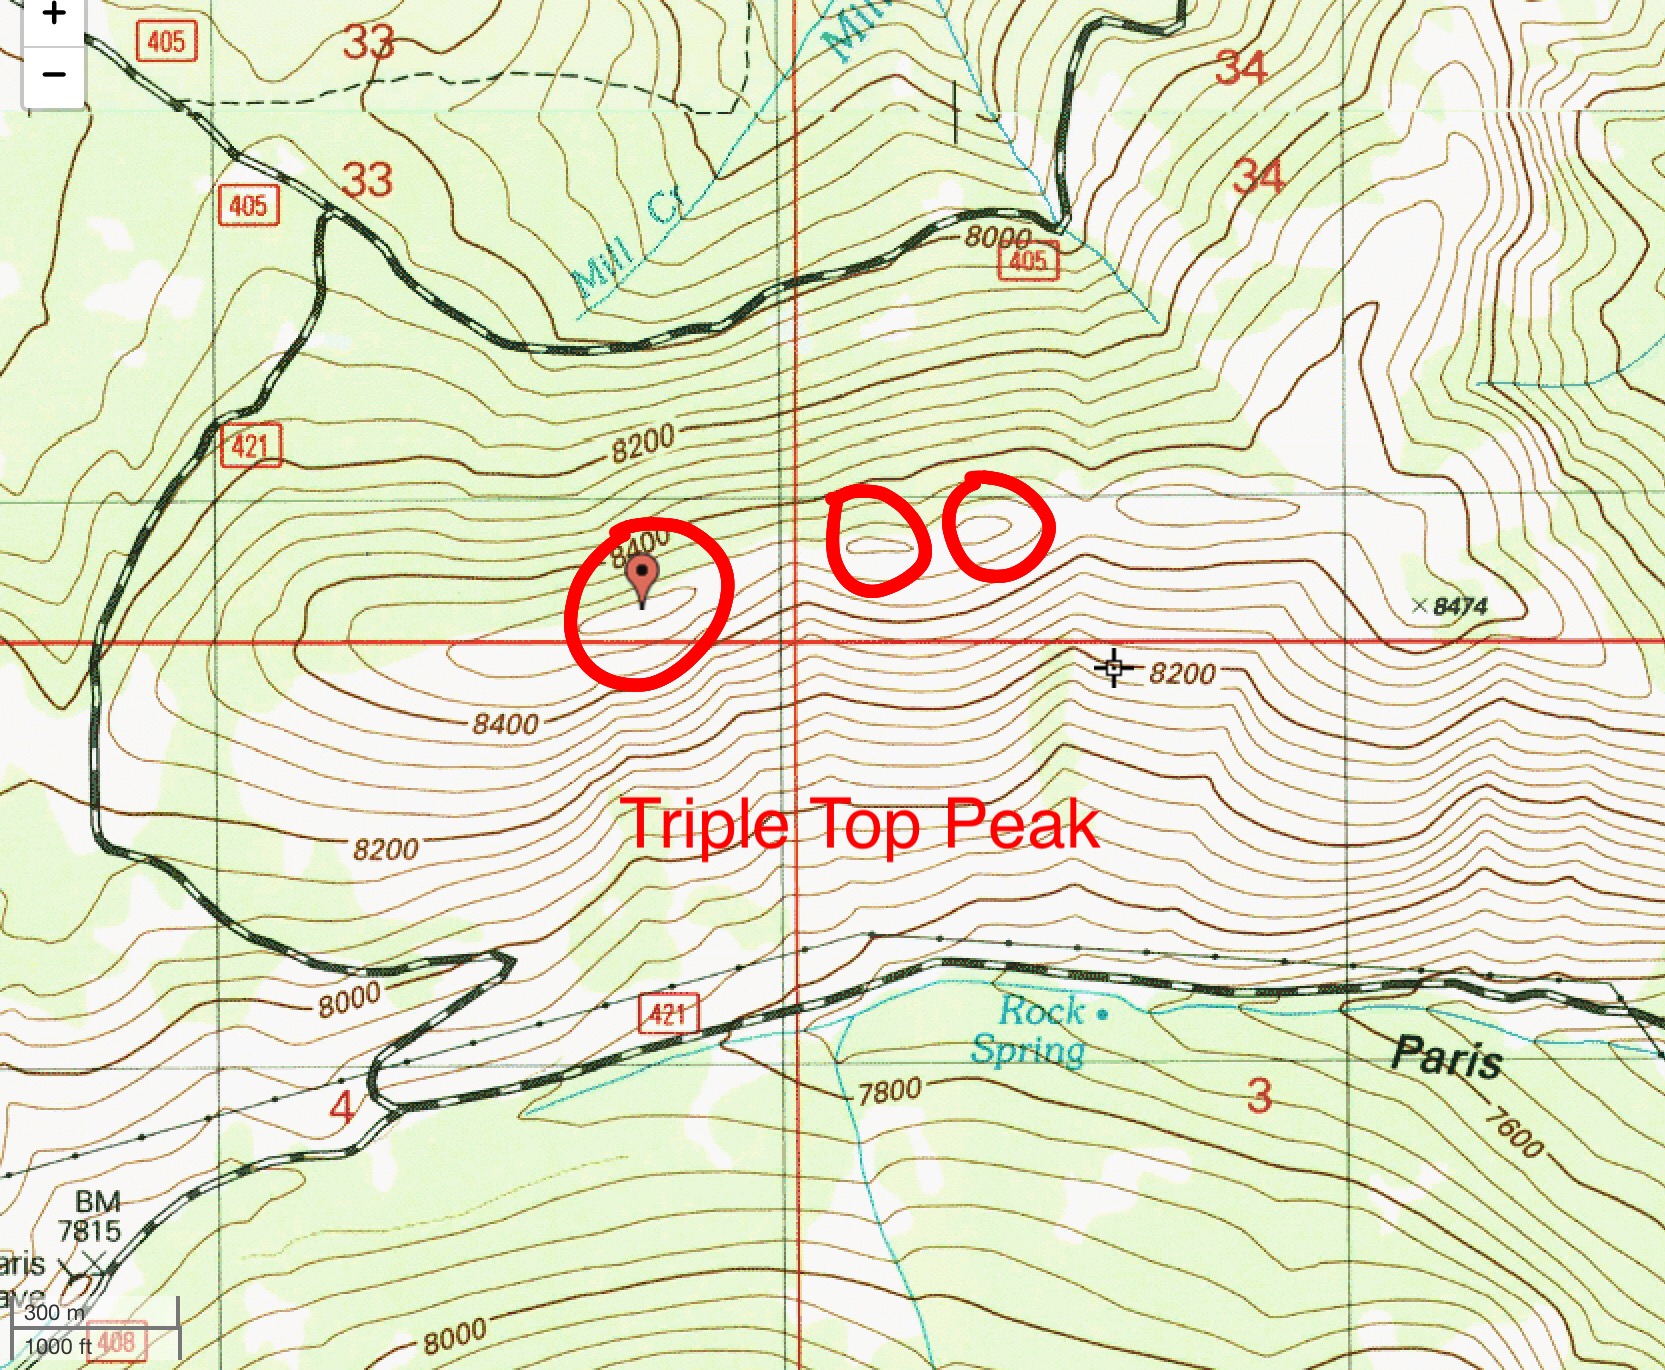
The closer the potential summits, the easier it is to make a subjective assessment. The farther apart the potential summits (and/or the larger the number of potential summits), the more difficult it is to make such an assessment. Tom Lopez made such an assessment on Idaho’s Triple Peak. I made such assessments on both Triple Top Peak and North Sister. In the case of Triple Peak, the contour line with the largest land area above the “highest” contour line is the true summit. However, in the case of Triple Top Peak, the contour line with the largest land mass above the contour line is NOT the true summit. In the case of North Sister (a peak with four potential summits), it was a tie between the third and fourth summits, both of which have similar land area above the “highest” contour line.
The map only creates a question as to which is the highest point on this peak.
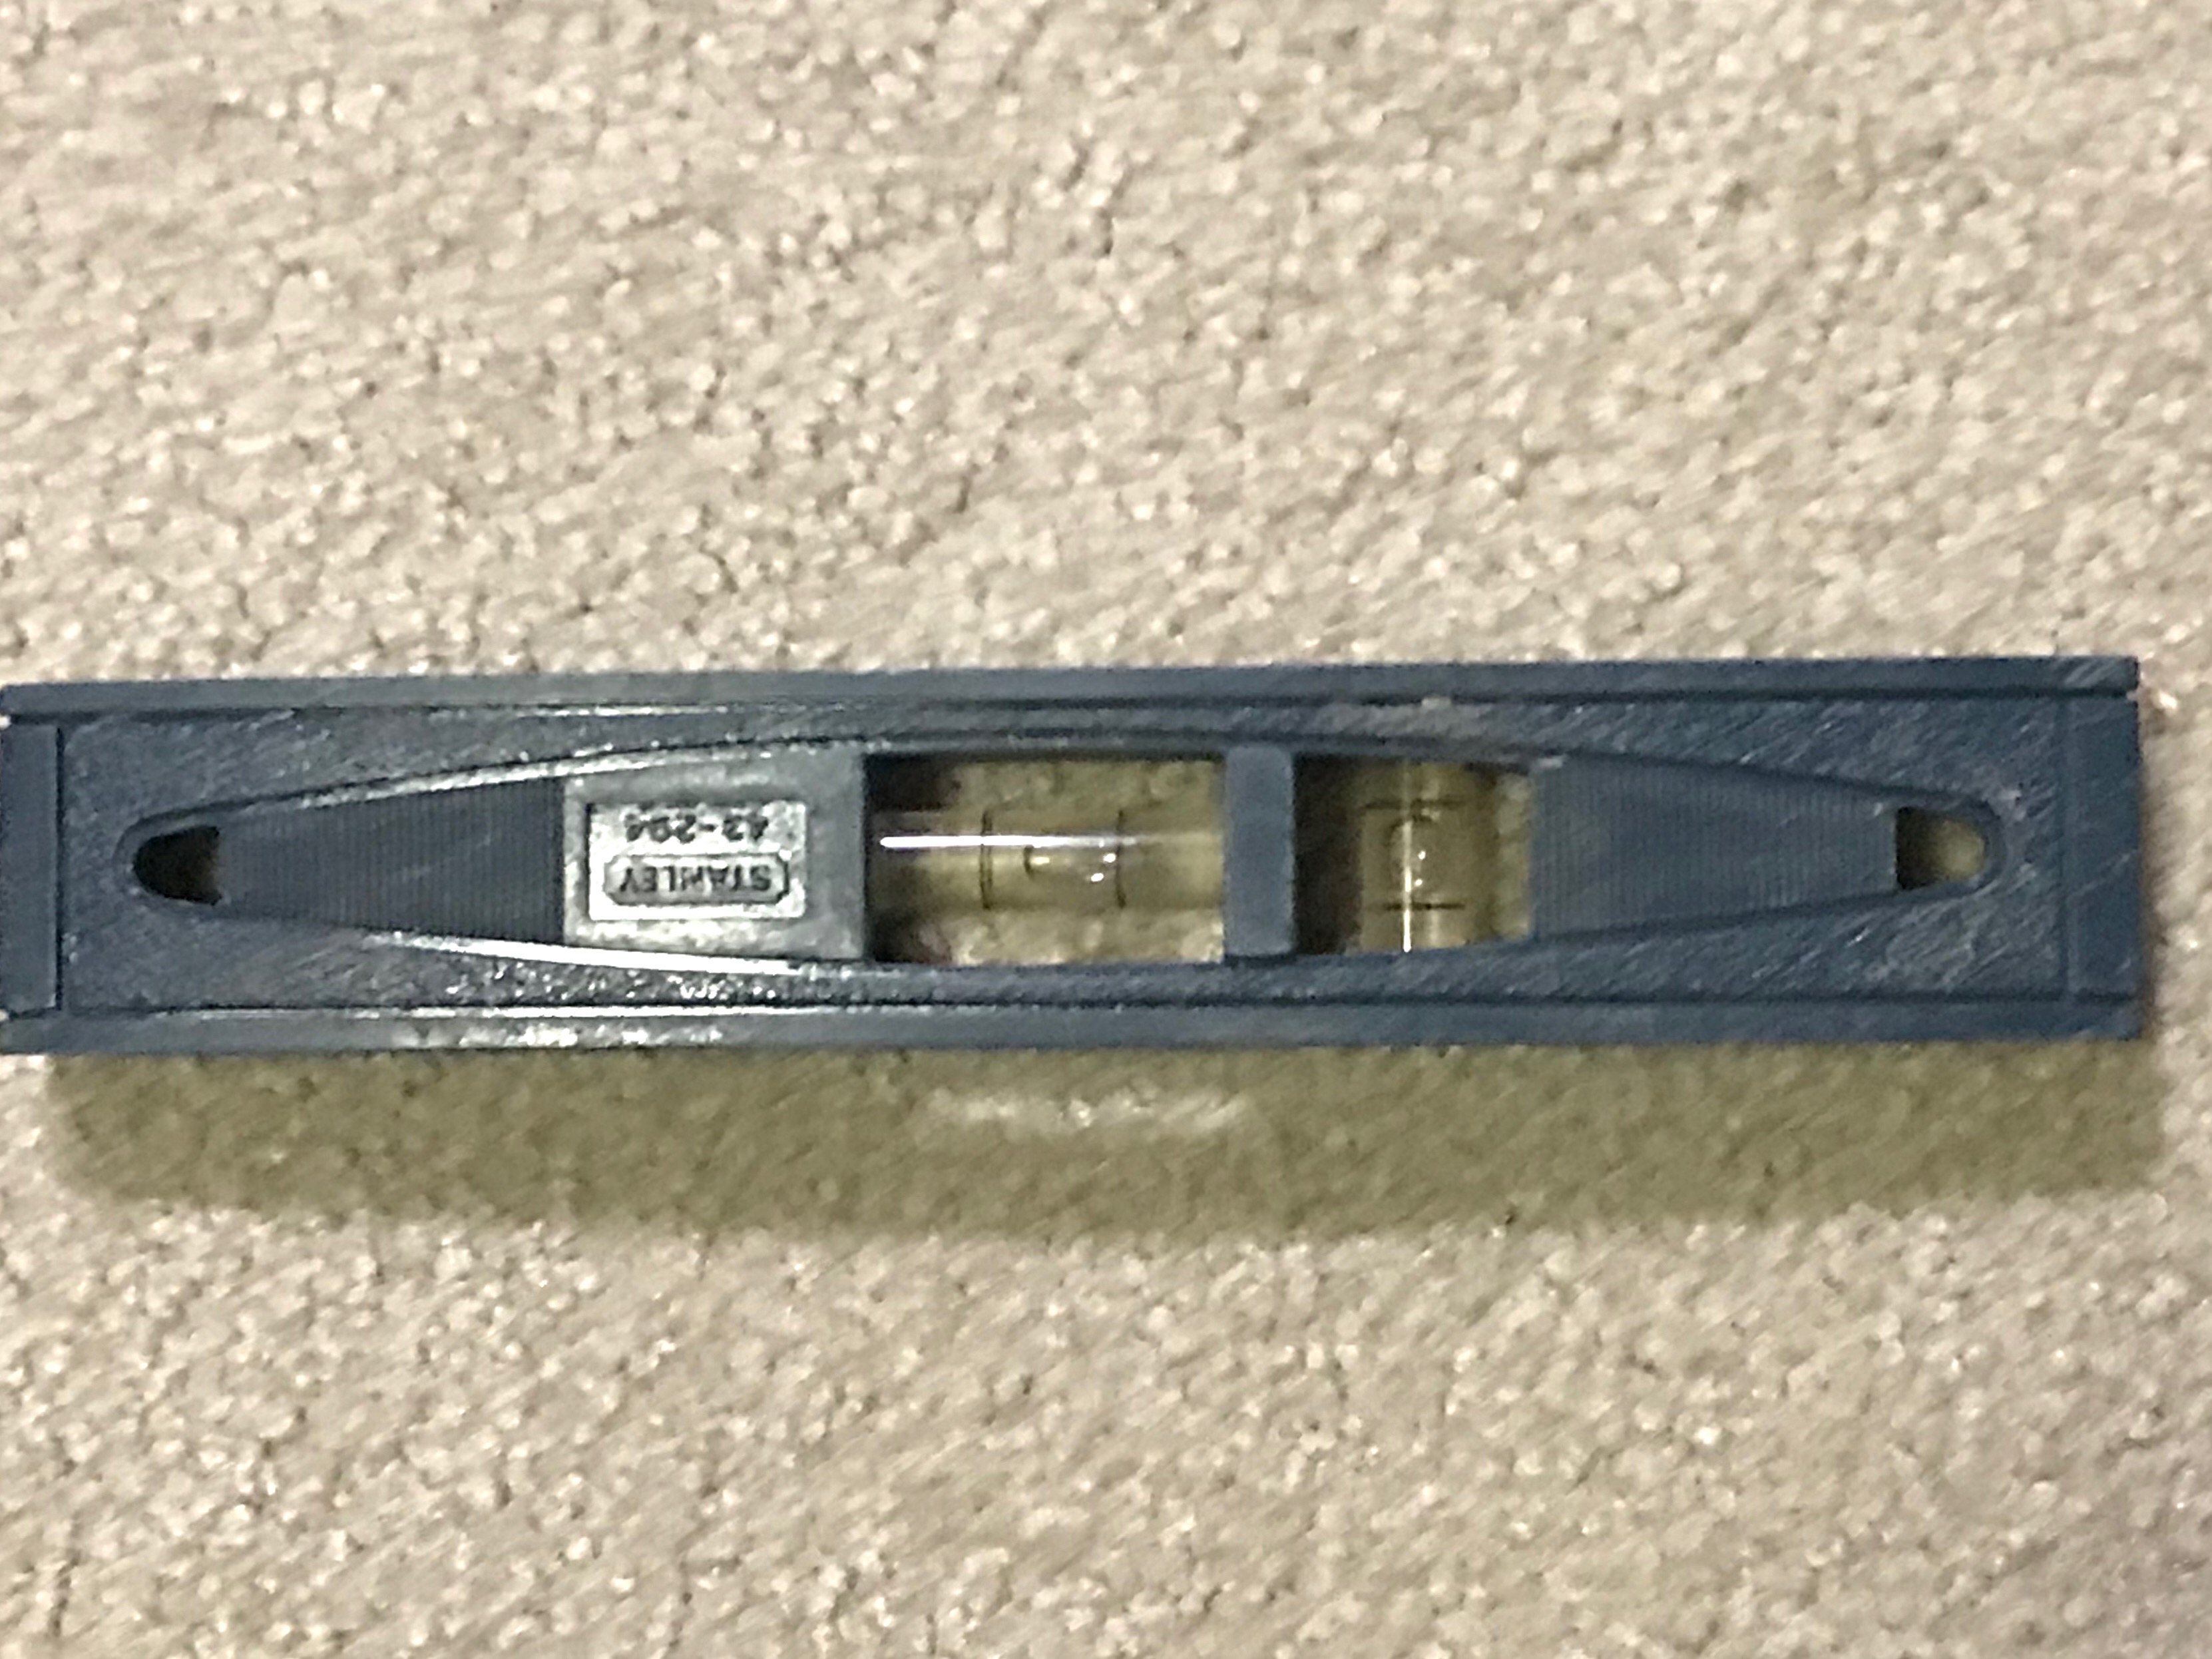
As you can see, determining the true summit can be a tricky endeavor. The best advice is to stand atop all of the potential summits, if possible, just to be sure. If the potential summits are close to each other and you can make a visual determination then a visit to each high point seems unnecessary. A small plastic hand level is an essential tool when the highest point is in question. [The following link discusses the use of a hand level in detail: Tips & Techniques for County Highpointing with Hand Levels]
This level only weighs a few onces and is easy to carry in your summit pack.
CASE #5
This is the case where a mountain has a measured summit and two (or more) unmeasured summits and all of the aforementioned summits share the same, albeit independent, “highest” contour line. This case raises the most complicated and contentious debate. And, unfortunately, it occurs more often than you would think. In Idaho, illustrations include Kinport Peak and Oxford Peak. The easiest way (and the traditional way) of handling these cases is to simply go with the measured summit and ignore the unmeasured summit(s).
Problems arise when you give the unmeasured summit an exact altitude (typically an interpolation between the “highest” contour line and the next higher contour line). An interpolation is simply the mid-point between the “highest” contour line and the next higher contour line. Contour intervals are typically 40 feet but are sometimes 20 feet (with low elevation peaks) and can be measured in meters as well (typically 20 meters, but sometimes 10 meters). An interpolation is simply an estimate. It is not an exact measurement.
Let’s say that we have a peak with a measured summit of 10,415 feet. The highest contour line for this measured summit is 10,400 feet. We also have an unmeasured summit that shares the same, but independent, contour line at 10,400 feet. Tradition says the true summit is located at the measured summit of 10,415 feet. However, some will assign the unmeasured summit an altitude of 10,420 feet (an interpolation based on a 40-foot contour interval). Comparing the 10,420 altitude to the 10,415 altitude, the unmeasured summit wins and is consecrated as the true summit.
But all we know about the unmeasured summit is that it is somewhere in the 10,400 to 10,439-foot range. We simply don’t know its exact elevation. Is it higher or lower than the 10,415-foot measured summit? We just don’t know. We can, however, do a visual inspection of our own, preferably backed up by a GPS or Altimeter measurement of each summit. From that inspection, we can then subjectively determine the true summit. When you mix interpolations (estimates) with actual measurements, the actual measured summit is thrown by the wayside about half of the time. The other half of the time, the measured summit wins. It’s really a crap-shoot. It’s better to either accept the measured summit as the high point (tradition) or to do a subjective, ON SITE assessment.
CASE #6
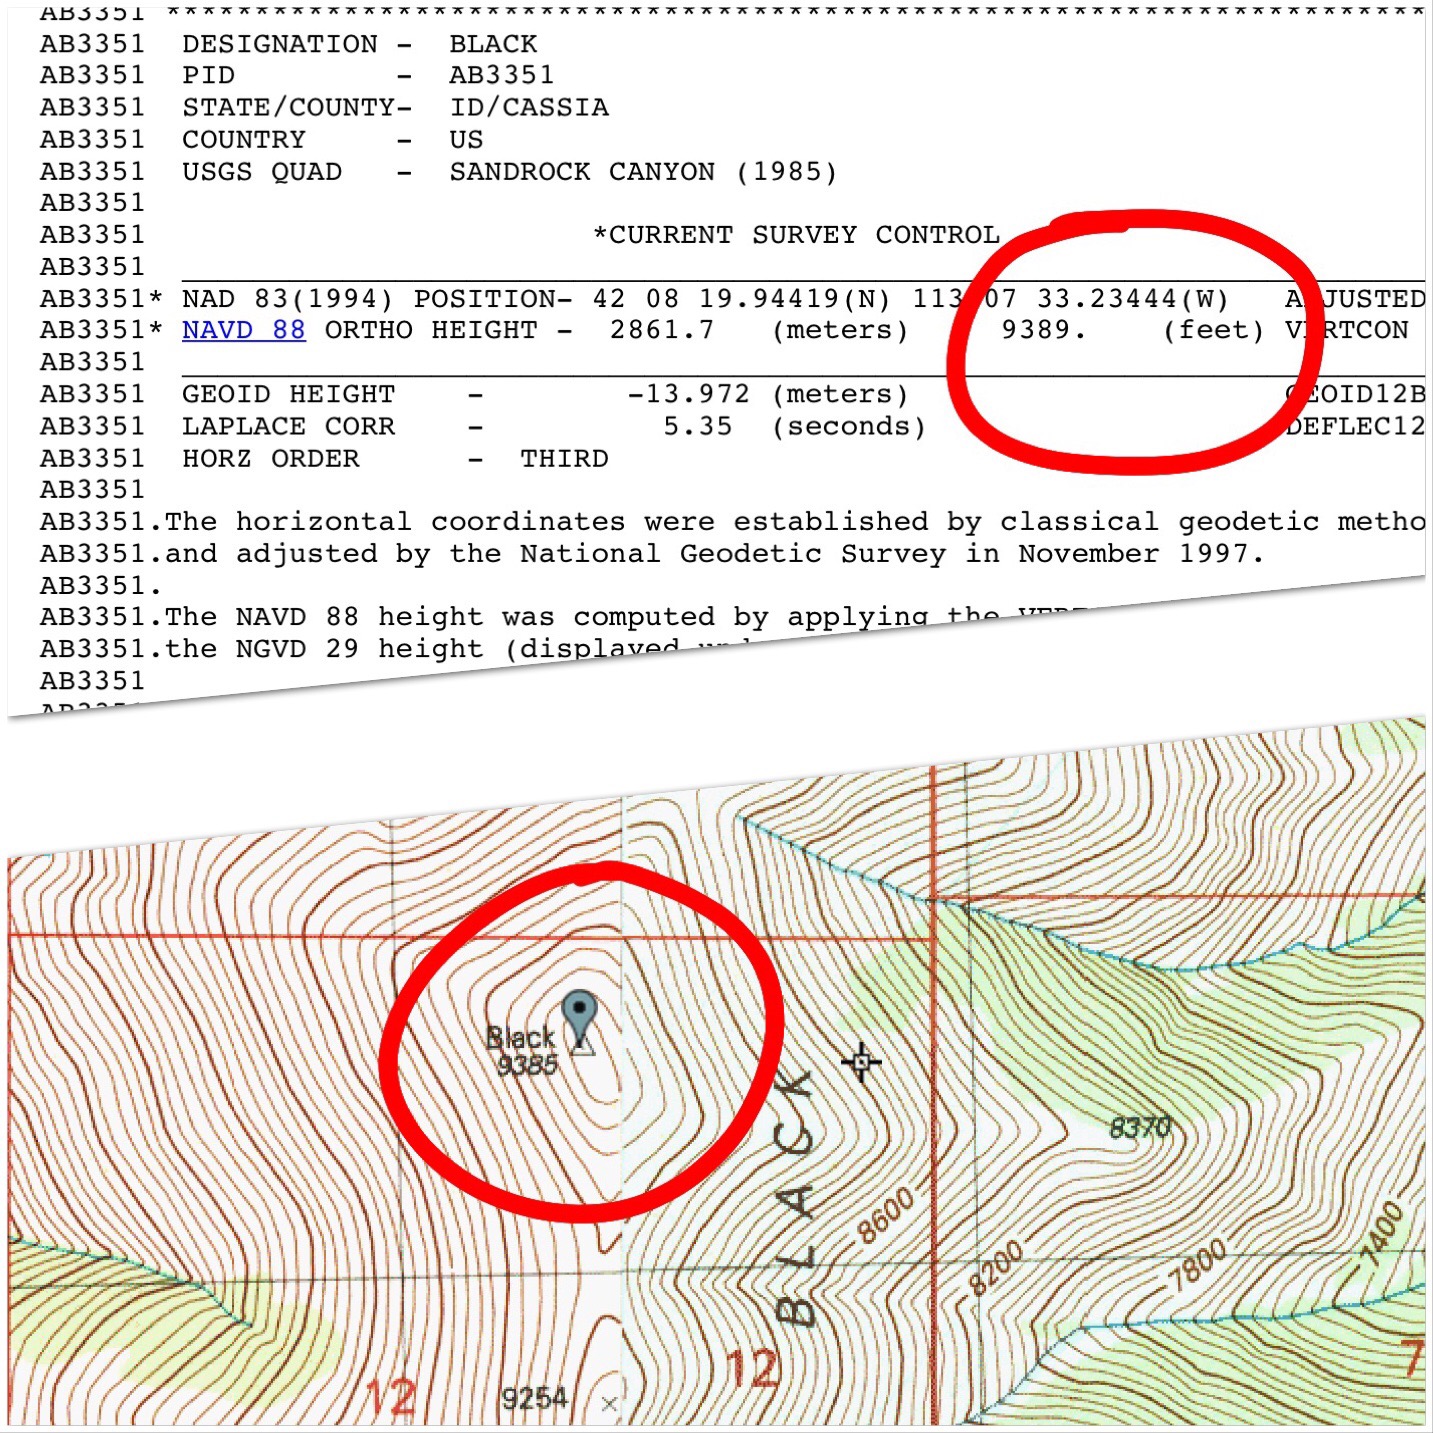
This is the case where a mountain has a measured summit but has a higher, unmeasured point that shares the SAME, NON-INDEPENDENT, “highest” contour line. In Idaho, such is the case with Black Peak/Black BM (in the Black Pine Mountains) and Wet Peak (in the Lost River Range). In each of these instances, the true summit is not the USGS benchmark (the measured summit) but is a higher point about 100-150 horizontal feet away. The higher point measures at 10 vertical feet higher than the BM in both of these cases.
Tradition dictates to ignore the unmeasured summit and go with the measured summit. Visual, ON SITE inspection may very well warrant a subjective assessment that the nearby unmeasured summit is somewhat higher. Indeed, on Page 351 of Idaho A Climbing Guide, Black Peak is assigned an elevation of 9,395 feet, 10 feet higher than Black BM (9,385 feet) because of observations of climbers who have done their own ON SITE inspection. I concur with that subjective assessment as I did both a visual and altimeter-based assessment of the two humps. My Altimeter determined Black Peak to be 10 feet higher than the nearby Black BM location (the altimeter measures altitude in 5-foot increments).
Once again, your safest bet as a mountain climber/peak-bagger is to stand atop both the measured summit and the unmeasured summit, JUST TO BE SURE. In Case #6, they are likely to be located fairly close to each other, making for an easy assessment. It is a subjective assessment, however. Sources considered to be reliable/authoritative still rely on the measured summit’s altitude, AS THEY SHOULD.
Case #7
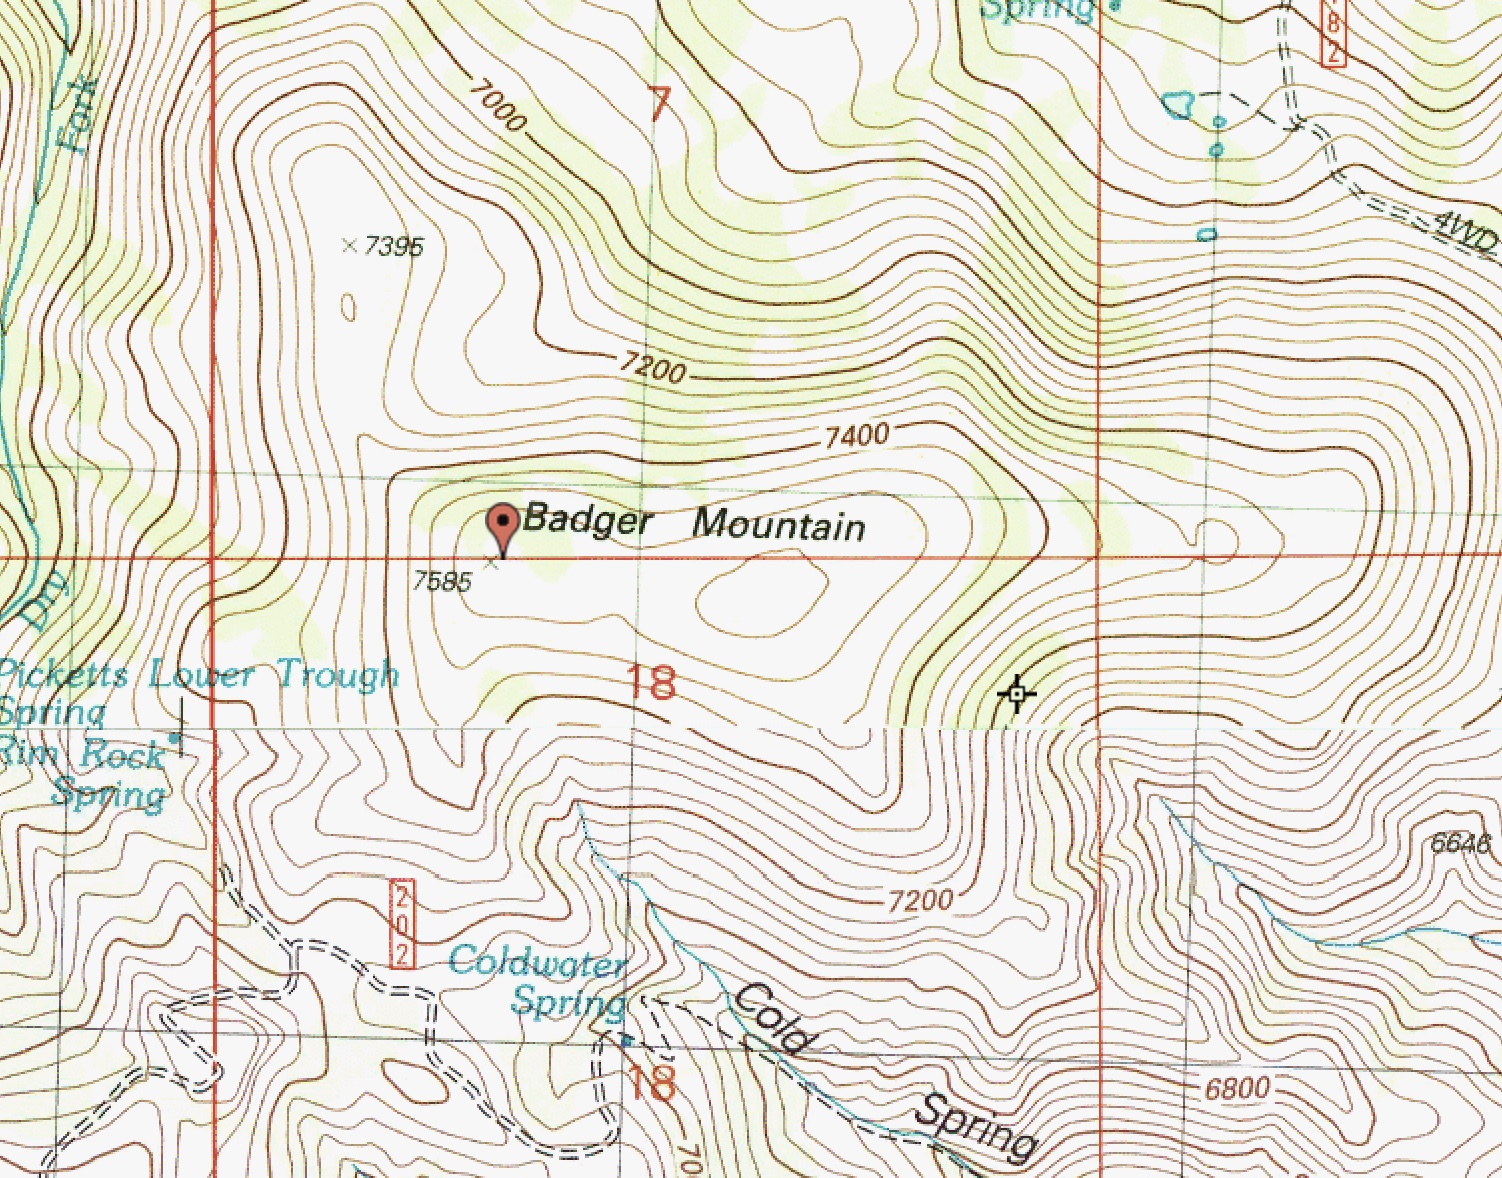
This is the case where there is uncertainty about the location of a summit because of an inconsistency in the USGS topo map measurements. Let’s look at Badger Mountain in the South Hills of Idaho:
The measured elevation for Badger Mountain is 7,585 feet. The summit is located at the western end of a wide summit plateau. However, the eastern end of the summit area is on a higher contour line (7,560 feet) than the western end (7,520 feet). How can this be? Did the USGS mapmakers intend to place the measured point at the eastern end, above the 7,560-foot contour line? Or did they forget to include a 7,560-foot contour line at the western end? Or is the 7,585-foot figure a mis-measurement?
Where is the actual high point for Badger Mountain? Based on the contour lines, the western end is lower than the eastern end and can’t possibly have the summit high point there. The eastern end has a higher contour line but a lower interpolated elevation (7,580 feet) than the specific point measurement at the western end (7,585 feet). This is all very confusing thanks to inconsistent map representations on the USGS topo map. I stood on the eastern end of Badger Mountain and, as the contour lines indicate, the high point is there. It is visually obvious and there is a summit cairn there as well. In cases like this, you must investigate the summit area for yourself and make your own determination of the location of the high point, ignoring the USGS topo map’s inconsistencies.
What is the true elevation of a summit and how is it determined?
There are two types of true elevations: actual/measured ones and estimated/unmeasured ones. We will discuss each in turn.
Actual/measured summits
In the process of mapping the Western United States, many mountains were measured by the intrepid surveyors working as part of a U.S. Government-funded project. In more recent times, the United States Geological Survey (USGS) has placed specific altitudes on many mountain peaks as well as USGS benchmarks. Periodically, these altitude assessments are updated, as can be seen with a comparison of an [older] 15-minute USGS topo map to a [more recent] 7.5-minute USGS topo map. Tradition is to ascribe the most recent altitude measurement to be the correct one. If an altitude is no longer given on the latest 7.5-minute map, then the [older] 15-minute map assessment is used. In addition, some sources use North America Vertical Datum of 1988 (NAVD88) measurements as a supplement to the [older] USGS topo map measurements.
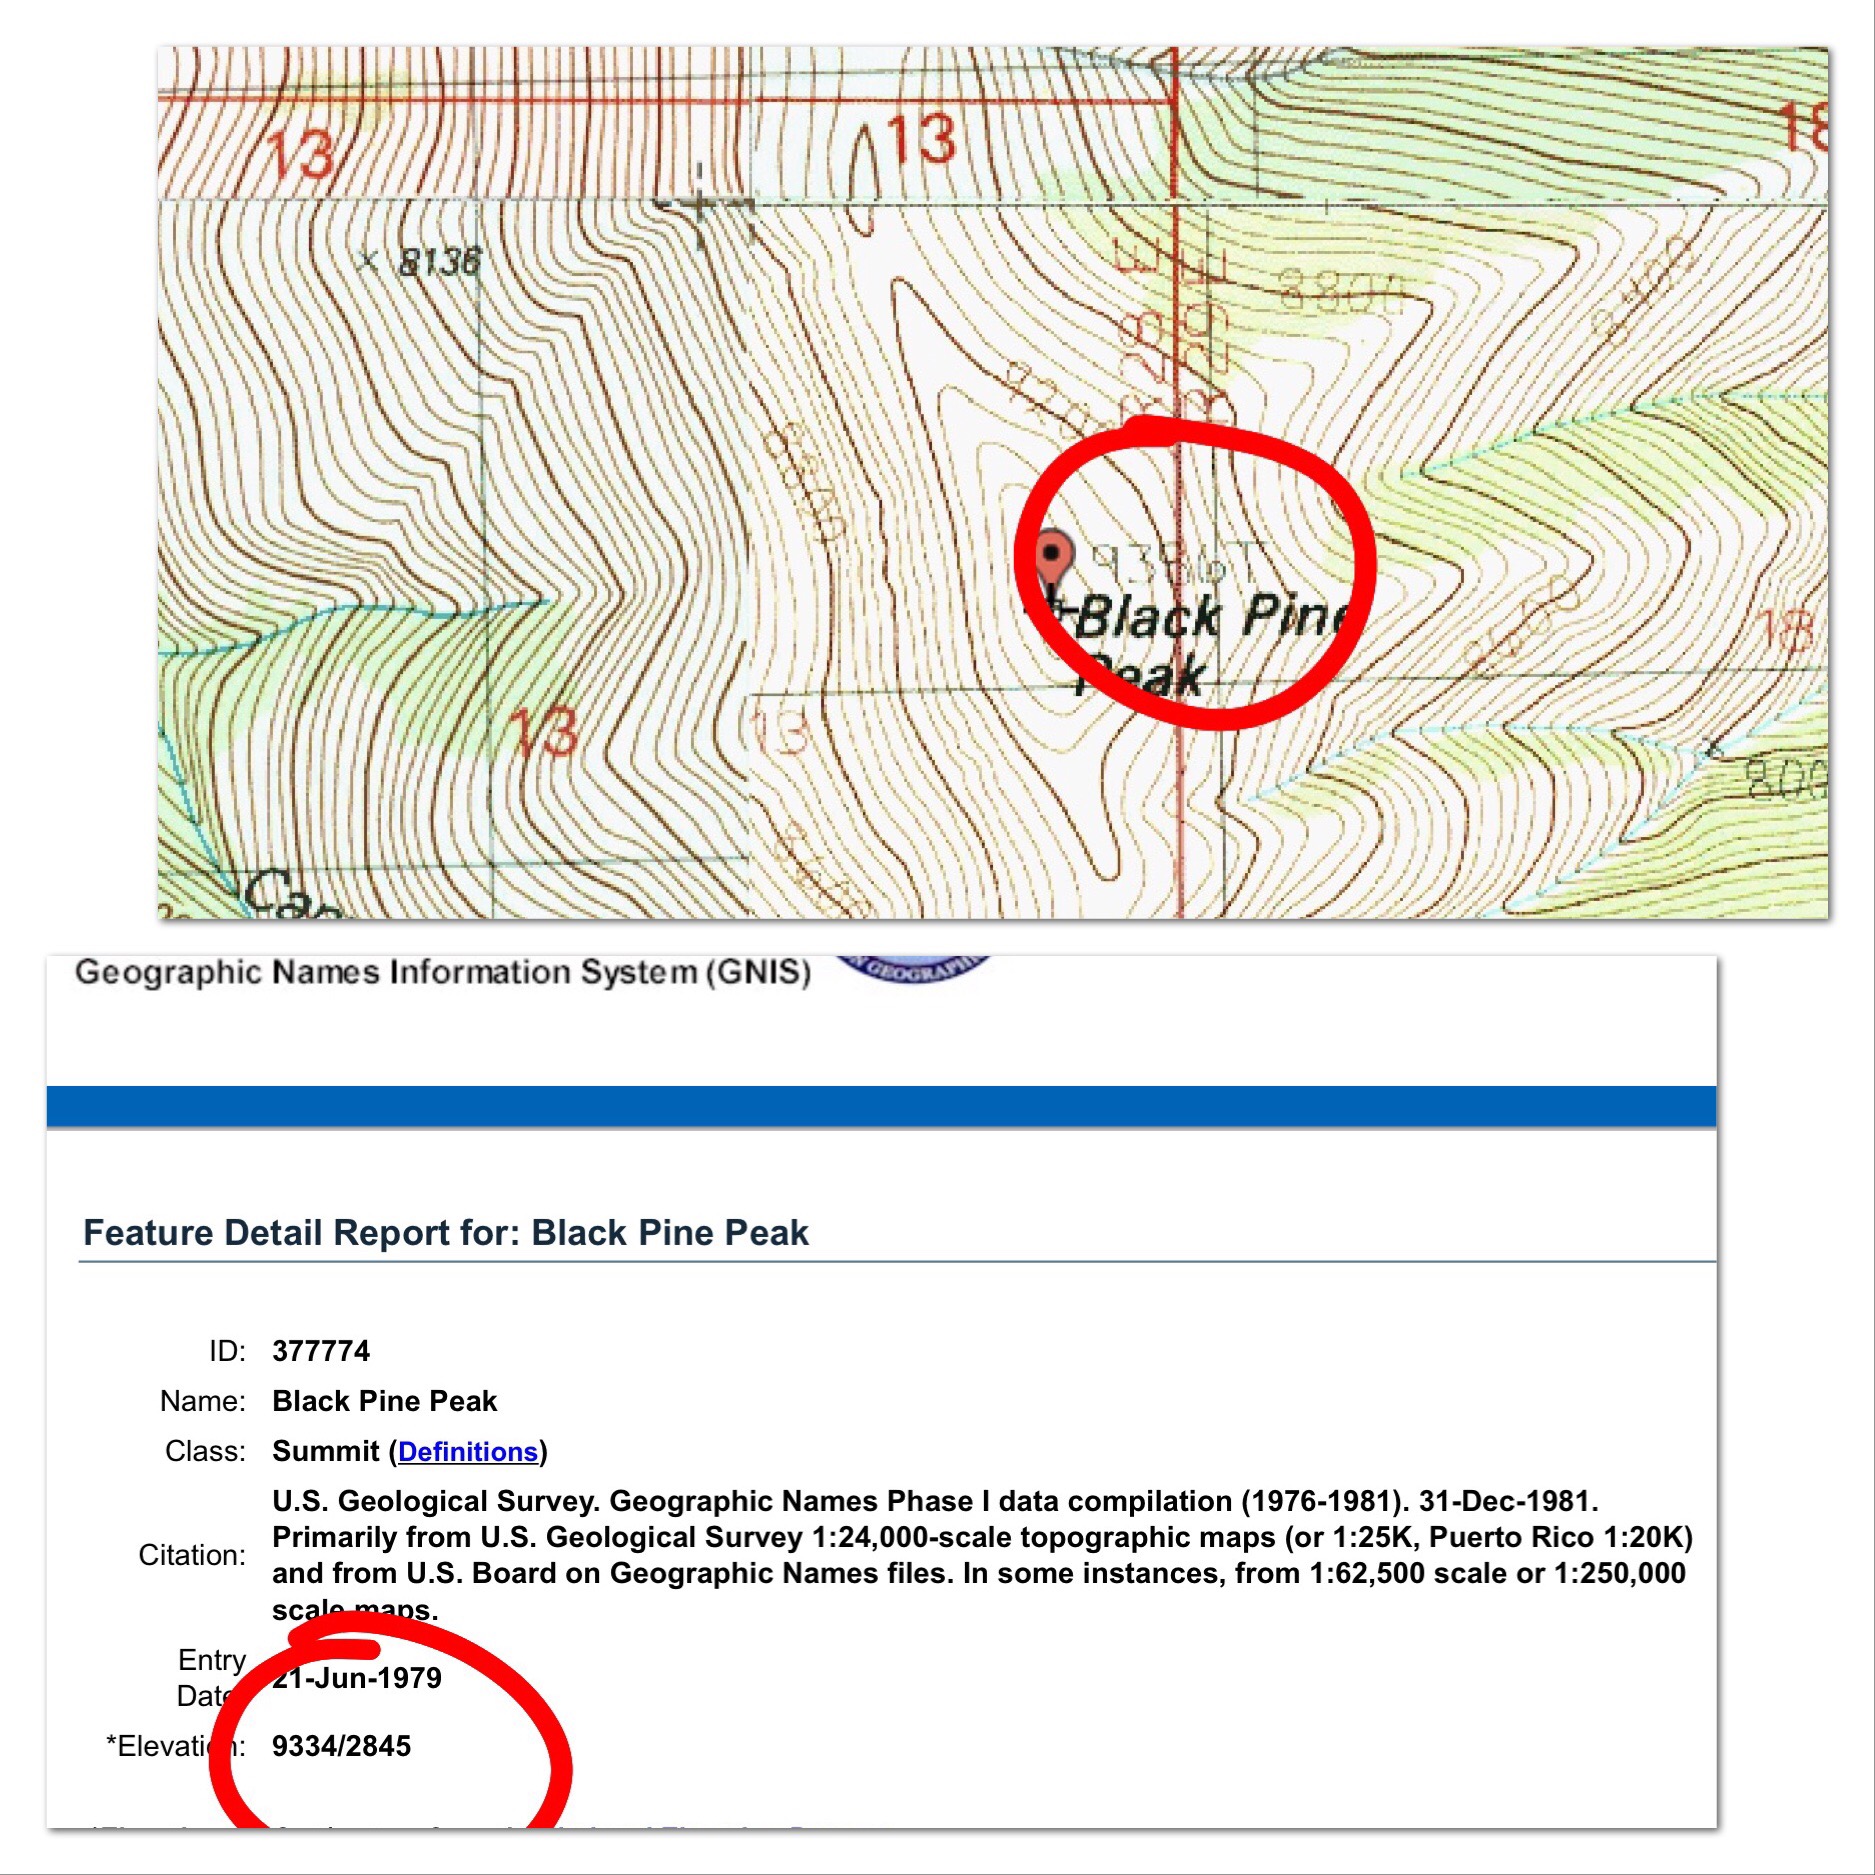
Regrettably, there are inconsistencies found on USGS maps, data sheets/maps and BGN pages. Here are two examples:
This graphic shows the discrepancy between a USGS map and the underlying data sheet for the Black Benchmark in Idaho’s Black Pine Mountains..This graphic shows discrepancy between a USGS map and the associated Board of Geographic Names page for Black Pine Peak in the Black Pine Mountains..
In most cases, minor changes (or inconsistencies) in measured altitudes are not terribly important. It can become an issue, however, when comparing two summits of similar height (e.g., Black Pine Peak versus Black Peak/BM) where one peak is a ranked summit and the other is an unranked summit. But, thankfully, that situation is not common. Given the GPS technology that we now have (and perhaps more accurate surveying equipment for ON THE GROUND work), we will probably see some adjustments to specific altitude measurements in the future. And, generally speaking, it’s not a big deal.
Estimated/unmeasured summits
It’s really astonishing how many mountain points and peaks have specific altitude measurements. However, many of the more obscure Idaho peaks lack a specific altitude figure. In these cases, sources rely on the highest contour line as the starting point to make an assessment of a specific altitude for a mountain peak. Typically, an interpolation is used as the specific measure of a peak’s altitude. For example, a peak with a “highest” contour line of 10,400 feet is assigned an altitude of 10,420 feet (assuming a 40-foot contour interval). And, with nothing else to rely on but a topo map with contour lines, such an interpolation is a reasonable estimate. It’s probably more logical than any other estimate. And it’s better than using an ill-defined figure like “10,000+ feet.”
Problems arise when you have a mountain with multiple potential summits (Case #5), one of which is a measured summit. Tradition says to use the measured summit’s altitude and ignore the unmeasured summits entirely. Sources considered to be reliable/authoritative either go with tradition or use the higher of the interpolation and the measured altitude. Others rely on climbers’ ON SITE evaluations.
Given the rather arbitrary nature of comparing interpolations/estimates to actual measured altitudes, I side with tradition on this one. But an ON SITE inspection is not a bad thing. I do it all the time. If you are a purist mountain climber/peak-bagger as I am, you simply must stand on all of the potential high points and make your own determination, if for no other reason than you wish to honestly say that that you stood on the highest point. In cases where a nearby summit is visually [and obviously] lower in altitude, I see no need to stand on the lower summit(s).
That being said, when I stood on the [higher] unmeasured south summit of Kinport Peak and could clearly see that the measured [and accepted] north summit is lower in elevation, I still dropped to a saddle and climbed that northern summit JUST TO BE SURE. And my Altimeter concurred, giving it a 20-foot lower altitude than the [unmeasured, unrecognized] south summit. And I accept the altitude for Kinport Peak as 7,222 feet, even though I know that the actual summit of Kinport Peak is closer to 7,240 feet. Until a recognized, authoritative entity (like the USGS) measures the south summit and confirms my visual (and altimeter-based) assessment, I cannot override the 7,222-foot figure.
Mis-measured summits
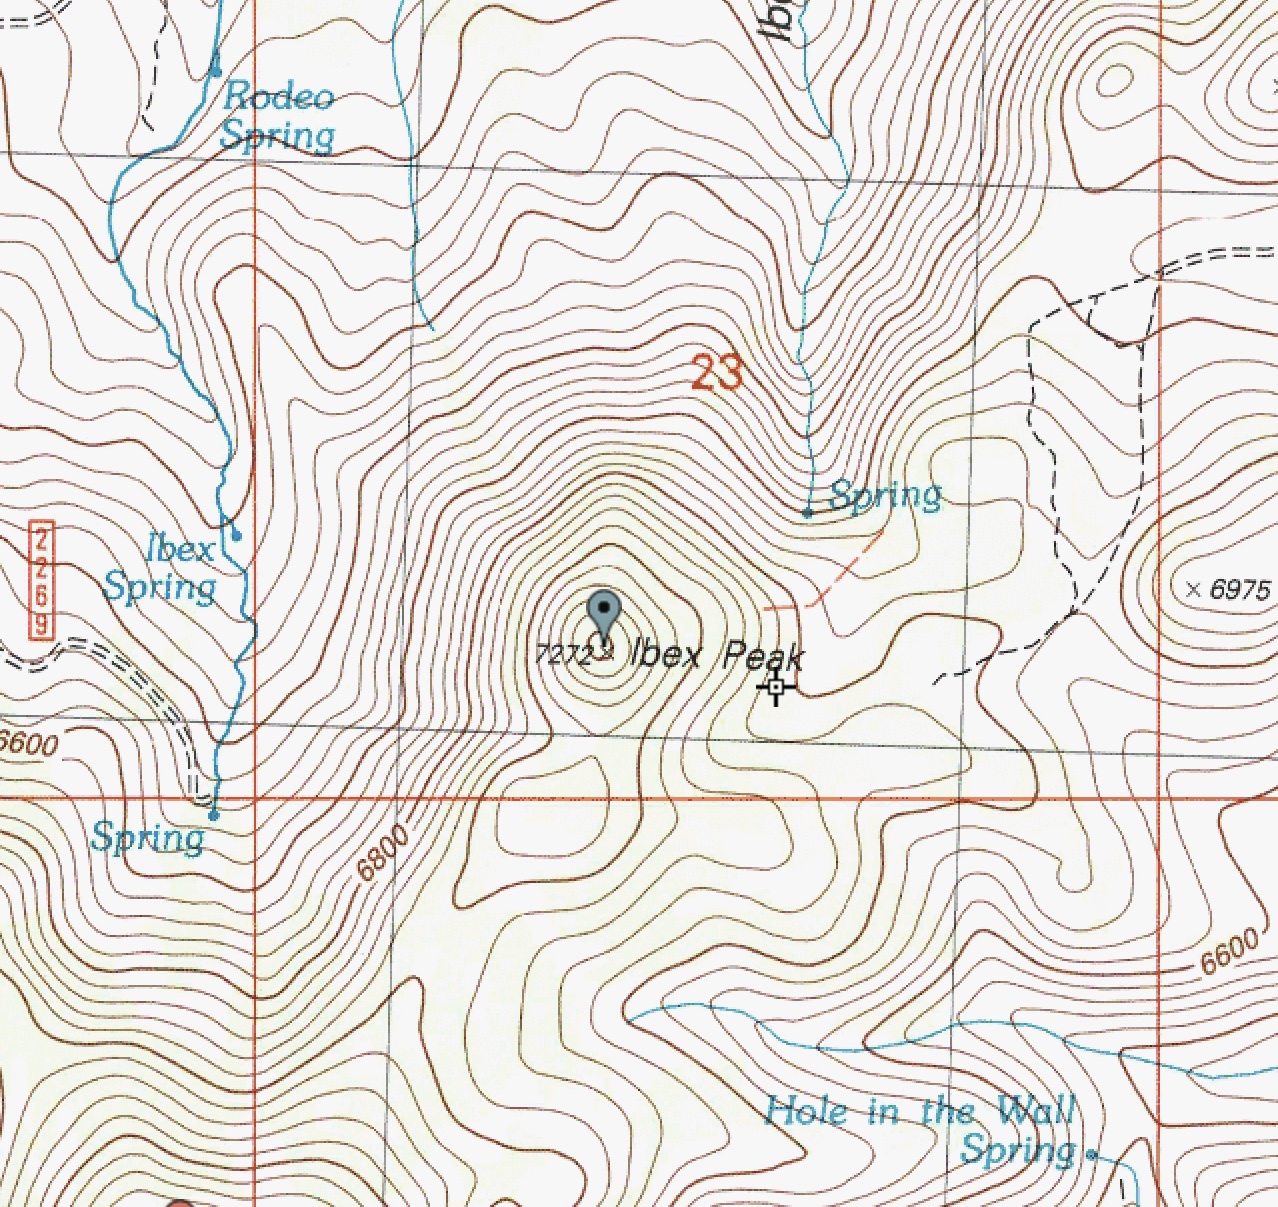
This is perhaps the most perplexing case of all and the most difficult to resolve. What is the correct elevation of a mountain peak with a measured altitude that is inconsistent with the USGS map contour lines? Let’s look at Ibex Peak as an illustration. Ibex Peak is an iconic summit located in the South Hills of Idaho. Here is what the USGS topo map shows:
The measured elevation is 7,272 feet and the summit area is pretty small. However, it is impossible for the elevation to be 7,272 feet since the highest contour line is 7,200 feet. Based on the contour lines, the interpolated elevation is 7,220 feet and the maximum elevation is 7,239 feet. Did the USGS mapmakers mis-measure the point elevation (7,272 feet) or fail to include the 7,240-foot contour line? Who knows? The standard convention in this case is to go with the measured elevation of 7,272 feet and ignore the missing contour line(s).
Summary and Conclusions
We can’t always rely on measured estimates of a mountain’s height. Nor can we always be sure that the measured point is the highest point. But neither should we blindly accept interpolations as surrogates for the real thing. We can’t always rely on subjective determinations of where the highest point is (e.g., the contour line with the greatest surface area above it). Sometimes that methodology is correct, sometimes it isn’t.
The best way to deal with all of the possible inaccuracies and estimates is to stand atop every one of the potential high points on a mountain, JUST TO BE SURE. It’s really that simple.
The two most popular websites for climbers are peakbagger.com and ListsofJohn.com. The methodology each of these websites for determining a peak’s elevation is set out below:
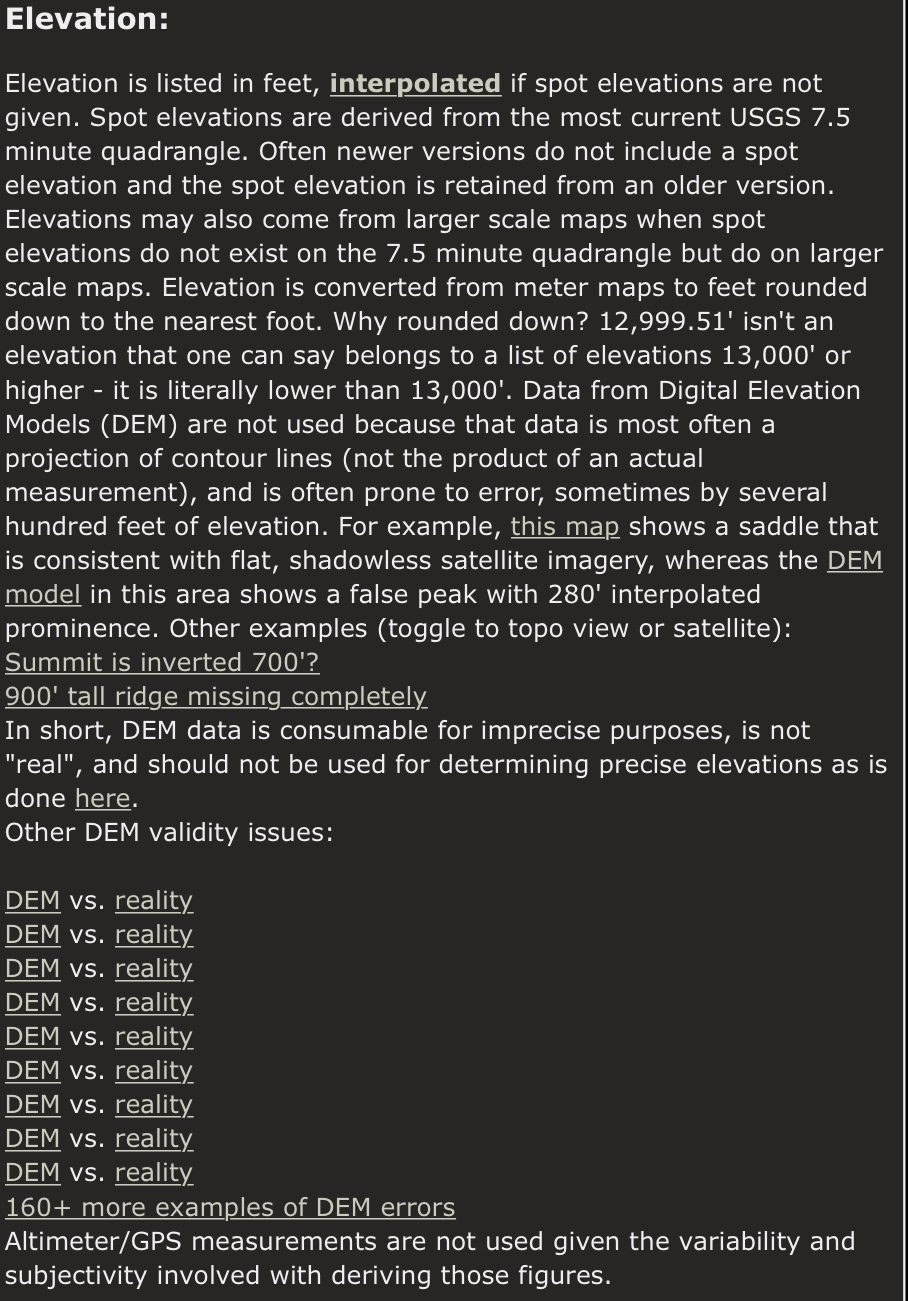
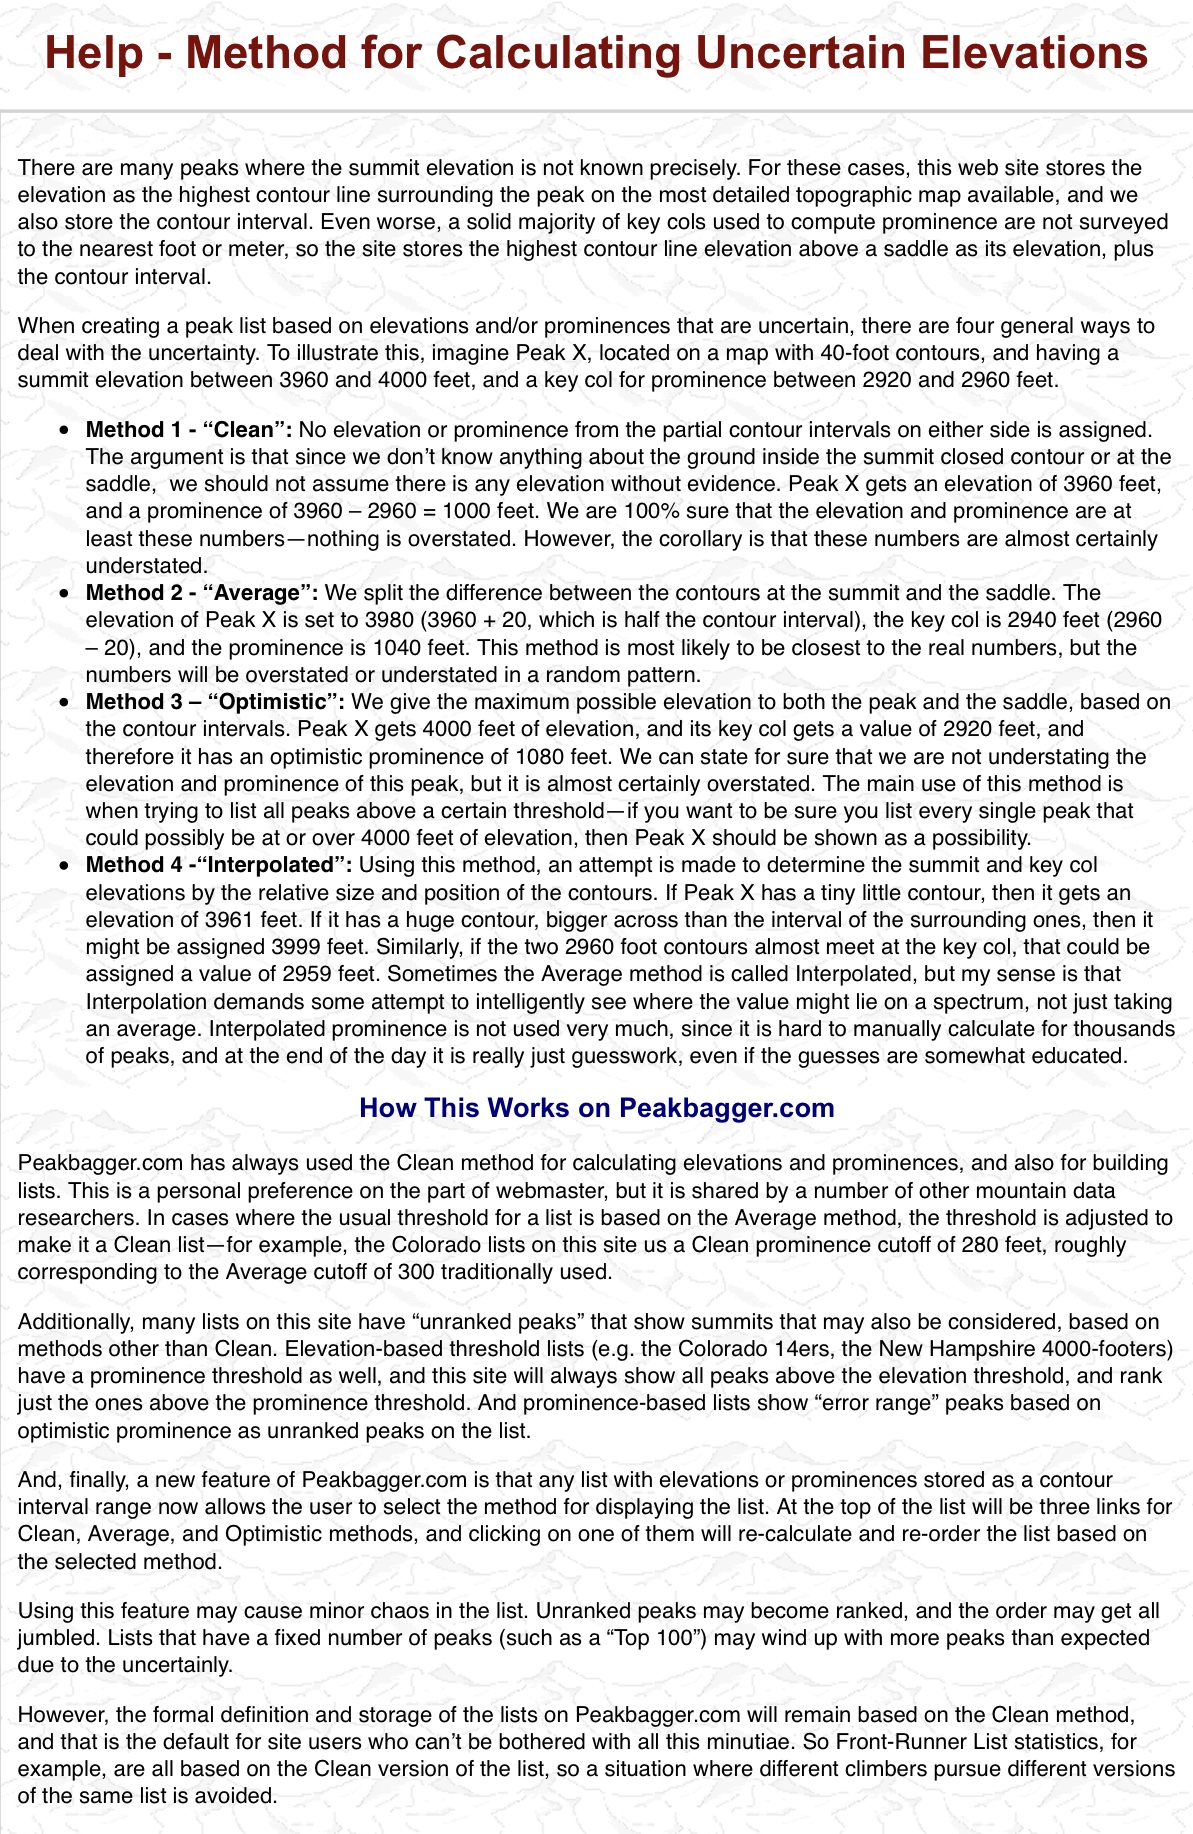
Lists of John’s elevation discussion.Peakbagger’s methodology discussion.